简介
If the SSD in your Lenovo Yoga 720-12IKB is not showing up on boot or it gets corrupted. You may need to replace the SSD.
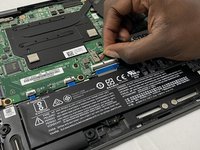
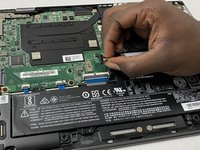
The SSD in the Lenovo Yoga 720-12IKB is very important to the system as everything lives there. Your files, operating system, and other media are all stored on the SSD of your computer. This is an important part in most laptops so without it you will not be able to use your laptop.
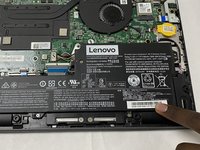
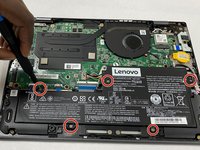
Use caution when taking out the SSD as you could damage other components in the system. Be sure to make a backup of everything on a separate drive to not lose any important files or documents.
你所需要的


To reassemble your device, follow these instructions in reverse order.
团队

Gateway, Team 1-4, Pee Spring 2022 Gateway, Team 1-4, Pee Spring 2022 的会员
GCC-PEE-S22S1G4
3 名成员
创作了6篇指南