简介
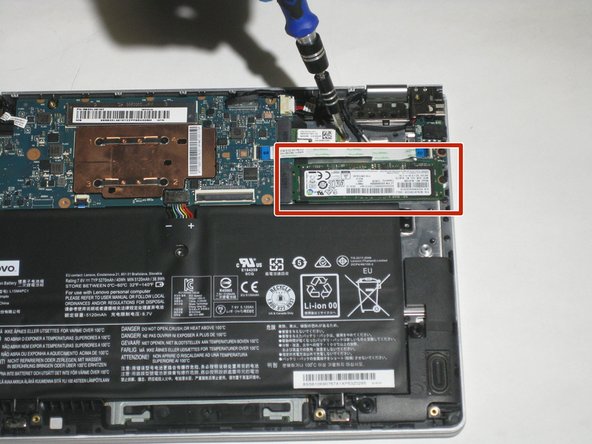
If your device isn’t properly loading or is slow to load files, the SSD may be corrupt. Follow these instructions to replace the SSD in your Lenovo Yoga 710-11ISK.
你所需要的
-
-
Make sure back panel is facing up.
-
Remove eleven 5mm screws with the T5 Torx Screwdriver.
-
-


即将完成!
To reassemble your device, follow these instructions in reverse order.
结论
To reassemble your device, follow these instructions in reverse order.
团队

The Citadel Military College of South Carolina, Team S2-G19, Eggleston Spring 2021 The Citadel Military College of South Carolina, Team S2-G19, Eggleston Spring 2021 的会员
CMCSC-EGGLESTON-S21S2G19
3 名成员
创作了3篇指南