跳转到主内容

Lenovo Yoga 3 Pro SSD Replacement

已存档的指南
本指南只作为历史记录保留。请使用指南的最新版本来进行维修。

你所需要的

  1. Lenovo Yoga 3 Pro SSD Replacement, Back Panel: 步骤 1 中的图像 1,2 Lenovo Yoga 3 Pro SSD Replacement, Back Panel: 步骤 1 中的图像 2,2
    • Flip the laptop so that the back panel is facing up.

    • Remove the ten 4.0mm T6 Torx screws from the back of the laptop.

  2. Lenovo Yoga 3 Pro SSD Replacement: 步骤 2 中的图像 1,1
    • Gently lift the back cover off of the laptop.

  3. Lenovo Yoga 3 Pro SSD Replacement, Battery: 步骤 3 中的图像 1,2 Lenovo Yoga 3 Pro SSD Replacement, Battery: 步骤 3 中的图像 2,2
    • Push the black battery cable towards the battery to disconnect it.

  4. Lenovo Yoga 3 Pro SSD Replacement: 步骤 4 中的图像 1,2 Lenovo Yoga 3 Pro SSD Replacement: 步骤 4 中的图像 2,2
    • Remove the six #0 3.8mm Phillips screws from the battery.

  5. Lenovo Yoga 3 Pro SSD Replacement: 步骤 5 中的图像 1,1
    • Gently lift the battery out of the laptop chassis.

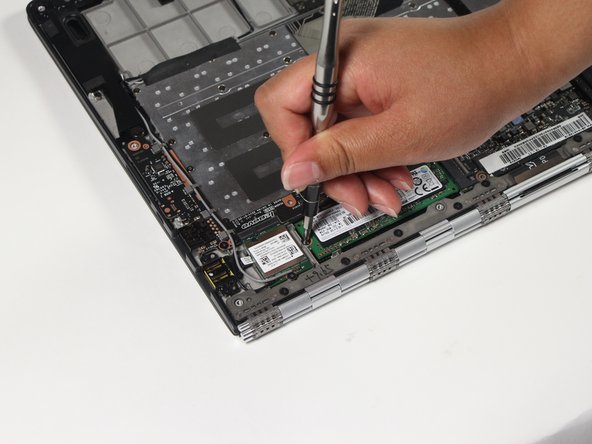
  6. Lenovo Yoga 3 Pro SSD Replacement, SSD: 步骤 6 中的图像 1,2 Lenovo Yoga 3 Pro SSD Replacement, SSD: 步骤 6 中的图像 2,2
    • Remove the one #0 2.9mm Phillips screw from the SSD.

  7. Lenovo Yoga 3 Pro SSD Replacement: 步骤 7 中的图像 1,1
    • Gently lift and wiggle the SSD side to side to remove it from the laptop chassis.

结论

To reassemble your device, follow these instructions in reverse order.

3等其他人完成本指南。

Nathan Lui

于04/10/17注册

839 声望

创作了5篇指南

团队

Cal Poly, Team S13-G6, Forte Spring 2017 Cal Poly, Team S13-G6, Forte Spring 2017 的会员

CPSU-FORTE-S17S13G6

4 名成员

创作了12篇指南

3条评论

For my Yoga 900 I needed a T5 Torx screw driver. Otherwise spot on.

Dan Benze - 回复

thanks for the info, what about the data from the original drive??

Jos Chan - 回复

Why did you remove the battery? Was it necessary?

Chris Horsfall - 回复

添加评论

浏览统计数据:

过去 24 小时: 0

过去 7 天: 1

过去 30 天: 8

总计 4,889