简介
This guide is to replace the wireless chip on the Lenovo ThinkPad X1 Yoga (Model Number: 20FQ005YUS). If your computer drops internet connection, has trouble connecting, or doesn’t connect at all, you may need to replace your wireless chip.
Note: Connection issues may be a result of a faulty router or network, so before opening your computer, please refer to our troubleshooting guide!
你所需要的
-
-
Flip the computer over so the bottom is facing up.
-
Remove nine 4mm Phillips #1 screws from the bottom of the computer.
-
Use an iFixit opening tool to pry the back cover off of the laptop.
-
-
-
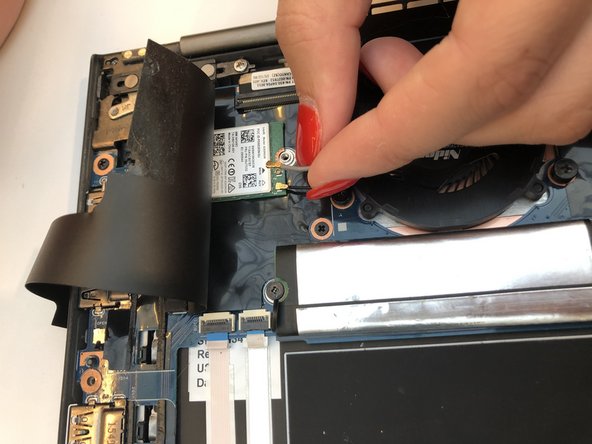
Gently peel back the black plastic covering.
-
Remove the single Phillips #1 screw securing the wireless chip in place.
-
-


To reassemble your device, follow these instructions in reverse order.
To reassemble your device, follow these instructions in reverse order.
团队

Embry-Riddle Aeronautical University, Team S22-G6, Branham Fall 2019 Embry-Riddle Aeronautical University, Team S22-G6, Branham Fall 2019 的会员
ERAU-BRANHAM-F19S22G6
3 名成员
创作了23篇指南