跳转到主内容

Lenovo ThinkPad X1 Carbon 5th Gen Fan and Heat Sink Replacement

你所需要的

  1. Lenovo ThinkPad X1 Carbon 5th Gen Fan and Heat Sink  Replacement, Back Cover: 步骤 1 中的图像 1,1
    • Turn the laptop on to its back.

  2. Lenovo ThinkPad X1 Carbon 5th Gen Fan and Heat Sink  Replacement: 步骤 2 中的图像 1,1
    • Use the Phillips #1 screwdriver to remove five 1.2 mm screws from the back cover of the laptop.

  3. Lenovo ThinkPad X1 Carbon 5th Gen Fan and Heat Sink  Replacement: 步骤 3 中的图像 1,1
    • Remove the back cover using the opening tool, leaving the laptop back exposed.

    • Use the opening tool to pry the edge and work your way around the perimeter.

    • Careful to undo the clips before removing the back cover.

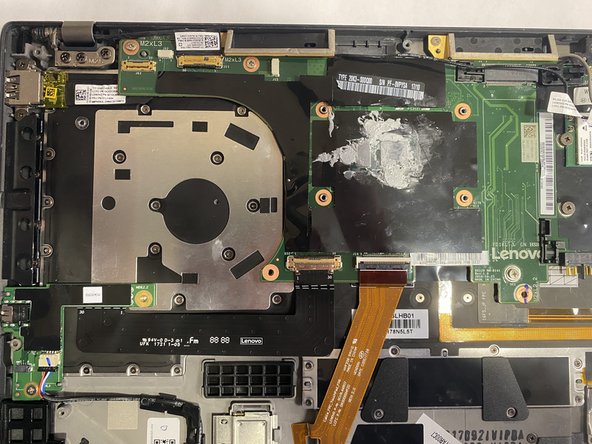
  4. Lenovo ThinkPad X1 Carbon 5th Gen Fan and Heat Sink  Replacement, Fan and Heat Sink: 步骤 4 中的图像 1,3 Lenovo ThinkPad X1 Carbon 5th Gen Fan and Heat Sink  Replacement, Fan and Heat Sink: 步骤 4 中的图像 2,3 Lenovo ThinkPad X1 Carbon 5th Gen Fan and Heat Sink  Replacement, Fan and Heat Sink: 步骤 4 中的图像 3,3
    • Use the Phillips #1 screwdriver to remove all five 1 mm screws holding the fan and heat sink down.

  5. Lenovo ThinkPad X1 Carbon 5th Gen Fan and Heat Sink  Replacement: 步骤 5 中的图像 1,2 Lenovo ThinkPad X1 Carbon 5th Gen Fan and Heat Sink  Replacement: 步骤 5 中的图像 2,2
    • Pick up the fan and heat sink and carefully and remove it.

结论

To reassemble your device, follow these instructions in reverse order.

另外一个人完成了本指南。

团队

Gateway, Team 1-3, Saknee Fall 2021 Gateway, Team 1-3, Saknee Fall 2021 的会员

GCC-SAKNEE-F21S1G3

4 名成员

创作了15篇指南

0条评论

添加评论

浏览统计数据:

过去 24 小时: 2

过去 7 天: 18

过去 30 天: 64

总计 1,879