跳转到主内容

Lenovo Legion 5 17ACH6H RAM Replacement

你所需要的

  1. Lenovo Legion 5 17ACH6H RAM Replacement, RAM: 步骤 1 中的图像 1,3 Lenovo Legion 5 17ACH6H RAM Replacement, RAM: 步骤 1 中的图像 2,3 Lenovo Legion 5 17ACH6H RAM Replacement, RAM: 步骤 1 中的图像 3,3
    • Use the Phillips #1 screwdriver to remove the ten screws on the back panel.

    • Four 4.6 mm PH1 screws

    • Six 12.8 mm PH1 screws

  2. Lenovo Legion 5 17ACH6H RAM Replacement: 步骤 2 中的图像 1,3 Lenovo Legion 5 17ACH6H RAM Replacement: 步骤 2 中的图像 2,3 Lenovo Legion 5 17ACH6H RAM Replacement: 步骤 2 中的图像 3,3
    • Insert the rounded side of the opening pick on the lower right of the back panel.

    • Apply light pressure downwards to release the clip.

    • Slide the opening pick along the lower back side of the panel to release the remaining clips.

  3. Lenovo Legion 5 17ACH6H RAM Replacement: 步骤 3 中的图像 1,3 Lenovo Legion 5 17ACH6H RAM Replacement: 步骤 3 中的图像 2,3 Lenovo Legion 5 17ACH6H RAM Replacement: 步骤 3 中的图像 3,3
    • Insert the opening pick on the right side of the panel (along the ports) and slide it across to release the pins.

    • Repeat this step on the left side of the panel.

  4. Lenovo Legion 5 17ACH6H RAM Replacement: 步骤 4 中的图像 1,3 Lenovo Legion 5 17ACH6H RAM Replacement: 步骤 4 中的图像 2,3 Lenovo Legion 5 17ACH6H RAM Replacement: 步骤 4 中的图像 3,3
    • Slide the pick in the vent near the USB C port.

    • Rotate the pick so it is on the top part of the vent.

    • Slide the pick across the top side of the vent

    • The laptop can be held vertically, so the process is much easier.

    • Repeat this step on the other side vent near the USB A port.

  5. Lenovo Legion 5 17ACH6H RAM Replacement: 步骤 5 中的图像 1,3 Lenovo Legion 5 17ACH6H RAM Replacement: 步骤 5 中的图像 2,3 Lenovo Legion 5 17ACH6H RAM Replacement: 步骤 5 中的图像 3,3
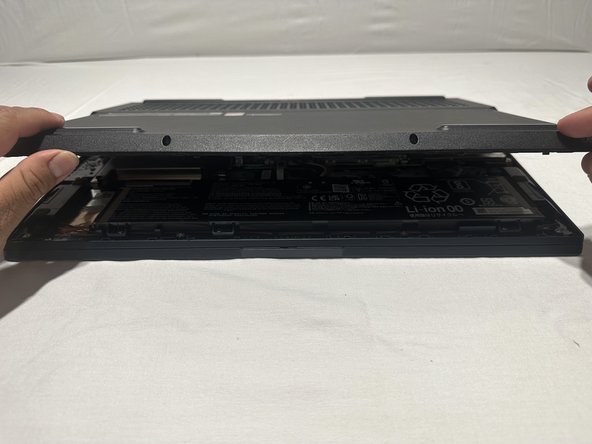
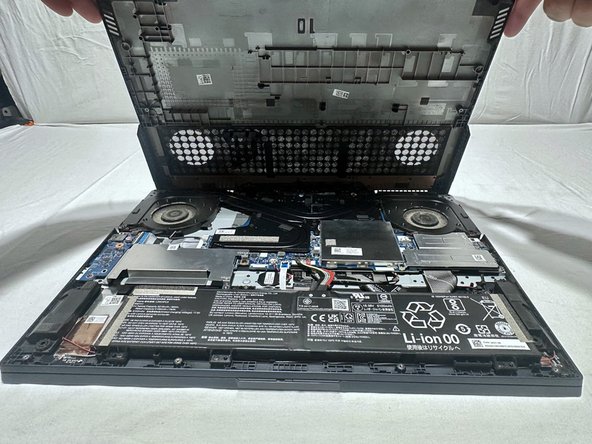
    • Grab the back panel and lift it to remove it from the chassis.

    • Before completely lifting the back panel, the panel should be pushed a little bit away from you. This is to prevent the panel from getting stuck with the IO ports.

  6. Lenovo Legion 5 17ACH6H RAM Replacement: 步骤 6 中的图像 1,3 Lenovo Legion 5 17ACH6H RAM Replacement: 步骤 6 中的图像 2,3 Lenovo Legion 5 17ACH6H RAM Replacement: 步骤 6 中的图像 3,3
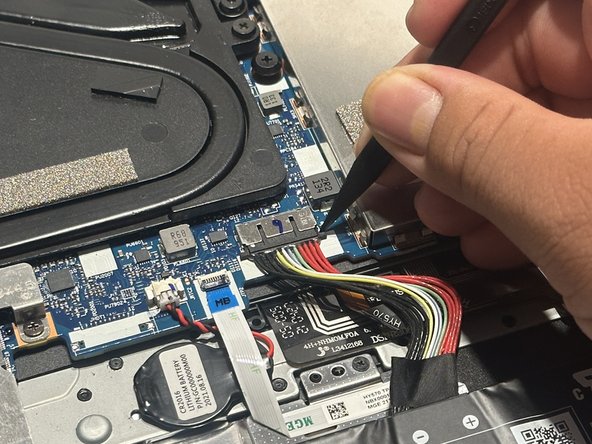
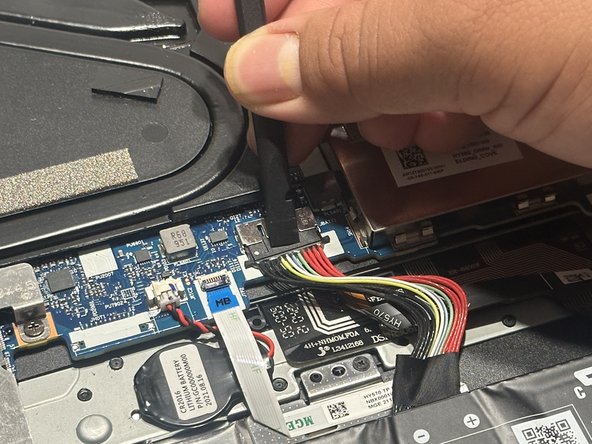
    • Use the pointed tip of a spudger to carefully push on each side of the connector.

    • Use the flat side of the spudger at the top of the battery connector to completely push it out.

    • Pull the cable by the connector and not the wires to move it out of the way.

    • It is important to disconnect the battery since touching the components with the battery connected can short-circuit the device. This could cause damage to the components and yourself.

  7. Lenovo Legion 5 17ACH6H RAM Replacement: 步骤 7 中的图像 1,3 Lenovo Legion 5 17ACH6H RAM Replacement: 步骤 7 中的图像 2,3 Lenovo Legion 5 17ACH6H RAM Replacement: 步骤 7 中的图像 3,3
    • Place the flat side of the spudger between the RAM shield (right) and the metal plate (left) at a 45-degree angle.

    • Pry open the bottom part of the metal plate by moving the spudger toward the RAM shield.

  8. Lenovo Legion 5 17ACH6H RAM Replacement: 步骤 8 中的图像 1,3 Lenovo Legion 5 17ACH6H RAM Replacement: 步骤 8 中的图像 2,3 Lenovo Legion 5 17ACH6H RAM Replacement: 步骤 8 中的图像 3,3
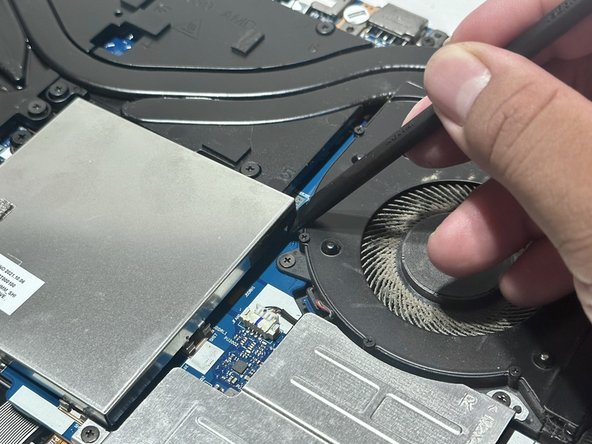
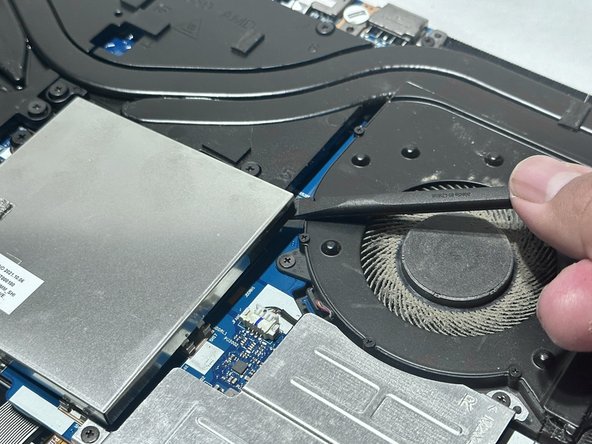
    • Place the flat side of the spudger between the fan (right) and the metal plate (left).

    • Pry open the top part of the metal plate by moving the spudger toward the fan.

  9. Lenovo Legion 5 17ACH6H RAM Replacement: 步骤 9 中的图像 1,3 Lenovo Legion 5 17ACH6H RAM Replacement: 步骤 9 中的图像 2,3 Lenovo Legion 5 17ACH6H RAM Replacement: 步骤 9 中的图像 3,3
    • Grab both sides of the metal plate to lift it off the clips.

  10. Lenovo Legion 5 17ACH6H RAM Replacement: 步骤 10 中的图像 1,3 Lenovo Legion 5 17ACH6H RAM Replacement: 步骤 10 中的图像 2,3 Lenovo Legion 5 17ACH6H RAM Replacement: 步骤 10 中的图像 3,3
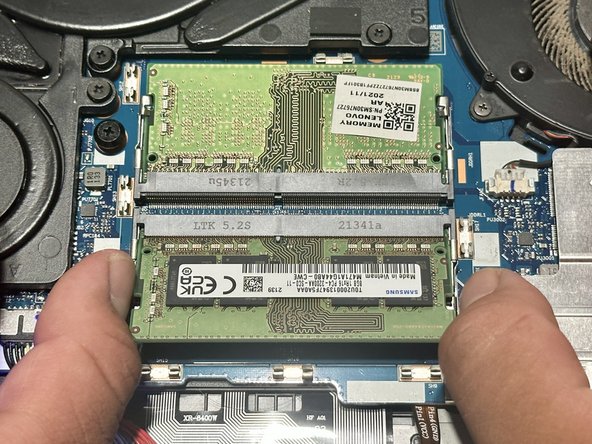
    • With both thumbs, push the clips outward.

    • Gently slide the RAM module out of the socket to remove it.

  11. Lenovo Legion 5 17ACH6H RAM Replacement: 步骤 11 中的图像 1,3 Lenovo Legion 5 17ACH6H RAM Replacement: 步骤 11 中的图像 2,3 Lenovo Legion 5 17ACH6H RAM Replacement: 步骤 11 中的图像 3,3
    • Repeat step 10 to remove the top module.

    • The laptop was rotated 180 degrees, which is why it is facing the camera.

  12. Lenovo Legion 5 17ACH6H RAM Replacement: 步骤 12 中的图像 1,3 Lenovo Legion 5 17ACH6H RAM Replacement: 步骤 12 中的图像 2,3 Lenovo Legion 5 17ACH6H RAM Replacement: 步骤 12 中的图像 3,3
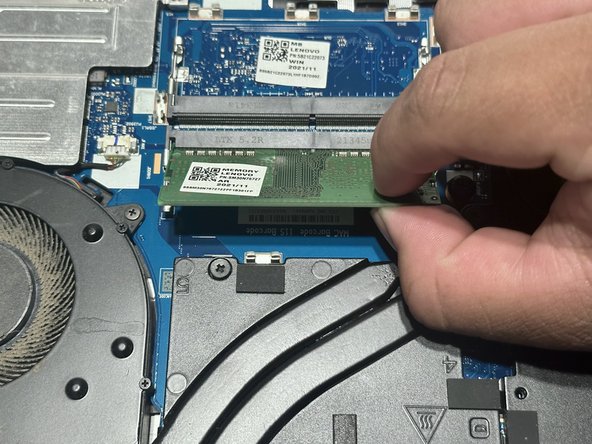
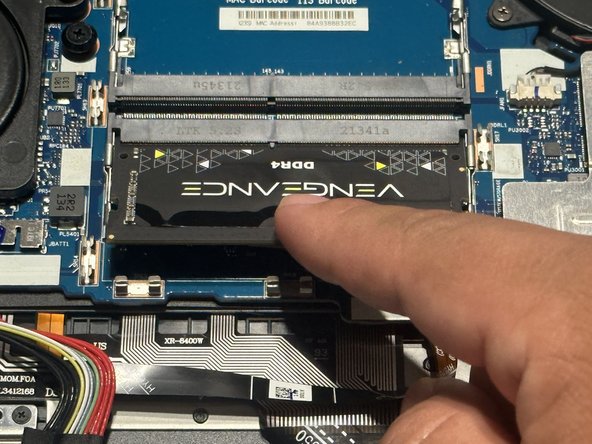
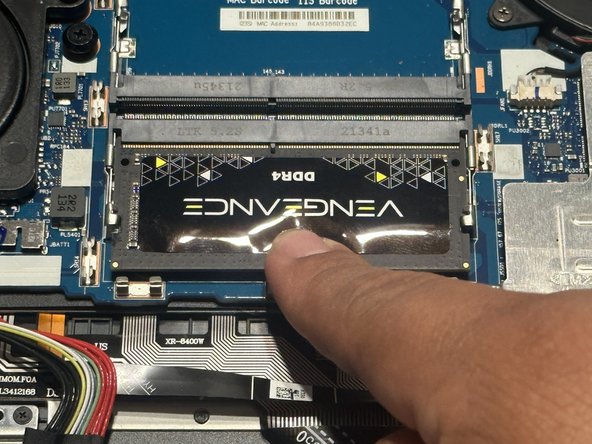
    • Insert the RAM module at a 45-degree angle.

    • Make sure the module aligns with the slot. You can check by making sure the module pins' holes align with the slot.

    • With a finger on the top part of the module, push the RAM stick downward.

    • A click indicates that the module has been inserted successfully.

  13. Lenovo Legion 5 17ACH6H RAM Replacement: 步骤 13 中的图像 1,3 Lenovo Legion 5 17ACH6H RAM Replacement: 步骤 13 中的图像 2,3 Lenovo Legion 5 17ACH6H RAM Replacement: 步骤 13 中的图像 3,3
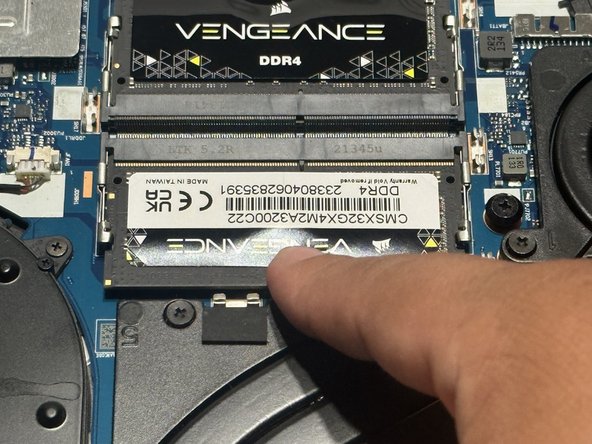
    • Repeat step 12 to insert the top RAM module.

    • The laptop was rotated 180 degrees, which is why it is facing the camera.

结论

To reassemble your device, follow these instructions in reverse order.

另外一个人完成了本指南。

Arturo Moreno

于10/24/23注册

253 声望

撰写一个指南

团队

CSU Los Angeles, Team 12-4, Ribeiro Fall 2023 CSU Los Angeles, Team 12-4, Ribeiro Fall 2023 的会员

CSULA-RIBEIRO-F23S12G4

2 名成员

创作了1篇指南

0条评论

添加评论

浏览统计数据:

过去 24 小时: 4

过去 7 天: 21

过去 30 天: 96

总计 674