跳转到主内容

Lenovo Ideatab S6000 Motherboard Replacement

你所需要的

  1. Lenovo Ideatab S6000 Motherboard Replacement, Battery: 步骤 1 中的图像 1,1
    • Remove the speaker screens by working them loose with a plastic opening tool. You may need to first loosen them with tweezers or a craft knife.

    • These screens are held in place by glue that is hard to remove. Please take your time to ensure that that this step is done correctly.

  2. Lenovo Ideatab S6000 Motherboard Replacement: 步骤 2 中的图像 1,1
    • Remove the screws from both of the spots that were covered.

  3. Lenovo Ideatab S6000 Motherboard Replacement: 步骤 3 中的图像 1,1
    • DO NOT USE A METAL TOOL FOR THIS.

    • Go all around the casing, prying the screen away from the backing with the spudger.

    • It will make a popping sound each time one of the lock tabs is disconnected.

    • Take your time as you move all around the device when prying the backing off.

  4. Lenovo Ideatab S6000 Motherboard Replacement: 步骤 4 中的图像 1,1
    • Pull off the plastic that is covering the battery cable.

  5. Lenovo Ideatab S6000 Motherboard Replacement: 步骤 5 中的图像 1,2 Lenovo Ideatab S6000 Motherboard Replacement: 步骤 5 中的图像 2,2
    • Using either the plastic opening tool or your fingers, gently pull on both sides of the plug to release it.

  6. Lenovo Ideatab S6000 Motherboard Replacement: 步骤 6 中的图像 1,1
    • Remove the battery by grabbing the tab shown and pulling up.

    • The battery is held to the device by adhesive. Pull the battery up from the tab and it will lift out with a bit of effort.

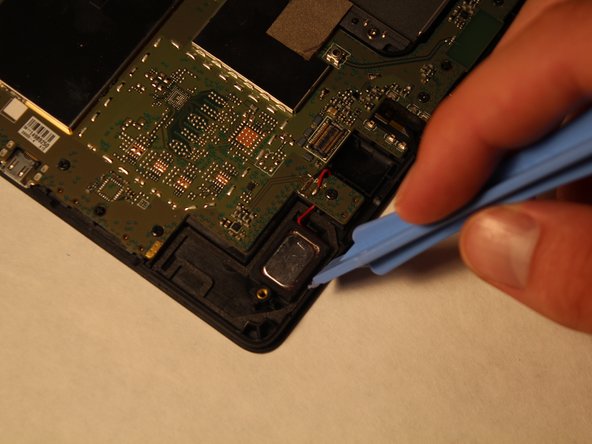
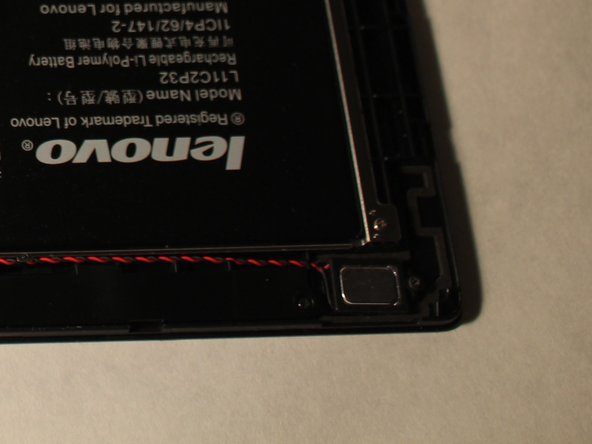
  7. Lenovo Ideatab S6000 Motherboard Replacement, Speakers: 步骤 7 中的图像 1,3 Lenovo Ideatab S6000 Motherboard Replacement, Speakers: 步骤 7 中的图像 2,3 Lenovo Ideatab S6000 Motherboard Replacement, Speakers: 步骤 7 中的图像 3,3
    • The speakers are connected to the tablet by glue and require a lot of prying to remove.

    • Make sure to get all the way under the speakers when prying.

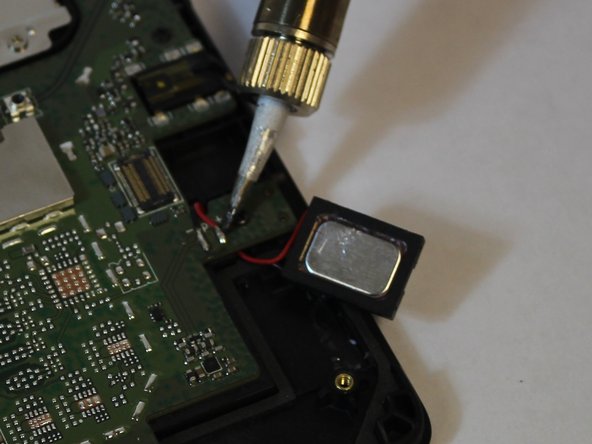
  8. Lenovo Ideatab S6000 Motherboard Replacement: 步骤 8 中的图像 1,2 Lenovo Ideatab S6000 Motherboard Replacement: 步骤 8 中的图像 2,2
    • This step is not necessary if you aren't replacing the speakers.

    • To the remove the wires heat the solder connecting the wires to the board, and gently pull on the wires.

    • Remember the placement of the red and black wires.

    • Connect new speakers by soldering the wires onto the board.

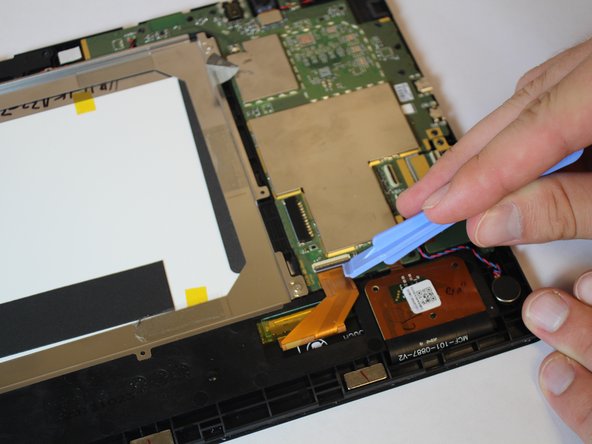
  9. Lenovo Ideatab S6000 Motherboard Replacement, Vibration Motor: 步骤 9 中的图像 1,1
    • Use the spudger to pry up the vibration motor.

  10. Lenovo Ideatab S6000 Motherboard Replacement, Motherboard: 步骤 10 中的图像 1,1
    • Remove the 3.16mm screws highlighted in red

  11. Lenovo Ideatab S6000 Motherboard Replacement: 步骤 11 中的图像 1,1
    • Force the ribbon cables out by pulling up the cables through the use of the plastic opening tool.

  12. Lenovo Ideatab S6000 Motherboard Replacement: 步骤 12 中的图像 1,1
    • Flip the black tab up to unlock the cables by using the plastic opening tool.

  13. Lenovo Ideatab S6000 Motherboard Replacement: 步骤 13 中的图像 1,1
    • Remove the piece of tape by pulling it up through the use of your hand.

  14. Lenovo Ideatab S6000 Motherboard Replacement: 步骤 14 中的图像 1,2 Lenovo Ideatab S6000 Motherboard Replacement: 步骤 14 中的图像 2,2
    • Remove the tape by pulling it up through the use of the plastic opening tool.

  15. Lenovo Ideatab S6000 Motherboard Replacement: 步骤 15 中的图像 1,2 Lenovo Ideatab S6000 Motherboard Replacement: 步骤 15 中的图像 2,2
    • Unlike the other small connectors this one does not flip up. You need to pull the connector cable to release this

    • Lift the tab by pulling it up with your hand.

  16. Lenovo Ideatab S6000 Motherboard Replacement: 步骤 16 中的图像 1,1
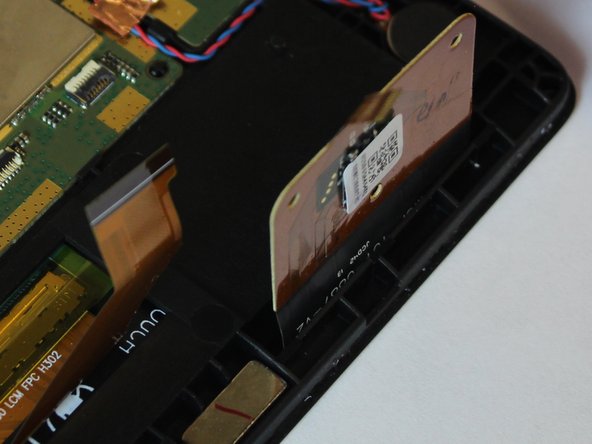
    • Lift up the cables connected to the tab by using the spudger tool.

  17. Lenovo Ideatab S6000 Motherboard Replacement: 步骤 17 中的图像 1,1
    • Remove the tablet's Motherboard by lifting it up with your hands.

结论

To reassemble your device, follow these instructions in reverse order.

8等其他人完成本指南。

Josiah Speed

于09/22/14注册

965 声望

创作了4篇指南

团队

USF Tampa, Team 10-4, Brown Fall 2014 USF Tampa, Team 10-4, Brown Fall 2014 的会员

USFT-BROWN-F14S10G4

4 名成员

创作了10篇指南

3条评论

Just followed this on my father's tablet, worked like a charm!

One step missing, there's a connector for the camera between steps 16 and 17 that needs pried up before taking the board off.

Other than that THANK YOU!!! :)

Mikel Farley - 回复

Any schematics or board view for this board out there?

DANIEL HOCH - 回复

Best purchase of mother board?

Terry Williams - 回复

添加评论

浏览统计数据:

过去 24 小时: 0

过去 7 天: 1

过去 30 天: 4

总计 8,190