你所需要的
-
-
At first locate the 10 Torx screws at the bottom of your Ideapad and unscrew them all.
-
Be sure to store the tiny screws some place safe. Now you can spot the bottom D-cover which is clipped to the C-cover.
-
Put a spudger or use you fingernails between the two covers and gently pull on the bottom cover on every side until it's opened.
-
-
-
Your Ideapad is now showing its internals. Watch out for the battery connector (red circle) and disconnect the battery before moving on.
-
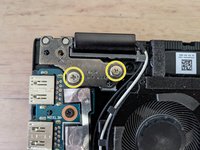
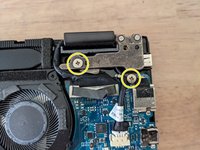
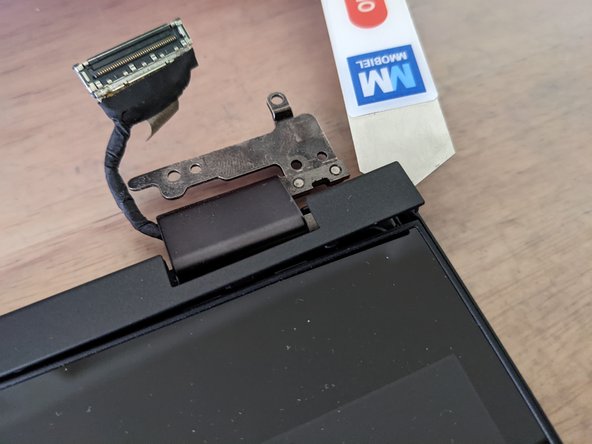
We now have to locate the hinges with two screws each and the connector ribbon cable to the left (yellow boxes)
-
-
-
-
Use a philips screwdriver to remove the four screws which are attaching the screen assembly to the Ideadpad.
-
-
-
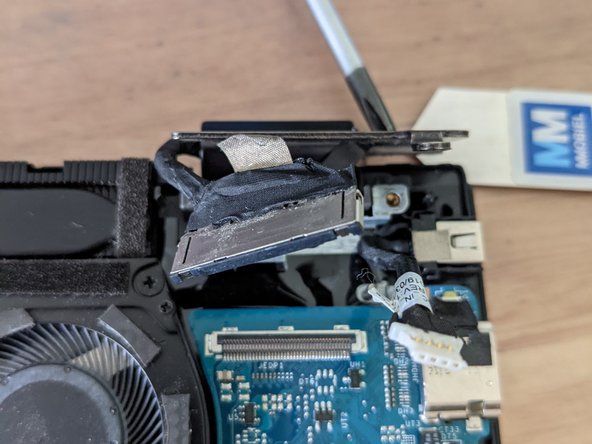
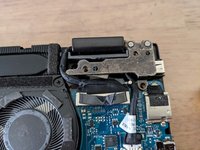
Locate the folded ribbon cable on the bottom left which connects the motherboard to the smaller power button board.
-
Release the ribbon cable to the right by lifting up the white part of the connector carefully. It should look just like in the photo. Now you can pull out the cable and have view at the WiFi card.
-
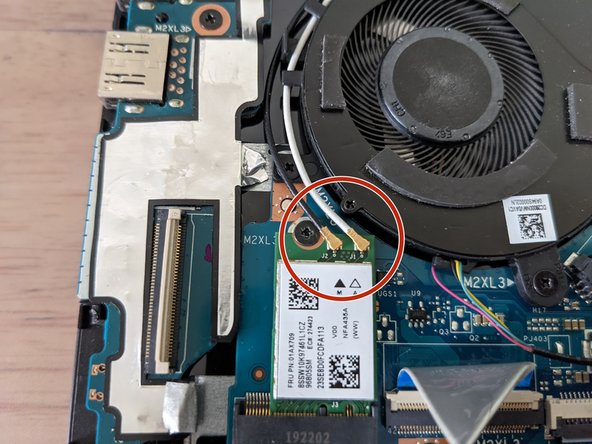
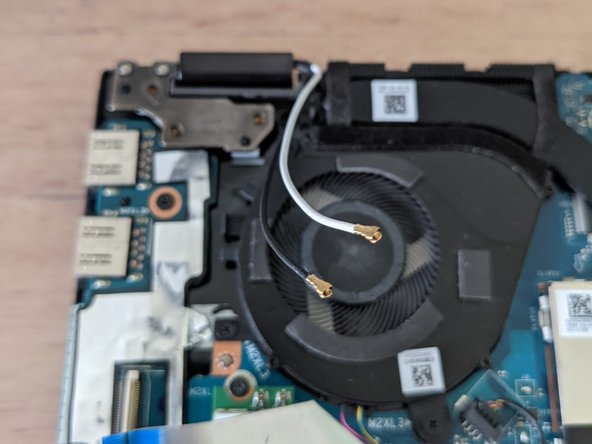
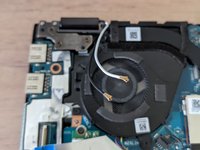
The WiFi card has antenna connectors to the screen and need to be disconnected. Locate the brazen connectors (red circle) and really gently disconnect them by using your fingernails or a spudger.
-
-
-
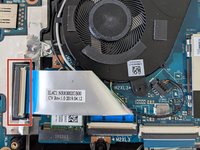
Last but not least you have to disconnect the display from the motherboard in the upper right corner of the Ideapad.
-
There is an adhesive strip which should allow you to lift the connector from the board. Unfortunately mine ripped off in the process but you can use a spudger if you're careful. It is really firm in place so you might want to be careful not to damage anything.
-
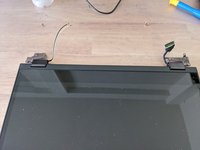
Now everything that connected the screen to the motherboard or assembly is loose and we're ready to take off the display.
-
-
-
Here is your touch display.
-
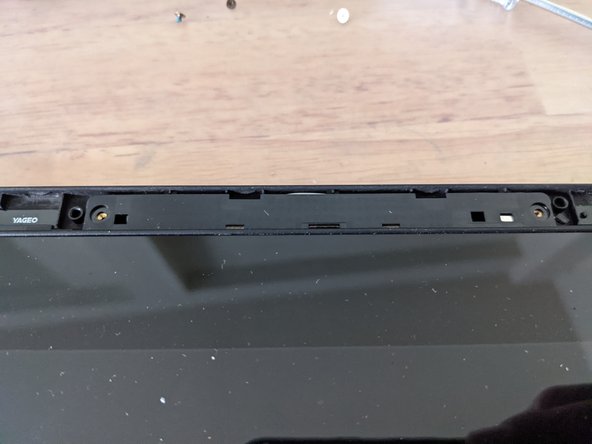
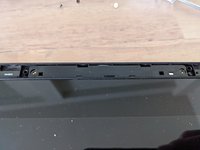
If you would like to go further like replacing the webcam in your display you'd have to move on by removing the bottom plastic strip with a spudger.
-
The display is glued to the A-Cover and requires further steps to accomplish.
-


To reassemble your device, follow these instructions in reverse order.
2等其他人完成本指南。

4指南评论
Where can I find the replacement screen like the whole assembly not just the digitizer because I cracked mine
Try eBay or AliExpress. You probably want a used screen. New ones are most likely as expensive as the whole unit
Fred -
Sorry but I got another question. I got a screen and replaced it and it was 100% the right model but it doesn’t register that it’s a touch screen. Any work around you know of?
There are plenty of things to consider:
1. Did you buy a used screen? Has it been opened? The digitizer and the display are in fact to different parts - maybe it has been tinkered with? Are you sure that you have plugged the display connector in correctly?
2. See if a BIOS upgrade is available and apply it - sometimes that does the trick.
3. Do you have a Ubuntu USB pen drive at hand? Boot it up and see if the touchscreen works under Linux. If it does it's probably just a driver issue. Under Windows in Device Manager you should have a device called something like HID compatible touch screen listed under input devices. If its there - try to uninstall it and reboot.
Good luck!
Fred -