跳转到主内容

Lenovo IdeaPad P400 Touch Hard Drive Replacement

你所需要的

  1. Lenovo IdeaPad P400 Touch Hard Drive Replacement, Keyboard: 步骤 1 中的图像 1,2 Lenovo IdeaPad P400 Touch Hard Drive Replacement, Keyboard: 步骤 1 中的图像 2,2
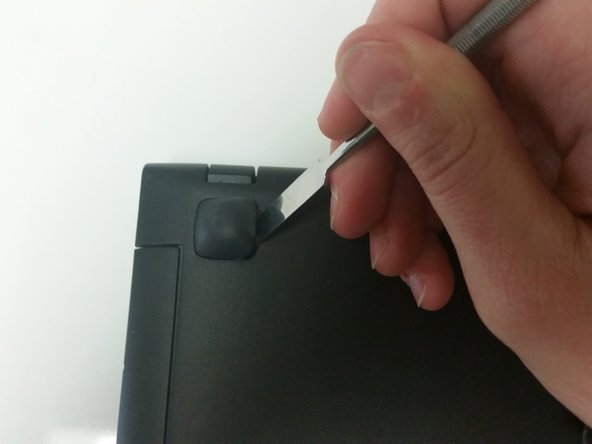
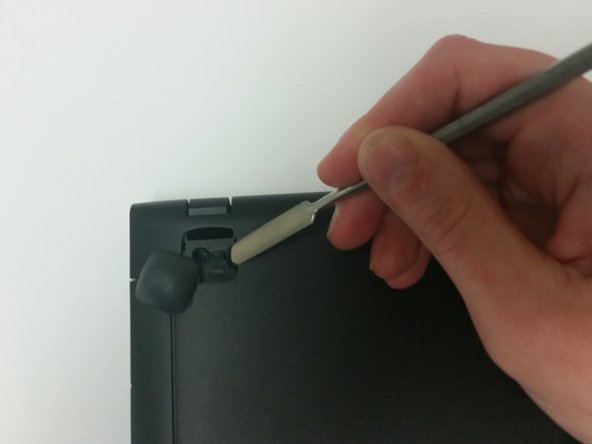
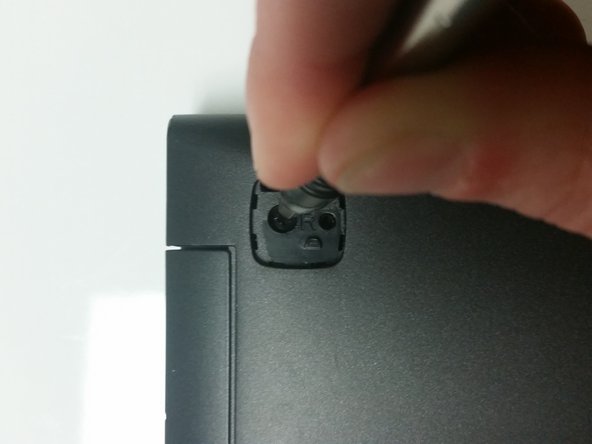
    • Remove the two 14mm Phillips #1 screws that attach the keyboard to the underside of the laptop.

    • Use a Phillips #1 screwdriver.

  2. Lenovo IdeaPad P400 Touch Hard Drive Replacement: 步骤 2 中的图像 1,2 Lenovo IdeaPad P400 Touch Hard Drive Replacement: 步骤 2 中的图像 2,2
    • Flip the laptop over and open it as you would to use it.

  3. Lenovo IdeaPad P400 Touch Hard Drive Replacement: 步骤 3 中的图像 1,2 Lenovo IdeaPad P400 Touch Hard Drive Replacement: 步骤 3 中的图像 2,2
    • Using your hands, lift the top corner of the keyboard, and keep lifting until the keyboard pops out. You will hear clicks as you do this.

    • If necessary, use the plastic spudger to pry up the corner and then lift the keyboard out with your hands.

    • Do not lift the keyboard out entirely. It will still be connected to the laptop. Only lift it enough so that it is unseated as shown in the second picture.

  4. Lenovo IdeaPad P400 Touch Hard Drive Replacement: 步骤 4 中的图像 1,3 Lenovo IdeaPad P400 Touch Hard Drive Replacement: 步骤 4 中的图像 2,3 Lenovo IdeaPad P400 Touch Hard Drive Replacement: 步骤 4 中的图像 3,3
    • Lift the top of the keyboard and flip the keyboard face down so that you can access the connectors underneath it.

    • Using your fingers, unplug the large connector that connects the keyboard to the center of the laptop by sliding the end of the strip out of the socket.

    • You may need to flip the white plastic bar up with a fingernail to be able to remove the strip.

  5. Lenovo IdeaPad P400 Touch Hard Drive Replacement: 步骤 5 中的图像 1,3 Lenovo IdeaPad P400 Touch Hard Drive Replacement: 步骤 5 中的图像 2,3 Lenovo IdeaPad P400 Touch Hard Drive Replacement: 步骤 5 中的图像 3,3
    • Using your fingers, unplug the second, smaller connector, located at the lower left hand side of the keyboard by sliding the strip out of the socket.

    • You may need to flip the white plastic bar up with your fingernail to remove the connector.

  6. Lenovo IdeaPad P400 Touch Hard Drive Replacement, Battery: 步骤 6 中的图像 1,1
    • Flip the laptop so that the bottom faces up.

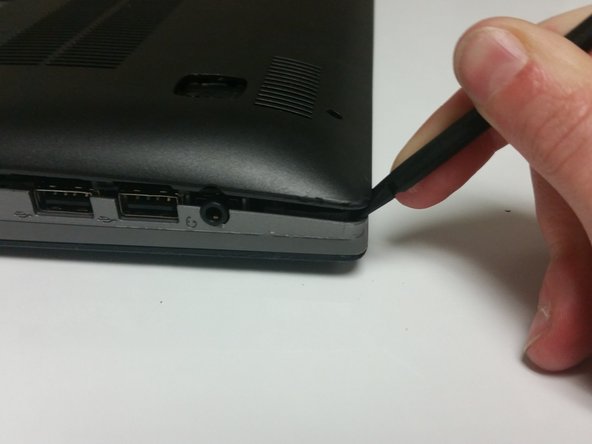
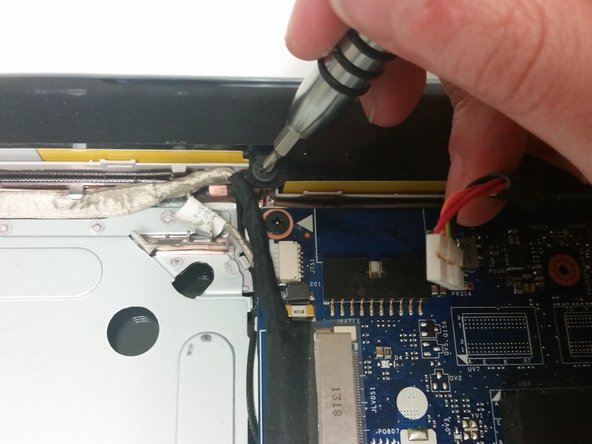
    • You will first need to remove three 7mm Phillips #1 screws from the bottom of the laptop.

  7. Lenovo IdeaPad P400 Touch Hard Drive Replacement: 步骤 7 中的图像 1,3 Lenovo IdeaPad P400 Touch Hard Drive Replacement: 步骤 7 中的图像 2,3 Lenovo IdeaPad P400 Touch Hard Drive Replacement: 步骤 7 中的图像 3,3
    • Using a spudger, remove the back two feet of the laptop.

    • You may need to use a metal spudger if you cannot remove them with a plastic one.

  8. Lenovo IdeaPad P400 Touch Hard Drive Replacement: 步骤 8 中的图像 1,2 Lenovo IdeaPad P400 Touch Hard Drive Replacement: 步骤 8 中的图像 2,2
    • Remove the 7mm Phillips #1 screw beneath where the foot was. Do this for both sides.

  9. Lenovo IdeaPad P400 Touch Hard Drive Replacement: 步骤 9 中的图像 1,3 Lenovo IdeaPad P400 Touch Hard Drive Replacement: 步骤 9 中的图像 2,3 Lenovo IdeaPad P400 Touch Hard Drive Replacement: 步骤 9 中的图像 3,3
    • Flip the laptop over and open it.

    • Remove the 3mm Phillips #1 screw holding the disc drive in place.

    • Remove the disc drive by sliding it out.

  10. Lenovo IdeaPad P400 Touch Hard Drive Replacement: 步骤 10 中的图像 1,1
    • Remove four 7mm Phillips #1 interior screws.

  11. Lenovo IdeaPad P400 Touch Hard Drive Replacement: 步骤 11 中的图像 1,2 Lenovo IdeaPad P400 Touch Hard Drive Replacement: 步骤 11 中的图像 2,2
    • Close the laptop lid and flip it over.

    • Remove three 3mm Phillips #1 screws from beneath where the disc drive was located.

  12. Lenovo IdeaPad P400 Touch Hard Drive Replacement: 步骤 12 中的图像 1,3 Lenovo IdeaPad P400 Touch Hard Drive Replacement: 步骤 12 中的图像 2,3 Lenovo IdeaPad P400 Touch Hard Drive Replacement: 步骤 12 中的图像 3,3
    • Using a plastic spudger, pry open the laptop case starting near the disc drive.

    • Continue prying open the case by using the spudger to open it in new areas.

    • Once there is enough space to allow you to grip the case, use your hands to finish removing it.

    • It may be difficult at first. If the plastic spudger does not work, you can try using a metal one. Using a hand to pull the case open while prying may help as well.

  13. Lenovo IdeaPad P400 Touch Hard Drive Replacement: 步骤 13 中的图像 1,3 Lenovo IdeaPad P400 Touch Hard Drive Replacement: 步骤 13 中的图像 2,3 Lenovo IdeaPad P400 Touch Hard Drive Replacement: 步骤 13 中的图像 3,3
    • Using your fingers, unplug the battery from the laptop by taking the plug out of its socket.

  14. Lenovo IdeaPad P400 Touch Hard Drive Replacement: 步骤 14 中的图像 1,3 Lenovo IdeaPad P400 Touch Hard Drive Replacement: 步骤 14 中的图像 2,3 Lenovo IdeaPad P400 Touch Hard Drive Replacement: 步骤 14 中的图像 3,3
    • Unscrew the battery from the laptop by removing two 3mm Phillips #1 screws.

  15. Lenovo IdeaPad P400 Touch Hard Drive Replacement: 步骤 15 中的图像 1,2 Lenovo IdeaPad P400 Touch Hard Drive Replacement: 步骤 15 中的图像 2,2
    • Using your hand, remove the battery from the laptop by lifting one side and then pulling it out of its slot.

  16. Lenovo IdeaPad P400 Touch Hard Drive Replacement, Hard Drive: 步骤 16 中的图像 1,1
    • Remove the four 3mm Phillips #1 screws holding in the hard drive.

  17. Lenovo IdeaPad P400 Touch Hard Drive Replacement: 步骤 17 中的图像 1,1
    • Lift the outermost end of the hard drive and slide it out of the connector to disconnect it from the motherboard.

结论

To reassemble your device, follow these instructions in reverse order.

9等其他人完成本指南。

2条评论

Straightforward instructions, pointed out the tricky parts perfectly. Thanks

robinprior - 回复

Is it possible to add a ssd keeping the hdd?

karim ghazoul - 回复

添加评论

浏览统计数据:

过去 24 小时: 0

过去 7 天: 1

过去 30 天: 8

总计 4,895