跳转到主内容

当前版本的文档还未经巡查,您可以查看最新的已查核版本

你所需要的

  1. 这个步骤还没有翻译 帮忙翻译一下

    : 步骤 1 中的图像 1,1
    • Turn over the device so that the bottom is facing up. Make sure the hinged side is facing you.

  2. 这个步骤还没有翻译 帮忙翻译一下

    : 步骤 2 中的图像 1,1
    • Move the right switch towards the right until it clicks in place. You should then see the color red reveal from where the switch was originally.

  3. 这个步骤还没有翻译 帮忙翻译一下

    : 步骤 3 中的图像 1,1
    • Now take your left hand and slide the left switch to the left.

    • This switch will not click in place like the other switch, so make sure to keep your left hand on the switch.

  4. 这个步骤还没有翻译 帮忙翻译一下

    : 步骤 4 中的图像 1,1
    • Take your free hand and place it on the battery. Gently slide it away from its slot.

  5. 这个步骤还没有翻译 帮忙翻译一下

    : 步骤 5 中的图像 1,3 : 步骤 5 中的图像 2,3 : 步骤 5 中的图像 3,3
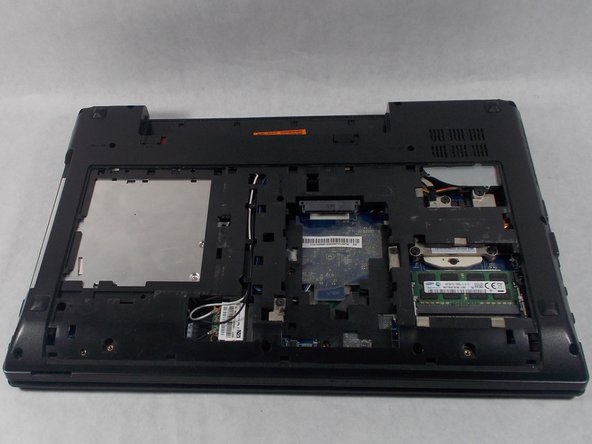
    • Rotate the laptop so that now the hinge is facing away from you.

    • Remove the two 2.5 x 4.0 mm Phillips #0 screws from the underside of the laptop.

    • Slide the bottom panel towards you until it stops, and then carefully lift it off.

  6. 这个步骤还没有翻译 帮忙翻译一下

    : 步骤 6 中的图像 1,1
    • Remove the three 2.0 x 6.0 mm Phillips #0 screws located on the underside of the device.

  7. 这个步骤还没有翻译 帮忙翻译一下

    : 步骤 7 中的图像 1,3 : 步骤 7 中的图像 2,3 : 步骤 7 中的图像 3,3
    • Turn the laptop right side up and open the lid.

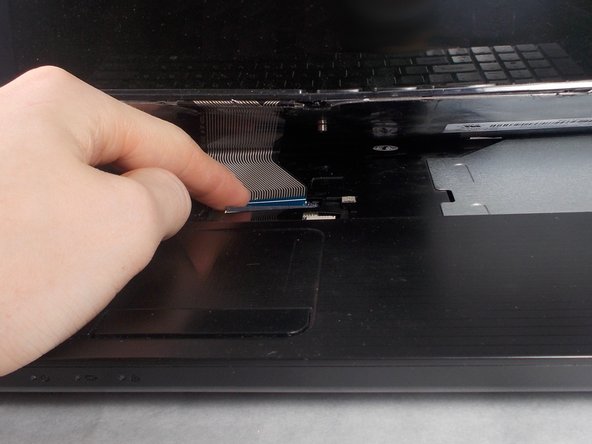
    • Using the spudger and your fingers, get in between the keyboard's edge and lift it up.

    • Carefully lift the keyboard ribbon cable out of the socket it is in.

  8. 这个步骤还没有翻译 帮忙翻译一下

    : 步骤 8 中的图像 1,2 : 步骤 8 中的图像 2,2
    • Remove the 2.5 x 6.0 mm Phillips #0 from the center of the device.

    • Close the laptop and place it face down once again.

  9. 这个步骤还没有翻译 帮忙翻译一下

    : 步骤 9 中的图像 1,1
    • If a hard disk drive is installed, remove the two 2.5 x 4.0 mm Phillips #0 screws.

    • Slide the hard disk drive out of its socket.

  10. 这个步骤还没有翻译 帮忙翻译一下

    : 步骤 10 中的图像 1,1
    • Remove the eleven 2.5 x 6.0 mm Phillips #0 screws.

    • Remove the three 2.0 x 3.0 mm flat head screws.

    • Remove the 2.5 x 4.0 mm Phillips #0 screw.

  11. 这个步骤还没有翻译 帮忙翻译一下

    : 步骤 11 中的图像 1,2 : 步骤 11 中的图像 2,2
    • Turn the laptop right side up and open the lid.

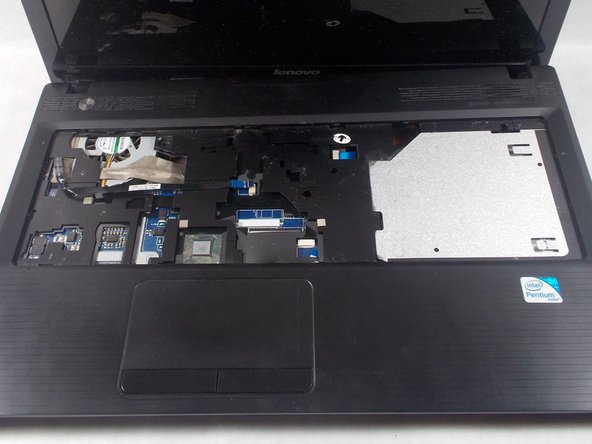
    • Disconnect the two ribbon cables from the center.

    • Lift the keyboard bezel (with trackpad) straight up and out.

  12. 这个步骤还没有翻译 帮忙翻译一下

    : 步骤 12 中的图像 1,1
    • Remove the five ribbon cables on the top of the computer.

    • Gently remove the single cable from its socket.

  13. 这个步骤还没有翻译 帮忙翻译一下

    : 步骤 13 中的图像 1,1
    • Remove the three 2.5 x 3.0 mm Phillips #0 screws on the motherboard.

  14. 这个步骤还没有翻译 帮忙翻译一下

    : 步骤 14 中的图像 1,2 : 步骤 14 中的图像 2,2
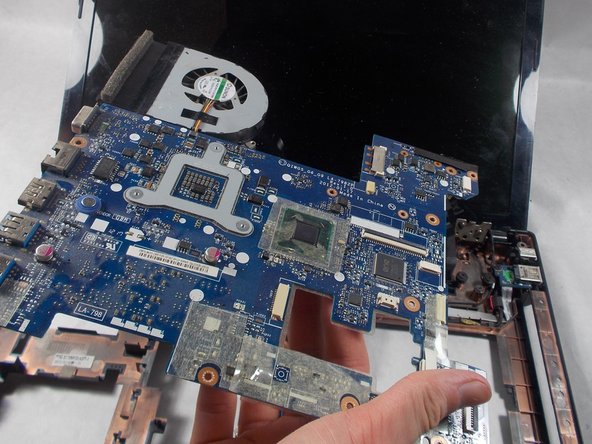
    • Using your fingers or a spudger, lift the motherboard slightly.

    • Detach the single cable from underneath.

    • Lift the motherboard the rest of the way out.

  15. 这个步骤还没有翻译 帮忙翻译一下

    : 步骤 15 中的图像 1,1
    • Detach the cable next to the fan assembly.

  16. 这个步骤还没有翻译 帮忙翻译一下

    : 步骤 16 中的图像 1,2 : 步骤 16 中的图像 2,2
    • Remove the three 2.0 x 3.2 mm Phillips #0 screws from the fan.

    • Lift the fan straight off the motherboard.

  17. 这个步骤还没有翻译 帮忙翻译一下

    : 步骤 17 中的图像 1,2 : 步骤 17 中的图像 2,2
    • Using a flathead screwdriver, turn the beige lock to counterclockwise to unlocked.

  18. 这个步骤还没有翻译 帮忙翻译一下

    : 步骤 18 中的图像 1,1
    • Lift the CPU out of the socket.

    • Upon replacing the CPU and re-locking back in place, remember to apply thermal paste in order to prevent overheating.

终点

5等其他人完成本指南。

Alex Amorim

于03/19/18注册

907 声望

创作了5篇指南

团队

UMass Dartmouth, Team S5-G2, Peak Spring 2018 UMass Dartmouth, Team S5-G2, Peak Spring 2018 的会员

UMASSD-PEAK-S18S5G2

2 名成员

创作了5篇指南

一条评论

süper olmuş eline sağlık çok açıklayıcı ve başarılı olmuş teşekkür ederim

Ümit Kocamanoglu - 回复

添加评论

浏览统计数据:

过去 24 小时: 0

过去 7 天: 7

过去 30 天: 15

总计 1,096