跳转到主内容

Lenovo IdeaPad 300-17ISK Optical Drive Replacement

你所需要的

  1. Lenovo IdeaPad 300-17ISK Optical Drive Replacement, Keyboard: 步骤 1 中的图像 1,1
    • Unscrew the three 6mm Phillips #1 screws from the upper back cover.

  2. Lenovo IdeaPad 300-17ISK Optical Drive Replacement: 步骤 2 中的图像 1,3 Lenovo IdeaPad 300-17ISK Optical Drive Replacement: 步骤 2 中的图像 2,3 Lenovo IdeaPad 300-17ISK Optical Drive Replacement: 步骤 2 中的图像 3,3
    • Place the opening tool's head under any edge of the keyboard.

    • Pull upwards to unsnap the keyboard.

    • Use your fingers and the opening tool to pop the keyboard out of its place.

    • You should't use any excessive force because the keyboard is still attached to the motherboard.

  3. Lenovo IdeaPad 300-17ISK Optical Drive Replacement: 步骤 3 中的图像 1,2 Lenovo IdeaPad 300-17ISK Optical Drive Replacement: 步骤 3 中的图像 2,2
    • Push the keyboard connector latch upwards with the spudger.

    • You shouldn't use excessive force. The connector latch is very fragile.

    • The keyboard connector cable should slide right out.

  4. Lenovo IdeaPad 300-17ISK Optical Drive Replacement, Optical Drive: 步骤 4 中的图像 1,1
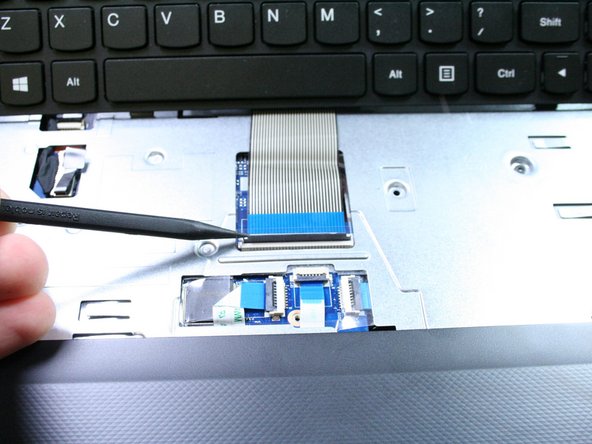
    • Remove the 6mm Phillips #1 screw that sits in the center of the front plate below the keyboard. This screw sits between two adjacent tabbed holes.

  5. Lenovo IdeaPad 300-17ISK Optical Drive Replacement: 步骤 5 中的图像 1,3 Lenovo IdeaPad 300-17ISK Optical Drive Replacement: 步骤 5 中的图像 2,3 Lenovo IdeaPad 300-17ISK Optical Drive Replacement: 步骤 5 中的图像 3,3
    • Insert the opening tool's head into one of the tabbed holes.

    • With the opening tool's head inserted under a tab, push to the right. The optical drive should slide out easily.

结论

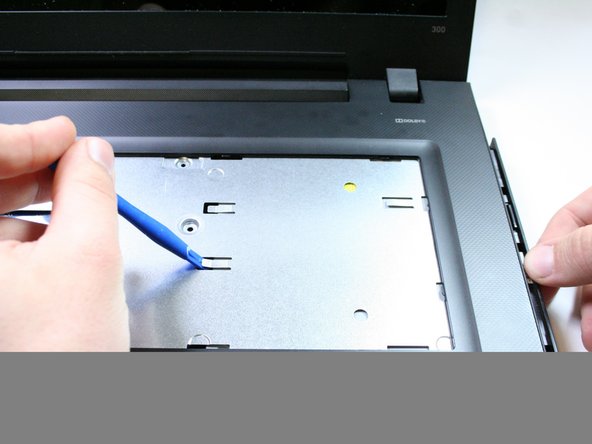
To reassemble your device, follow these instructions in reverse order.

另外一个人完成了本指南。

Ammar Dodin

于01/19/17注册

1,057 声望

创作了6篇指南

团队

UC Davis, Team 1-3, Rodger Winter 2017 UC Davis, Team 1-3, Rodger Winter 2017 的会员

UCD-RODGER-W17S1G3

4 名成员

创作了6篇指南

0条评论

添加评论

浏览统计数据:

过去 24 小时: 3

过去 7 天: 6

过去 30 天: 21

总计 5,029