跳转到主内容

Lenovo IdeaPad 3-1481W000NGUS SSD Replacement

你所需要的

  1. Lenovo IdeaPad 3-1481W000NGUS SSD Replacement, Back Cover: 步骤 1 中的图像 1,3 Lenovo IdeaPad 3-1481W000NGUS SSD Replacement, Back Cover: 步骤 1 中的图像 2,3 Lenovo IdeaPad 3-1481W000NGUS SSD Replacement, Back Cover: 步骤 1 中的图像 3,3
    在这个步骤中使用的工具:
    Magnetic Project Mat
    $19.95
    购买
    • Orient the laptop so that the bottom is facing up.

    • Remove the six 7 mm screws using a Phillips #00 screwdriver.

    • Remove the four 4 mm screws using a Phillips #00 screwdriver.

    • Throughout this repair, keep track of each screw and make sure it goes back exactly where it came from.

  2. Lenovo IdeaPad 3-1481W000NGUS SSD Replacement: 步骤 2 中的图像 1,3 Lenovo IdeaPad 3-1481W000NGUS SSD Replacement: 步骤 2 中的图像 2,3 Lenovo IdeaPad 3-1481W000NGUS SSD Replacement: 步骤 2 中的图像 3,3
    • Pry up the sides of the back case using the iFixit opening tool. Then, lift to remove.

    • You may hear snapping when removing the panel. This is normal!

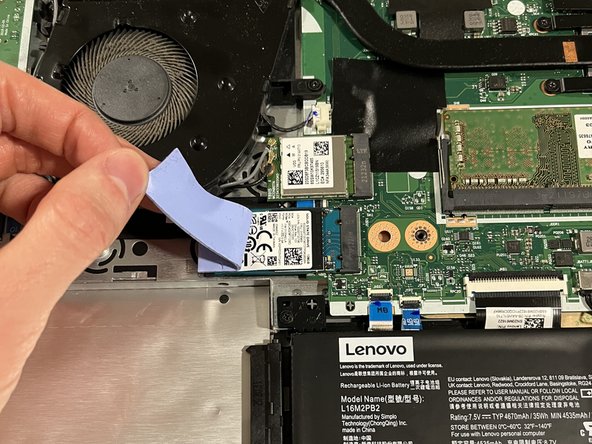
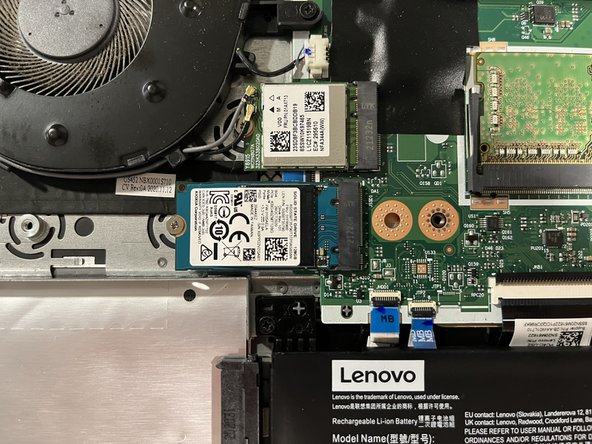
  3. Lenovo IdeaPad 3-1481W000NGUS SSD Replacement, SSD: 步骤 3 中的图像 1,3 Lenovo IdeaPad 3-1481W000NGUS SSD Replacement, SSD: 步骤 3 中的图像 2,3 Lenovo IdeaPad 3-1481W000NGUS SSD Replacement, SSD: 步骤 3 中的图像 3,3
    • Gently peel away the blue thermal pad, revealing the SSD underneath.

    • Do not set the sticky bottom side of the thermal pad on any surface.

  4. Lenovo IdeaPad 3-1481W000NGUS SSD Replacement: 步骤 4 中的图像 1,2 Lenovo IdeaPad 3-1481W000NGUS SSD Replacement: 步骤 4 中的图像 2,2
    • Remove the 4 mm screw keeping the SSD in place using a Phillips #00 screwdriver.

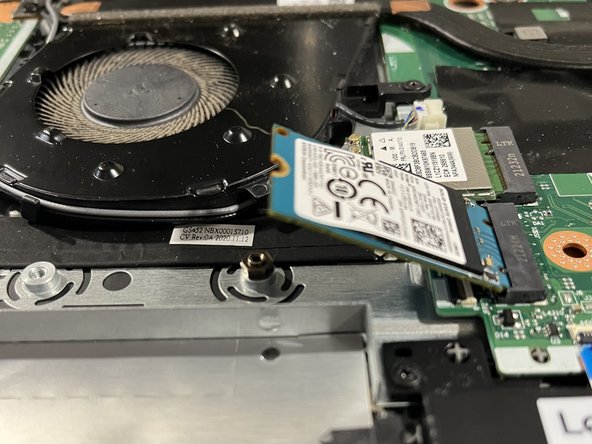
  5. Lenovo IdeaPad 3-1481W000NGUS SSD Replacement: 步骤 5 中的图像 1,1
    • Pull the SSD out straight, without applying any vertical pressure.

    • When removing, do not pull the SSD upwards. This may damage the motherboard slot and hard drive.

结论

To reassemble your device, follow these instructions in reverse order.

Matthew Gwin

于03/01/23注册

97 声望

撰写一个指南

0条评论

添加评论

浏览统计数据:

过去 24 小时: 1

过去 7 天: 4

过去 30 天: 7

总计 137