跳转到主内容

Lenovo B575-1450 Display Panel Replacement

你所需要的

  1. Lenovo B575-1450 Display Panel  Replacement, Battery: 步骤 1 中的图像 1,1
    • Turn off the computer.

    • Disconnect the charger from the computer.

    • Flip the computer upside down.

  2. Lenovo B575-1450 Display Panel  Replacement: 步骤 2 中的图像 1,2 Lenovo B575-1450 Display Panel  Replacement: 步骤 2 中的图像 2,2
    • Push the right-hand switch outward into the "unlocked" position.

  3. Lenovo B575-1450 Display Panel  Replacement: 步骤 3 中的图像 1,3 Lenovo B575-1450 Display Panel  Replacement: 步骤 3 中的图像 2,3 Lenovo B575-1450 Display Panel  Replacement: 步骤 3 中的图像 3,3
    • While holding the battery, use your other hand to push the left clip to the left and pull the battery out.

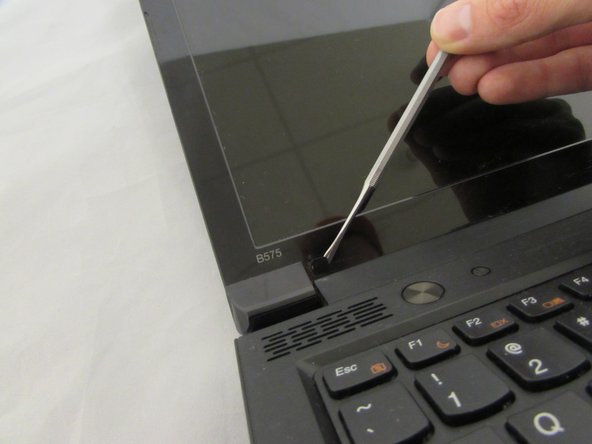
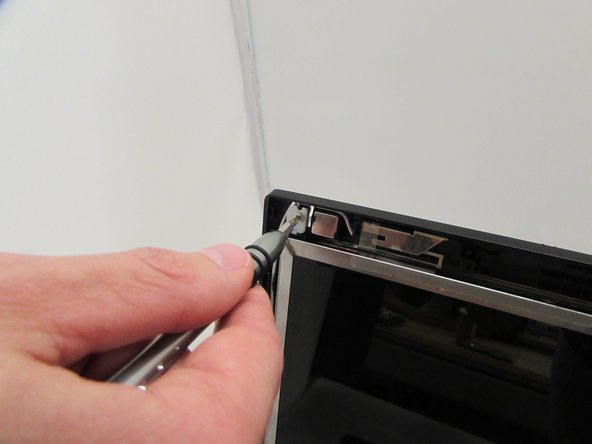
  4. Lenovo B575-1450 Display Panel  Replacement, Display Panel: 步骤 4 中的图像 1,2 Lenovo B575-1450 Display Panel  Replacement, Display Panel: 步骤 4 中的图像 2,2
    • Remove both screw covers from the bottom of screen bezel using a plastic spudger. The screws underneath will now be exposed

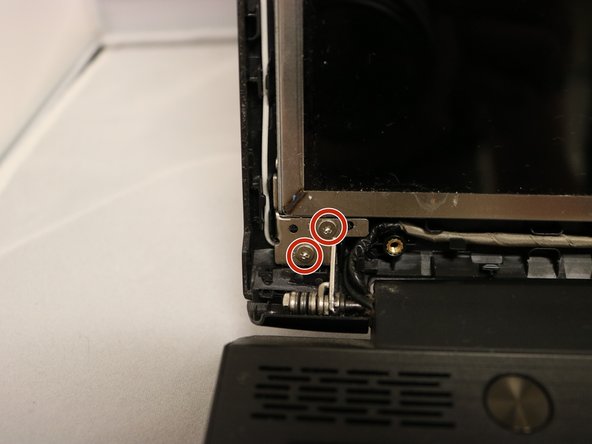
  5. Lenovo B575-1450 Display Panel  Replacement: 步骤 5 中的图像 1,1
    • Using the Phillips #0 Screwdriver, remove the two 4.3 mm screws holding the display to the front bezel.

  6. Lenovo B575-1450 Display Panel  Replacement: 步骤 6 中的图像 1,2 Lenovo B575-1450 Display Panel  Replacement: 步骤 6 中的图像 2,2
    • Separate the front bezel from the display panel using the plastic opening tool by gently prying around the edges and removing it.

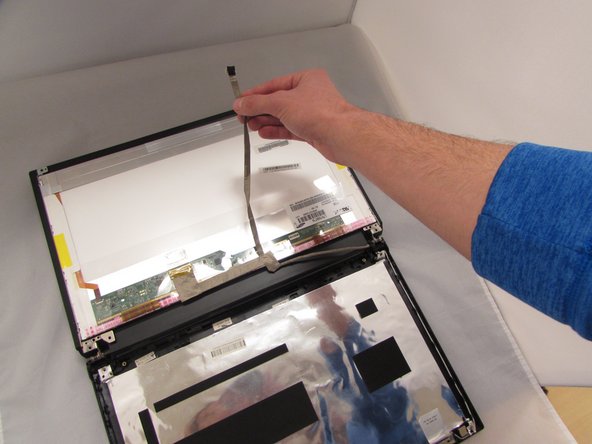
  7. Lenovo B575-1450 Display Panel  Replacement: 步骤 7 中的图像 1,1
    • Using the tweezers carefully disconnect the ZIF connector by pulling cable away from front facing camera that is attached to the back bezel.

  8. Lenovo B575-1450 Display Panel  Replacement: 步骤 8 中的图像 1,3 Lenovo B575-1450 Display Panel  Replacement: 步骤 8 中的图像 2,3 Lenovo B575-1450 Display Panel  Replacement: 步骤 8 中的图像 3,3
    • Using the Phillips #0 Screwdriver, remove the six 4.3 mm screws that connect display screen to the rear bezel.

    • There are two screws in the bottom left and right corners of the frame.

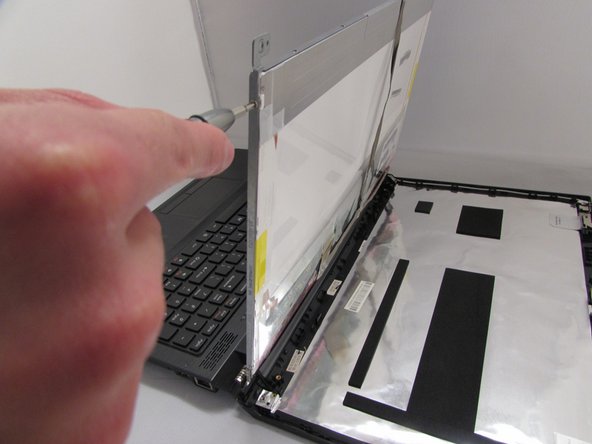
  9. Lenovo B575-1450 Display Panel  Replacement: 步骤 9 中的图像 1,2 Lenovo B575-1450 Display Panel  Replacement: 步骤 9 中的图像 2,2
    • Using the Phillips #0 Screwdriver, remove the four 2.9 mm screws from each side of the bracket that holds the display panel in place.

  10. Lenovo B575-1450 Display Panel  Replacement: 步骤 10 中的图像 1,2 Lenovo B575-1450 Display Panel  Replacement: 步骤 10 中的图像 2,2
    • Lay display panel face down on the keyboard.

    • Peel back the flat wire that has the camera's ZIF connector until it is loose from the back of the display.

    • Carefully peel of the clear adhesive tape attached to the primary display ZIF connector using a plastic spudger.

  11. Lenovo B575-1450 Display Panel  Replacement: 步骤 11 中的图像 1,2 Lenovo B575-1450 Display Panel  Replacement: 步骤 11 中的图像 2,2
    • Place the metal tweezer tips between the ZIF connector and the wire-to-board connection.

    • Carefully separate ZIF wire-to-board connection by pulling metal tweezers in a downward motion.

    • Pull up on flat wire until display is completely disconnected.

    • Be very careful when separating ZIF connections . The ends of the ZIF wire connectors are delicate and can break easily.

结论

To reassemble your device, follow these instructions in reverse order.

另外一个人完成了本指南。

0条评论

添加评论

浏览统计数据:

过去 24 小时: 0

过去 7 天: 2

过去 30 天: 3

总计 1,400