跳转到主内容

Lenovo 100e Chromebook 2nd Gen Display Replacement

你所需要的

  1. Lenovo 100e Chromebook 2nd Gen Display Replacement, Keyboard: 步骤 1 中的图像 1,1
    • Remove the nine 6 mm screws from the back of the laptop using a Phillips #0 screwdriver.

  2. Lenovo 100e Chromebook 2nd Gen Display Replacement: 步骤 2 中的图像 1,2 Lenovo 100e Chromebook 2nd Gen Display Replacement: 步骤 2 中的图像 2,2
    • Open the laptop and lay it flat.

    • Go along the edge of the keyboard with an opening tool until it pops loose.

    • Potential for device damage: Make sure that the keyboard does not fall away from the laptop, as it is still connected to the internal components

  3. Lenovo 100e Chromebook 2nd Gen Display Replacement: 步骤 3 中的图像 1,2 Lenovo 100e Chromebook 2nd Gen Display Replacement: 步骤 3 中的图像 2,2
    • Lift the keyboard connectors up using an opening pick.

    • Remove the connectors from their sockets.

  4. Lenovo 100e Chromebook 2nd Gen Display Replacement, Battery: 步骤 4 中的图像 1,1
    • Remove the four 4 mm Phillips #0 screws holding the battery in.

  5. Lenovo 100e Chromebook 2nd Gen Display Replacement: 步骤 5 中的图像 1,1
    • Using an opening pick, push on the connection where the wires are connected to the motherboard.

    • Potential for device damage: This step takes some force to disconnect, but be careful to not pull the wires out of the battery.

  6. Lenovo 100e Chromebook 2nd Gen Display Replacement: 步骤 6 中的图像 1,1
    • The battery is now loose and can be removed from the laptop.

  7. Lenovo 100e Chromebook 2nd Gen Display Replacement, Screen Bezel: 步骤 7 中的图像 1,1
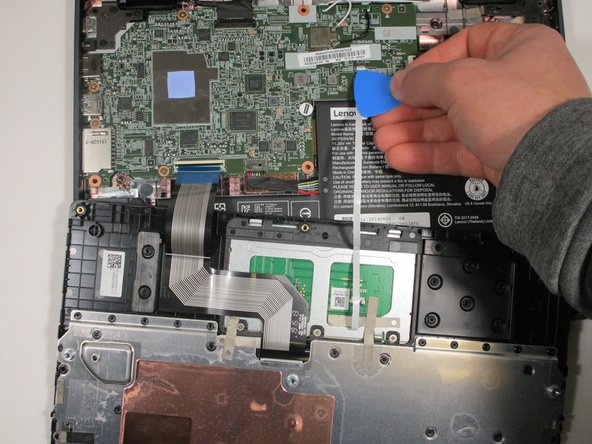
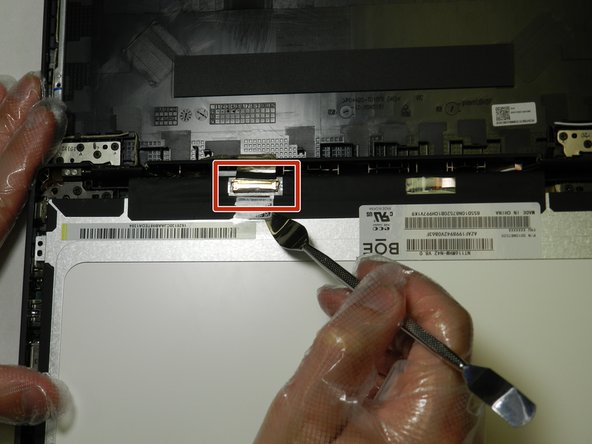
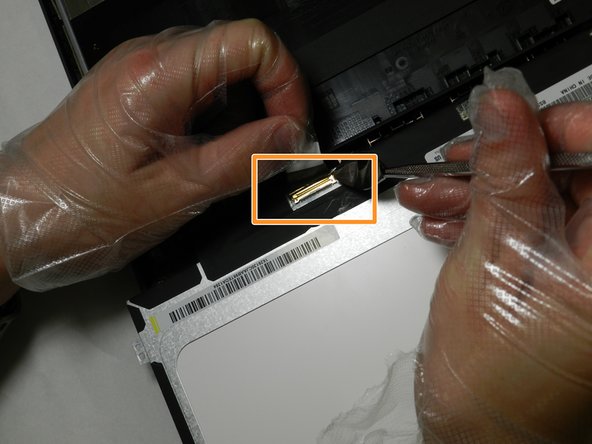
    • Using a spudger, go along the edge of the screen and pop the connections between the cover and the back side out.

  8. Lenovo 100e Chromebook 2nd Gen Display Replacement: 步骤 8 中的图像 1,1
    • Insert the spudger into the gap between the hinges and pull up to detach the connections.

  9. Lenovo 100e Chromebook 2nd Gen Display Replacement: 步骤 9 中的图像 1,1
    • Remove the screen bezel from the laptop.

  10. Lenovo 100e Chromebook 2nd Gen Display Replacement, Display: 步骤 10 中的图像 1,1
    • Remove the four 3.4 mm screws holding the screen in place using the Phillips #00 screwdriver.

  11. Lenovo 100e Chromebook 2nd Gen Display Replacement: 步骤 11 中的图像 1,1
    • Carefully pull the screen back onto the lower assembly.

  12. Lenovo 100e Chromebook 2nd Gen Display Replacement: 步骤 12 中的图像 1,3 Lenovo 100e Chromebook 2nd Gen Display Replacement: 步骤 12 中的图像 2,3 Lenovo 100e Chromebook 2nd Gen Display Replacement: 步骤 12 中的图像 3,3
    • Peel back the protective tape over the display cable using the spudger.

    • Gently lift the black bar latch holding the cable in place, until the cable becomes loose.

    • Pull the cable free and remove the display.

    • DO NOT pull on the cable before lifting the bar latch or the cable will break.

结论

To reassemble your device, follow these instructions in reverse order.

0条评论

添加评论

浏览统计数据:

过去 24 小时: 7

过去 7 天: 35

过去 30 天: 111

总计 1,998