跳转到主内容

LeapFrog LeapPad Ultra XDi Screen Replacement

你所需要的

  1. LeapFrog LeapPad Ultra XDi Screen Replacement, Battery: 步骤 1 中的图像 1,2 LeapFrog LeapPad Ultra XDi Screen Replacement, Battery: 步骤 1 中的图像 2,2
    • Orient the tablet so it’s laying screen down and the barcode sticker is facing up.

    • Remove the barcode sticker to expose the two screws.

  2. LeapFrog LeapPad Ultra XDi Screen Replacement: 步骤 2 中的图像 1,2 LeapFrog LeapPad Ultra XDi Screen Replacement: 步骤 2 中的图像 2,2
    • Remove the two 5.0mm Phillips #0 screws.

  3. LeapFrog LeapPad Ultra XDi Screen Replacement: 步骤 3 中的图像 1,3 LeapFrog LeapPad Ultra XDi Screen Replacement: 步骤 3 中的图像 2,3 LeapFrog LeapPad Ultra XDi Screen Replacement: 步骤 3 中的图像 3,3
    • Using the iFixit opening tool, pry off the purple and white child-proof casing to expose the twelve screws.

  4. LeapFrog LeapPad Ultra XDi Screen Replacement: 步骤 4 中的图像 1,2 LeapFrog LeapPad Ultra XDi Screen Replacement: 步骤 4 中的图像 2,2
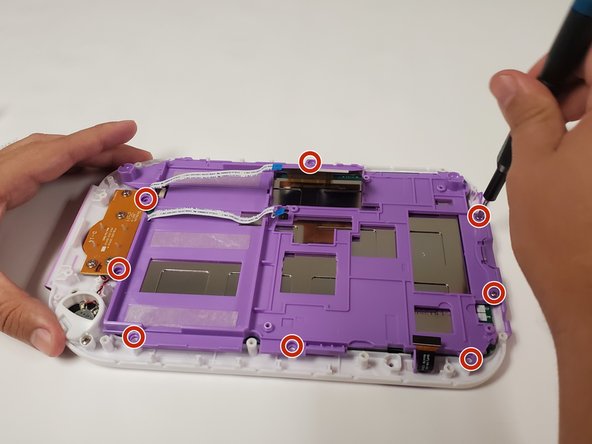
    • Remove all twelve 7mm Phillips #1 screws located along the edges of the device.

  5. LeapFrog LeapPad Ultra XDi Screen Replacement: 步骤 5 中的图像 1,2 LeapFrog LeapPad Ultra XDi Screen Replacement: 步骤 5 中的图像 2,2
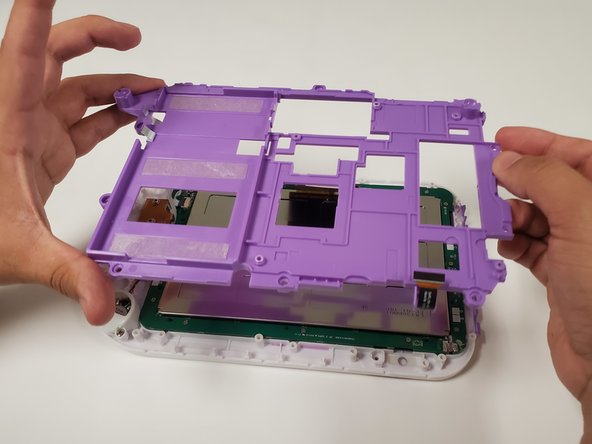
    • Remove the purple case, exposing the motherboard and battery.

  6. LeapFrog LeapPad Ultra XDi Screen Replacement: 步骤 6 中的图像 1,3 LeapFrog LeapPad Ultra XDi Screen Replacement: 步骤 6 中的图像 2,3 LeapFrog LeapPad Ultra XDi Screen Replacement: 步骤 6 中的图像 3,3
    • Use the Spudger to remove the glued down battery.

    • Using your fingers, grab the battery wires and carefully unplug them from the motherboard.

    • Replace the battery with a new one.

  7. LeapFrog LeapPad Ultra XDi Screen Replacement, Screen: 步骤 7 中的图像 1,3 LeapFrog LeapPad Ultra XDi Screen Replacement, Screen: 步骤 7 中的图像 2,3 LeapFrog LeapPad Ultra XDi Screen Replacement, Screen: 步骤 7 中的图像 3,3
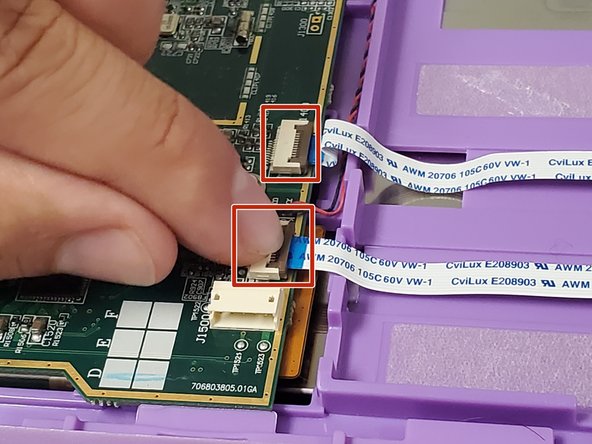
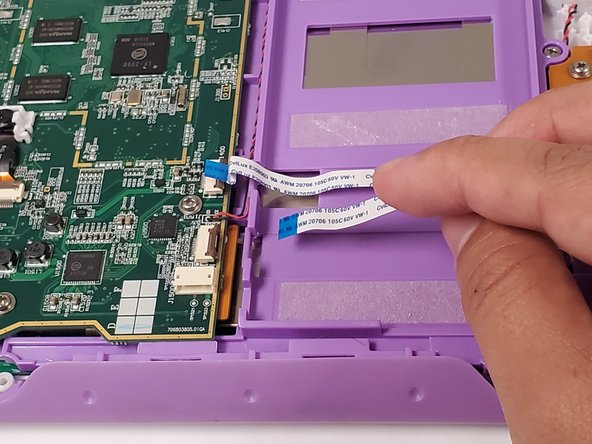
    • Locate the three ribbon cables on top of the motherboard.

    • Flip up the locking clip on the ribbon cable connector to release the cable.

    • Disconnect the cables from their connectors.

  8. LeapFrog LeapPad Ultra XDi Screen Replacement: 步骤 8 中的图像 1,1
    • Unscrew the four 5.0 mm Phillips #0 screws securing the motherboard.

  9. LeapFrog LeapPad Ultra XDi Screen Replacement: 步骤 9 中的图像 1,3 LeapFrog LeapPad Ultra XDi Screen Replacement: 步骤 9 中的图像 2,3 LeapFrog LeapPad Ultra XDi Screen Replacement: 步骤 9 中的图像 3,3
    • Pull the two side grips up to remove them from the casing.

    • Unscrew the eight 7.0 mm Phillips #1 screws securing the base. Remove the base.

  10. LeapFrog LeapPad Ultra XDi Screen Replacement: 步骤 10 中的图像 1,2 LeapFrog LeapPad Ultra XDi Screen Replacement: 步骤 10 中的图像 2,2
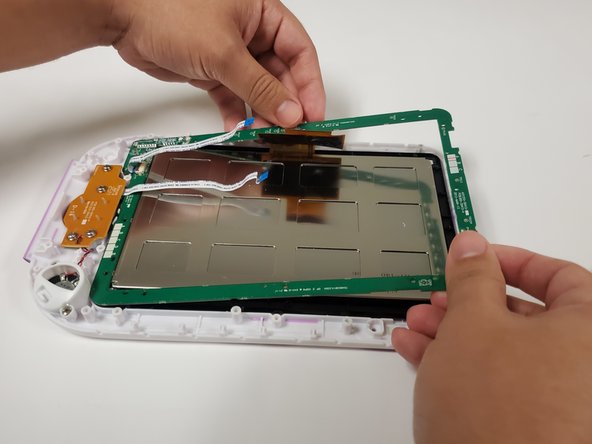
    • Unscrew the eleven 7.0 mm Phillips #1 screws securing the circuit board to the case. Remove the circuit board.

  11. LeapFrog LeapPad Ultra XDi Screen Replacement: 步骤 11 中的图像 1,1
    • Lift the screen from the front case. Replace the screen.

结论

To reassemble your device, follow these instructions in reverse order.

2条评论

Where exactly can I find a replacement screen? I have looked everywhere with no luck.

Siblings have a cracked one i would really like to fix so any help would be greatly appreciated.

Derp Dude - 回复

So I would suggest ebay or buy one that's not chargable on macari and use it for parts that's the route I'm taking with what ever I find .hope that helps since this post is old

Cherry -

添加评论

浏览统计数据:

过去 24 小时: 2

过去 7 天: 6

过去 30 天: 11

总计 844