跳转到主内容

LeapFrog LeapPad Ultra Repair Motherboard Replacement

你所需要的

  1. LeapFrog LeapPad Ultra Repair Motherboard Replacement, Battery: 步骤 1 中的图像 1,1
    • Remove the barcode covering the two screws on the lower back of the Leap Pad.

  2. LeapFrog LeapPad Ultra Repair Motherboard Replacement: 步骤 2 中的图像 1,1
    • Remove the two 5 mm screws that were covered by the sticker.

  3. LeapFrog LeapPad Ultra Repair Motherboard Replacement: 步骤 3 中的图像 1,1
    • Using a plastic opening tool, pry off the outer protective child proof casing, starting from the bottom.

  4. LeapFrog LeapPad Ultra Repair Motherboard Replacement: 步骤 4 中的图像 1,1
    • Remove the 7 mm screw to the right of the cartridge dock, two 8 mm screws in the top left, and the nine 8 mm screws holding the the green shell.

  5. LeapFrog LeapPad Ultra Repair Motherboard Replacement: 步骤 5 中的图像 1,1
    • Remove the hard plastic casing, exposing the motherboard and battery.

  6. LeapFrog LeapPad Ultra Repair Motherboard Replacement: 步骤 6 中的图像 1,2 LeapFrog LeapPad Ultra Repair Motherboard Replacement: 步骤 6 中的图像 2,2
    • Disconnect the battery using tweezers or your fingernails.

    • The battery is glued down, if available put some isopropyl alcohol around the edges of the battery to soften the glue.

    • Gently pry of the battery lose using a spudger or another thin prying tool.

    • Be careful, damaging/puncturing the battery may cause an explosion.

  7. LeapFrog LeapPad Ultra Repair Motherboard Replacement, Motherboard: 步骤 7 中的图像 1,3 LeapFrog LeapPad Ultra Repair Motherboard Replacement, Motherboard: 步骤 7 中的图像 2,3 LeapFrog LeapPad Ultra Repair Motherboard Replacement, Motherboard: 步骤 7 中的图像 3,3
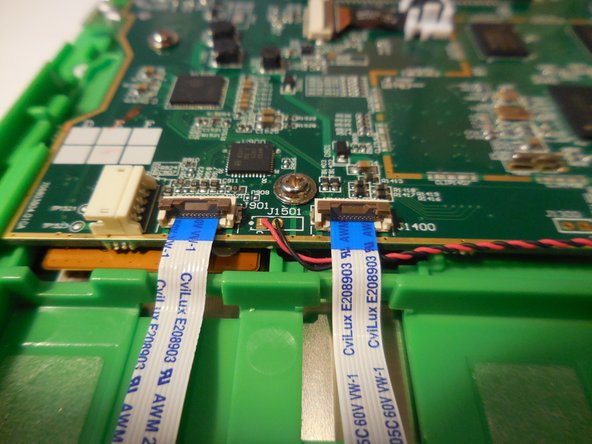
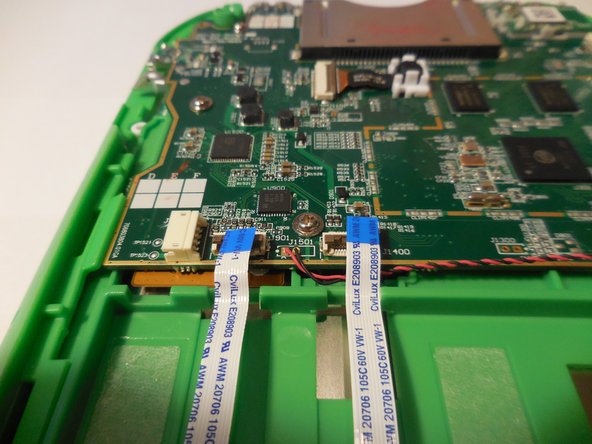
    • Disconnect the three wires that will be visible on top of the motherboard. The wires need to be disconnected by pulling them up vertically.

  8. LeapFrog LeapPad Ultra Repair Motherboard Replacement: 步骤 8 中的图像 1,1
    • Unscrew the five screws holding the motherboard into the housing.

  9. LeapFrog LeapPad Ultra Repair Motherboard Replacement: 步骤 9 中的图像 1,3 LeapFrog LeapPad Ultra Repair Motherboard Replacement: 步骤 9 中的图像 2,3 LeapFrog LeapPad Ultra Repair Motherboard Replacement: 步骤 9 中的图像 3,3
    • Lift the motherboard up exposing the fourth and final wire. Once you lift up the motherboard you will need to pull down on the wire to disconnect.

  10. LeapFrog LeapPad Ultra Repair Motherboard Replacement: 步骤 10 中的图像 1,1
    • Remove and replace motherboard.

结论

To reassemble your device, follow these instructions in reverse order.

Rocky Hirsch

于08/27/15注册

848 声望

创作了3篇指南

团队

USF Tampa, Team 4-99, Meier Fall 2015 USF Tampa, Team 4-99, Meier Fall 2015 的会员

USFT-MEIER-F15S4G99

4 名成员

创作了10篇指南

0条评论

添加评论

浏览统计数据:

过去 24 小时: 0

过去 7 天: 0

过去 30 天: 2

总计 1,543