跳转到主内容

LeapFrog LeapPad Ultimate Motherboard Replacement

你所需要的

  1. LeapFrog LeapPad Ultimate Motherboard Replacement, Back Panel: 步骤 1 中的图像 1,2 LeapFrog LeapPad Ultimate Motherboard Replacement, Back Panel: 步骤 1 中的图像 2,2
    • Flip over the Pad to its back side to begin the removal of the back panel.

    • Begin by removing the blue rim along the edge of the device. It runs along the green silicone lining.

    • This is very difficult to remove , so do be patient. To help remove the seal, both a metal spudger and plastic opening tool may be used.

    • Remove the pen from its place before starting to avoid tangling.

  2. LeapFrog LeapPad Ultimate Motherboard Replacement: 步骤 2 中的图像 1,2 LeapFrog LeapPad Ultimate Motherboard Replacement: 步骤 2 中的图像 2,2
    • Once the blue rim is removed, the 12 screws will be visible.

    • Use the Phillips #1 screwdriver to unscrew all 12 screws.

  3. LeapFrog LeapPad Ultimate Motherboard Replacement, Motherboard: 步骤 3 中的图像 1,2 LeapFrog LeapPad Ultimate Motherboard Replacement, Motherboard: 步骤 3 中的图像 2,2
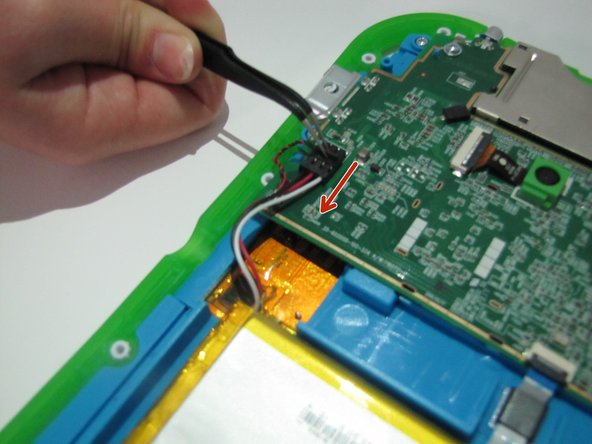
    • Begin with the removal of the battery from its place.

    • Flip the black switch that is connecting the battery to the motherboard.

    • Then pull gently and should disconnect.

  4. LeapFrog LeapPad Ultimate Motherboard Replacement: 步骤 4 中的图像 1,3 LeapFrog LeapPad Ultimate Motherboard Replacement: 步骤 4 中的图像 2,3 LeapFrog LeapPad Ultimate Motherboard Replacement: 步骤 4 中的图像 3,3
    • Remove the black and white ribbon structures from the side of the motherboard.

    • Next, remove the three screws along the corners of the motherboard using the Phillips # 1 screwdriver.

  5. LeapFrog LeapPad Ultimate Motherboard Replacement: 步骤 5 中的图像 1,1
    • Use a Phillips #1 screwdriver to unscrew the 7 screws from the speaker with the bronze plate sound board.

    • Unscrew the 8 screws from the blue sub-panel.

  6. LeapFrog LeapPad Ultimate Motherboard Replacement: 步骤 6 中的图像 1,2 LeapFrog LeapPad Ultimate Motherboard Replacement: 步骤 6 中的图像 2,2
    • Take off the sub-panel exposing the motherboard.

    • Flip the motherboard on its back side and flip the switch to remove the wide orange ribbon and pull the twisted black and white wires from its place.

结论

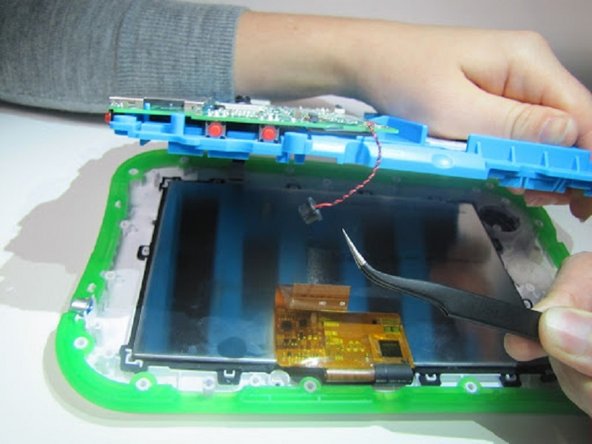
To reassemble your device, follow these instructions in reverse order.

0条评论

添加评论

浏览统计数据:

过去 24 小时: 1

过去 7 天: 5

过去 30 天: 6

总计 633