-
-
Before disassembling your phone, be sure it is powered off to avoid minor electric shock or possible fire.
-
Place the phone face down on the table.
-
Use your fingernail or an opening tool to pull down the tab below the battery.
-
Lift the battery out.
-
-
-
-
-
Locate the seam around the edge of the phone.
-
Insert the plastic opening tool into the seam and pry gently to release the tabs.
-
Work your way around the phone until all tabs are released.
-
Remove the back panel of the phone.
-
-
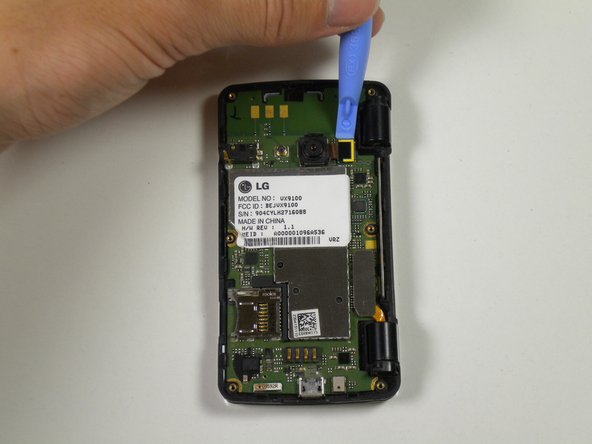
Locate the ribbon attached to the lens of the camera.
-
Place the plastic opening tool in between the logic board and ribbon.
-
Lift up the plastic opening to detach the ribbon from the logic board.
-
-
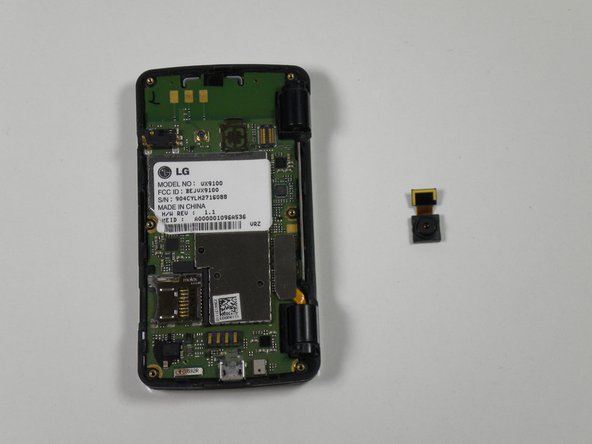
Place the plastic opening tool in between the lens and the logic board.
-
Detach the lens from the logic board using the plastic opening tool by popping it out.
-
Take the entire lens and ribbon off of the logic board.
嵌入本指南
选择一个尺寸并复制下面的代码,将本指南作为一个小插件嵌入到你的网站/论坛中。
预览