跳转到主内容

LG G Stylo Glass Screen Replacement

你所需要的

  1. LG G Stylo Glass Screen Replacement, Battery: 步骤 1 中的图像 1,2 LG G Stylo Glass Screen Replacement, Battery: 步骤 1 中的图像 2,2
    • Make sure that you power off the phone before beginning.

    • Remove the back cover by placing the plastic opening tool on the bottom left side of the device and gently prying up.

    • There is a small slit that fits the plastic opening tool perfectly on the left side.

  2. LG G Stylo Glass Screen Replacement: 步骤 2 中的图像 1,2 LG G Stylo Glass Screen Replacement: 步骤 2 中的图像 2,2
    • Insert the plastic opening tool into the indent at the bottom of the battery and lift up. Fully remove the battery with your fingers.

  3. LG G Stylo Glass Screen Replacement, Motherboard: 步骤 3 中的图像 1,2 LG G Stylo Glass Screen Replacement, Motherboard: 步骤 3 中的图像 2,2
    • Carefully use the Phillips #00 screwdriver to remove the eleven 3.9mm visible screws found on the back. The screws to be removed are marked with the given indicators.

  4. LG G Stylo Glass Screen Replacement: 步骤 4 中的图像 1,3 LG G Stylo Glass Screen Replacement: 步骤 4 中的图像 2,3 LG G Stylo Glass Screen Replacement: 步骤 4 中的图像 3,3
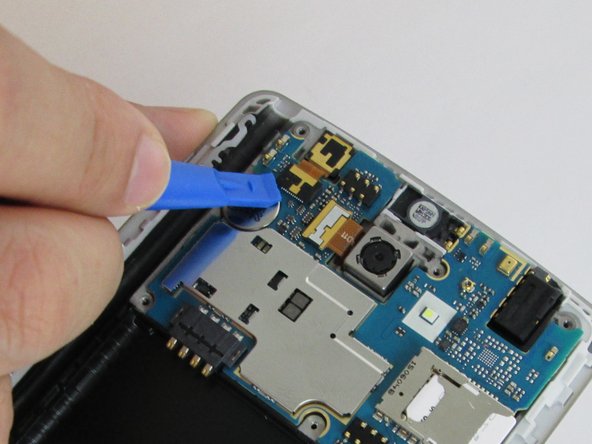
    • When you have finished removing all of the screws, place the plastic opening tool in the groove at the bottom left corner of the motherboard cover and lift up.

    • Make sure to remove the SIM card before you remove the motherboard cover. You can get the cover off without doing this, but the SIM card will be stuck underneath the cover once you put it back together.

    • This part could be more difficult if you have never removed the motherboard cover. If difficulty arises, pry the plastic opening tool into each groove along the edge of the motherboard cover until it releases.

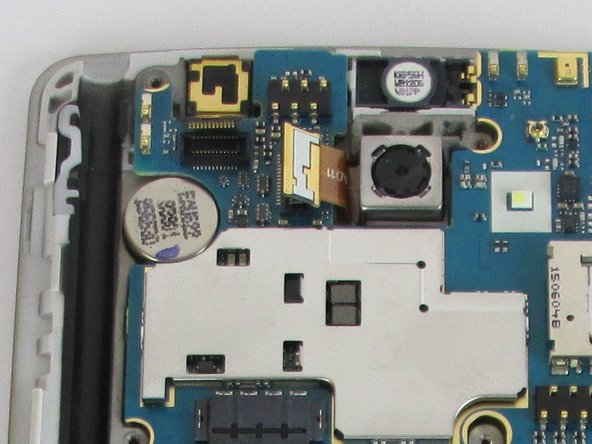
    • Once a clip is released, you can detach the motherboard cover with your fingers and set aside.

  5. LG G Stylo Glass Screen Replacement: 步骤 5 中的图像 1,3 LG G Stylo Glass Screen Replacement: 步骤 5 中的图像 2,3 LG G Stylo Glass Screen Replacement: 步骤 5 中的图像 3,3
    • Carefully place the plastic opening tool under the ribbons where the cables are connecting and lift up to detach the cables.

    • Keep in mind to be careful with the ribbons, because they are small components and important for the device's functionality.

    • The third photo attached depicts what the ribbons look like when they are successfully detached.

  6. LG G Stylo Glass Screen Replacement: 步骤 6 中的图像 1,2 LG G Stylo Glass Screen Replacement: 步骤 6 中的图像 2,2
    • Fully remove the motherboard by prying upward with the plastic opening tool.

    • This step will be quite simple if all the ribbons have been detached correctly.

  7. LG G Stylo Glass Screen Replacement, Glass Screen: 步骤 7 中的图像 1,2 LG G Stylo Glass Screen Replacement, Glass Screen: 步骤 7 中的图像 2,2
    • Use the plastic opening tool to peel off the sticker.

  8. LG G Stylo Glass Screen Replacement: 步骤 8 中的图像 1,2 LG G Stylo Glass Screen Replacement: 步骤 8 中的图像 2,2
    • Gently use the plastic opening tool to set the tab free. This tab is used to hold the screen in place.

  9. LG G Stylo Glass Screen Replacement: 步骤 9 中的图像 1,2 LG G Stylo Glass Screen Replacement: 步骤 9 中的图像 2,2
    • The screen is held with adhesive, so use the iOpener to apply heat to the device.

    • Once you applied the iOpener on the device, use the plastic opening tool or opening pick to pry the screen free.

    • When working with electronics, it's important to use ESD-safe tools to avoid accidental damage to the device. The regular black nylon spudger or a plastic opening tool should be used whenever possible. Also, beware of sharp edges on a broken screen.

    • Once the broken screen has been set free, put in the screen replacement.

结论

To reassemble your device, follow these instructions in reverse order.

39等其他人完成本指南。

Patrick Zhang

于02/09/16注册

1,356 声望

撰写一个指南

团队

USF Tampa, Team 11-7, Cheng Spring 2016 USF Tampa, Team 11-7, Cheng Spring 2016 的会员

USFT-CHENG-S16S11G7

4 名成员

创作了14篇指南

14条评论

where I can found the screen pease?

bachibachi6 - 回复

thanks for the guide

Jeff Moore - 回复

Your guide was clear and the photos were good up until removing and replacing the glass, which is the title of this guide. Was the screen glued onto the LCD? Did you have to replace the LCD and glass or just the glass? How did you remove the glass from the LCD? Did you have to glue the glass back to the LCD screen or use adhesive tape? I'm asking because I don't know if this is a DIY job or if I should get the phone professionally repaired.

Pernickety Jon - 回复

True, missing important details. I'm about to do this replacement. I assume the replacement screen has dual side tape built in. I'll report back soon.

joscomsu -

It seems the tutorial is for the whole screen (LCD+Glass) and it pretty much covers everything. After removing the screen, it's just a matter of replacing it with the new one.

My experience: I bought the whole screen and mine came without any adhesives, so I had to use a double sided tape I got previously for another screen. It's a very thin black tape and while I've read that it is not recommended, it held the screen in place. Although I am worried that it might be a bit weak for the long run. Also, it didn't came with the speaker grill, so I had to use the one from the broken screen. Remember this before installing the new one.

joscomsu -

添加评论

浏览统计数据:

过去 24 小时: 0

过去 7 天: 5

过去 30 天: 24

总计 53,229