本指南有最近更改,您可查看未经巡查的最新版本。
简介
This guide will cover how to replace a cracked screen on the LG G Pad 7.0
你所需要的
-
-
The screen assembly is secured to the plastic backing with clips.Insert the plastic opening tool between the screen and plastic.
-
Carefully work your way around the device making sure not to go too deep damaging any eternal components, freeing it from the connecting clips.
-
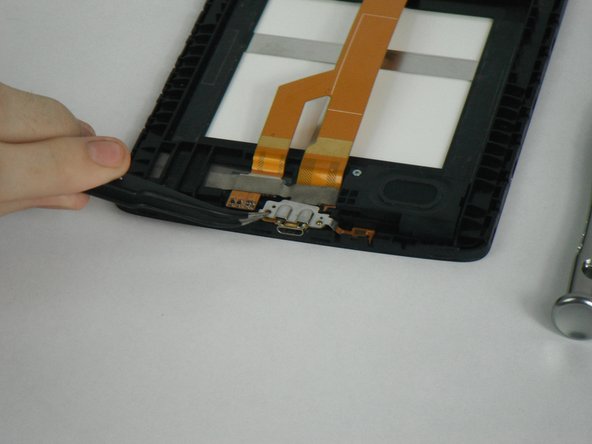
Lift the tablet from the plastic frame. You may need to loosen some more clips if it is difficult to remove.
-
-
-
Remove the red marked connectors by gently prying up. Be sure not to rip the ribbon cables as they are very fragile.
-
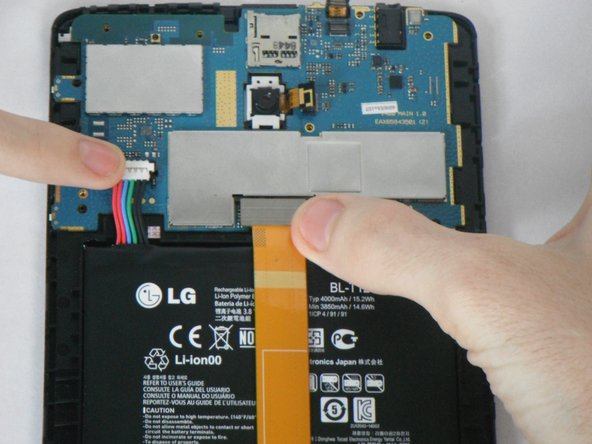
Remove the three connectors marked in orange by gently prying them upwards. The cables are very fragile so be careful not to rip them.
-
-
-
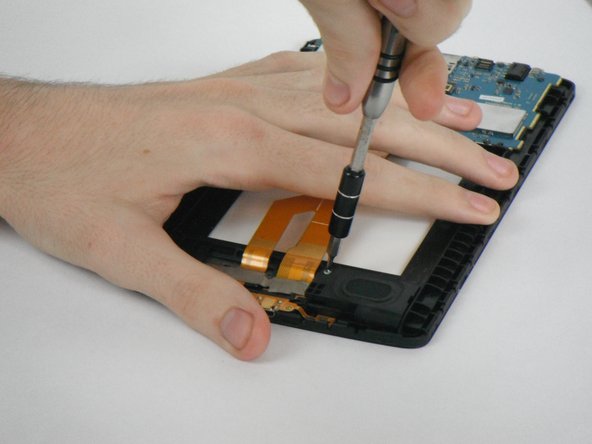
Remove the 7 screws marked in red that are securing the logic board to the case.
-
Be sure that all the connectors marked in orange are removed before pulling out the mother board.
-
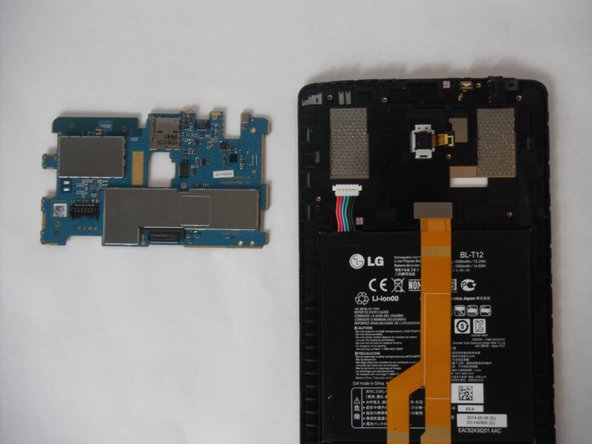
Very carefully remove the logic board after the screws have been removed
-
-
-
-
Use a heat gun to loosen the adhesive holding the display to the plastic midframe.
-
Slowly remove the display from the midframe with a razor blade.
-


To reassemble your device, follow these instructions in reverse order.
To reassemble your device, follow these instructions in reverse order.
10等其他人完成本指南。

团队

6条评论
Thanks so very much for a very helpful guide. YOU rock dude!!!
Tara Davis - 回复
This doesn’t make sense. guide is to replace display, Step 5 is “Insert new motherboard”???
Then no pictures for steps 6 and 7, are they to be done with motherboard in place or what?
What does your replacement display look like? does it include the plastic frame? “New motherboard” incorrectly assumes youre replacing the motherboard, if youre doing a screen, just re insert your old one.
There should be a different guide for the motherboard. Step 5 is super confusing.
I totally agree. You should have one guide for just the screen replacement and one for motherboard replacement otherwise anyone following step by step to do either task will be doing unnecessary steps. It would clear up a lot of confusion if there were two separate guides.