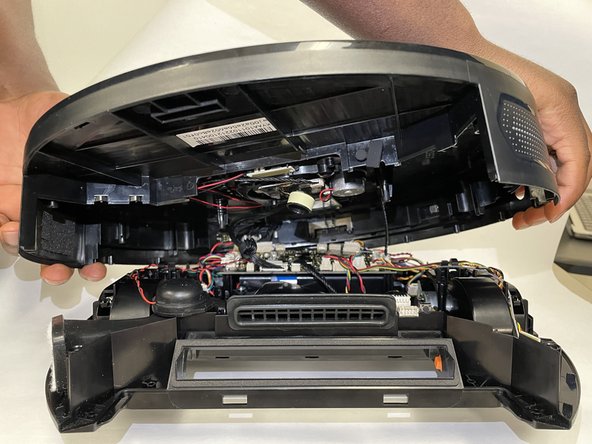
跳转到主内容

Kyvol Cybovac L20 Sensor Replacement

你所需要的

  1. Kyvol Cybovac L20 Sensor Replacement, Battery: 步骤 1 中的图像 1,1
    • Begin with the device laying on a flat surface with the power button facing up.

  2. Kyvol Cybovac L20 Sensor Replacement: 步骤 2 中的图像 1,2 Kyvol Cybovac L20 Sensor Replacement: 步骤 2 中的图像 2,2
    • Remove both of the side brushes.

  3. Kyvol Cybovac L20 Sensor Replacement: 步骤 3 中的图像 1,1
    • Use a Phillips #1 screwdriver to remove two 1 mm screws that secure the panel.

    • Remove the battery panel.

  4. Kyvol Cybovac L20 Sensor Replacement: 步骤 4 中的图像 1,2 Kyvol Cybovac L20 Sensor Replacement: 步骤 4 中的图像 2,2
    • Slightly lift the battery out of the compartment.

    • Disconnect the battery connector.

    • Completely remove the battery.

  5. Kyvol Cybovac L20 Sensor Replacement, Sensor: 步骤 5 中的图像 1,1
    • Remove the eight 12.2 mm Phillips screws.

  6. Kyvol Cybovac L20 Sensor Replacement: 步骤 6 中的图像 1,3 Kyvol Cybovac L20 Sensor Replacement: 步骤 6 中的图像 2,3 Kyvol Cybovac L20 Sensor Replacement: 步骤 6 中的图像 3,3
    • Lift the body away from the base and disconnect all connectors between the two halves.

  7. Kyvol Cybovac L20 Sensor Replacement: 步骤 7 中的图像 1,1
    • Remove the two 8 mm Phillips screws that secure the sensor.

  8. Kyvol Cybovac L20 Sensor Replacement: 步骤 8 中的图像 1,2 Kyvol Cybovac L20 Sensor Replacement: 步骤 8 中的图像 2,2
    • Use a spudger or your fingernails to gently walk the white connector directly out of its port.

    • Remove the sensor.

结论

To reassemble your device, follow these instructions in reverse order.

Brad

于04/01/24注册

397 声望

创作了3篇指南

团队

IUPUI, Team 1-1, Harley Spring 2024 IUPUI, Team 1-1, Harley Spring 2024 的会员

IUPUI-HARLEY-S24S1G1

3 名成员

创作了3篇指南

0条评论

添加评论

浏览统计数据:

过去 24 小时: 0

过去 7 天: 3

过去 30 天: 17

总计 44