跳转到主内容

Kyocera Zio M6000 Motherboard Replacement

你所需要的

  1. Kyocera Zio M6000 Motherboard Replacement, Battery: 步骤 1 中的图像 1,2 Kyocera Zio M6000 Motherboard Replacement, Battery: 步骤 1 中的图像 2,2
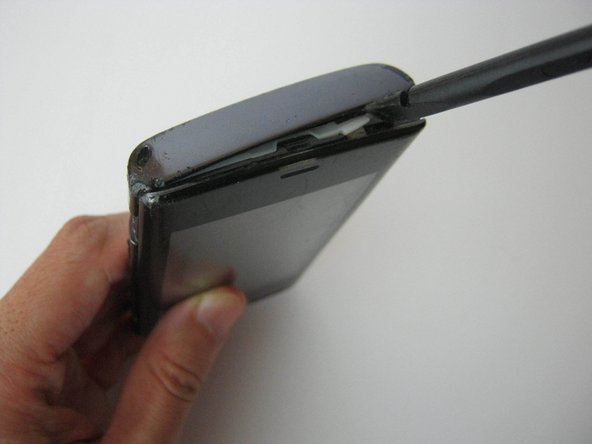
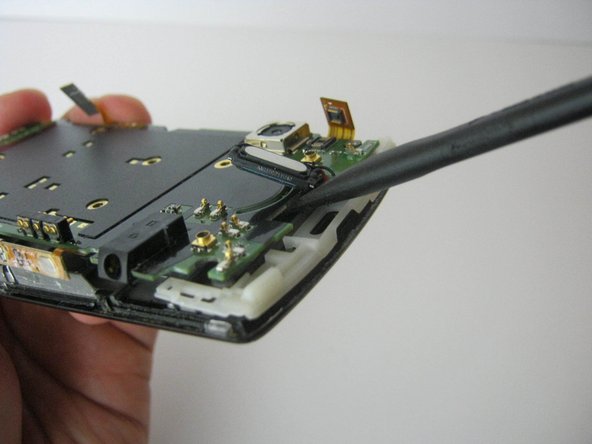
    • Press down on the back of the phone, applying moderate pressure.

    • Slide the back casing down to separate it.

  2. Kyocera Zio M6000 Motherboard Replacement: 步骤 2 中的图像 1,2 Kyocera Zio M6000 Motherboard Replacement: 步骤 2 中的图像 2,2
    • Remove the back casing to expose the battery.

    • Use a plastic spudger to lift the battery out using the battery's groove on its top left corner.

  3. Kyocera Zio M6000 Motherboard Replacement, Motherboard: 步骤 3 中的图像 1,2 Kyocera Zio M6000 Motherboard Replacement, Motherboard: 步骤 3 中的图像 2,2
    • Remove the six 3.18 mm screws using a Phillips 00 screwdriver.

  4. Kyocera Zio M6000 Motherboard Replacement: 步骤 4 中的图像 1,2 Kyocera Zio M6000 Motherboard Replacement: 步骤 4 中的图像 2,2
    • Insert the flat end of the spudger between the front and back panels, and pry it apart by running the spudger along the side to further separate them.

    • Go all the way around, prying as you go, until the back casing completely separates from the rest of the phone.

  5. Kyocera Zio M6000 Motherboard Replacement: 步骤 5 中的图像 1,3 Kyocera Zio M6000 Motherboard Replacement: 步骤 5 中的图像 2,3 Kyocera Zio M6000 Motherboard Replacement: 步骤 5 中的图像 3,3
    • Unclip the two flex cables -- a small one located on the left side on the lower half of the motherboard, and a longer one on the right side, higher up.

  6. Kyocera Zio M6000 Motherboard Replacement: 步骤 6 中的图像 1,3 Kyocera Zio M6000 Motherboard Replacement: 步骤 6 中的图像 2,3 Kyocera Zio M6000 Motherboard Replacement: 步骤 6 中的图像 3,3
    • Pry out the earpiece speaker using the spudger.

    • Pry out the vibration motor using the spudger.

  7. Kyocera Zio M6000 Motherboard Replacement: 步骤 7 中的图像 1,2 Kyocera Zio M6000 Motherboard Replacement: 步骤 7 中的图像 2,2
    • Place the flat end of the spudger underneath the digitizer connector and pry it up to disconnect it.

  8. Kyocera Zio M6000 Motherboard Replacement: 步骤 8 中的图像 1,3 Kyocera Zio M6000 Motherboard Replacement: 步骤 8 中的图像 2,3 Kyocera Zio M6000 Motherboard Replacement: 步骤 8 中的图像 3,3
    • Remove the sticker to uncover the screws underneath.

    • Remove the six 1.59 mm screws using a Phillips 00 screwdriver.

  9. Kyocera Zio M6000 Motherboard Replacement: 步骤 9 中的图像 1,3 Kyocera Zio M6000 Motherboard Replacement: 步骤 9 中的图像 2,3 Kyocera Zio M6000 Motherboard Replacement: 步骤 9 中的图像 3,3
    • Lift the bottom portion of the motherboard away from the front panel.

    • Do not forcefully pull the components apart as there is another connector on the underside of the motherboard attaching it to the panel.

    • Insert the flat end of the spudger in between the panel and motherboard to unfasten the connector.

结论

To reassemble your device, follow these instructions in reverse order.

2等其他人完成本指南。

Scott Nguyen

于09/16/15注册

522 声望

创作了3篇指南

团队

0条评论

添加评论

浏览统计数据:

过去 24 小时: 1

过去 7 天: 3

过去 30 天: 3

总计 283