跳转到主内容

Kyocera DuraForce Pro Headphone Jack Replacement

你所需要的

  1. Kyocera DuraForce Pro Headphone Jack Replacement, Headphone Jack: 步骤 1 中的图像 1,3 Kyocera DuraForce Pro Headphone Jack Replacement, Headphone Jack: 步骤 1 中的图像 2,3 Kyocera DuraForce Pro Headphone Jack Replacement, Headphone Jack: 步骤 1 中的图像 3,3
    • Flip the phone on its side so that the volume button is facing up.

    • Use the plastic opening tool to remove outer case of the phone.

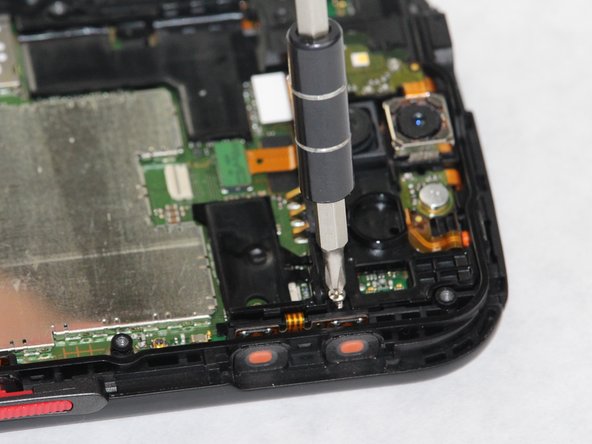
    • Remove the 8 screws around the outer portion of the phone with a JIS #0 screwdriver.

  2. Kyocera DuraForce Pro Headphone Jack Replacement: 步骤 2 中的图像 1,3 Kyocera DuraForce Pro Headphone Jack Replacement: 步骤 2 中的图像 2,3 Kyocera DuraForce Pro Headphone Jack Replacement: 步骤 2 中的图像 3,3
    • Remove the 2 screws with the same screwdriver bit.

    • Remove battery from the phone with plastic opening tool.

  3. Kyocera DuraForce Pro Headphone Jack Replacement: 步骤 3 中的图像 1,3 Kyocera DuraForce Pro Headphone Jack Replacement: 步骤 3 中的图像 2,3 Kyocera DuraForce Pro Headphone Jack Replacement: 步骤 3 中的图像 3,3
    • Once the battery pops out, use tweezers to gently pull the ribbon out along with it.

    • Remove the 2 screws along the sides of the mounting bracket, then remove the bracket.

  4. Kyocera DuraForce Pro Headphone Jack Replacement: 步骤 4 中的图像 1,3 Kyocera DuraForce Pro Headphone Jack Replacement: 步骤 4 中的图像 2,3 Kyocera DuraForce Pro Headphone Jack Replacement: 步骤 4 中的图像 3,3
    • Remove final ribbon cable, lift the latch up, and then slide it down. The audio jack will then slide out.

结论

To reassemble your device, follow these instructions in reverse order.

另外一个人完成了本指南。

Dylan Ulbricht

于10/08/18注册

735 声望

创作了5篇指南

团队

0条评论

添加评论

浏览统计数据:

过去 24 小时: 0

过去 7 天: 3

过去 30 天: 9

总计 1,301