简介
This only dissassembles the front part of the viewfinder (the one sticking out of the front cover). This was removed for cleaning. For the rest of the viewfinder a soldergun is needed. I did not need to go that deep.
你所需要的
-
-
-
The machinery is now open and can be dissasembled further or the front cover might be cleaned freely without worry that cleaning liquid would seep into the camera.
-
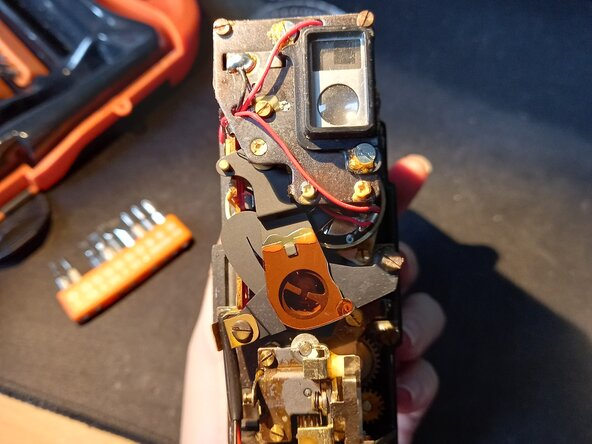
Make sure to remember what the "roll and lock" switch was on before dissassembly or to not touch it at all.
-
-
-
You might need to push the brass lever that holds the wires in place (right under the small board on the leftside) up to fit the front cover back on.
-
If its stuck in place in the wrong position, loosen the screw attached to it a little bit to pry it back in it's original position.
-
-
-
2 flathead screws hold the viewfinder and lightmeter in place.
-
Remove them and then slide the viewfinder out from underneath the upper red wire.
-
-
-
You can now carefully clean both sides of the upper window with a piece of microfibre cloth.
-
-
-
Reassembling can be done by placing the viewfinder back in place and screwing the screws back in.
-
Start with the bottom, more easily accessable screw.
-
Then do the top, making sure the red wire is between the screw and the higher part of the viewfinder. It can fit just barely.
-


To reassemble your device, follow these instructions in reverse order. Make sure the red wire is above the lens and on the right side of the top screw.
