跳转到主内容

Kodak EasyShare C195 Lens Replacement

你所需要的

  1. Kodak EasyShare C195 Lens Replacement, LCD Screen: 步骤 1 中的图像 1,3 Kodak EasyShare C195 Lens Replacement, LCD Screen: 步骤 1 中的图像 2,3 Kodak EasyShare C195 Lens Replacement, LCD Screen: 步骤 1 中的图像 3,3
    • To start, remove the Philips #00 4.5 mm screws on both sides of the camera.

    • On the bottom, there are three Philips #00 4.5 mm screws. Two are for the front panel and one is for the back panel. To remove the back panel, take out the screws indicated in the final picture of the sequence.

  2. Kodak EasyShare C195 Lens Replacement: 步骤 2 中的图像 1,3 Kodak EasyShare C195 Lens Replacement: 步骤 2 中的图像 2,3 Kodak EasyShare C195 Lens Replacement: 步骤 2 中的图像 3,3
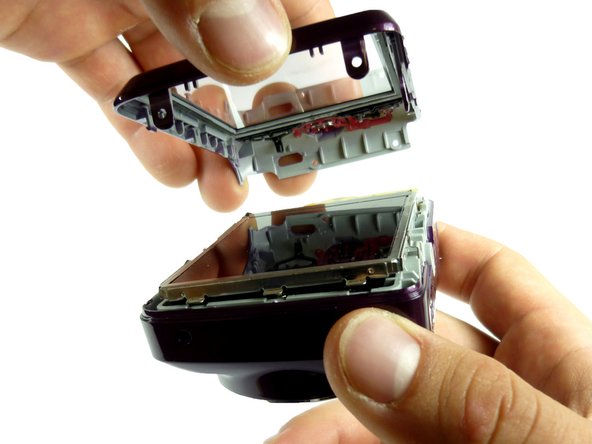
    • Once all the screws are out, remove the back panel.

    • The front panel does not need to be removed for replacing the LCD or the Lens.

    • To do this, start by removing the bottom of the panel.

  3. Kodak EasyShare C195 Lens Replacement: 步骤 3 中的图像 1,2 Kodak EasyShare C195 Lens Replacement: 步骤 3 中的图像 2,2
    • Once the bottom part is unhooked, unhook the top, and the whole panel should come off.

    • Be sure to gently pry the cover off.

  4. Kodak EasyShare C195 Lens Replacement: 步骤 4 中的图像 1,1
    • In the top right hand corner of the inside of the camera, there is a Philips #00 4 mm screw that needs to be removed.

  5. Kodak EasyShare C195 Lens Replacement: 步骤 5 中的图像 1,3 Kodak EasyShare C195 Lens Replacement: 步骤 5 中的图像 2,3 Kodak EasyShare C195 Lens Replacement: 步骤 5 中的图像 3,3
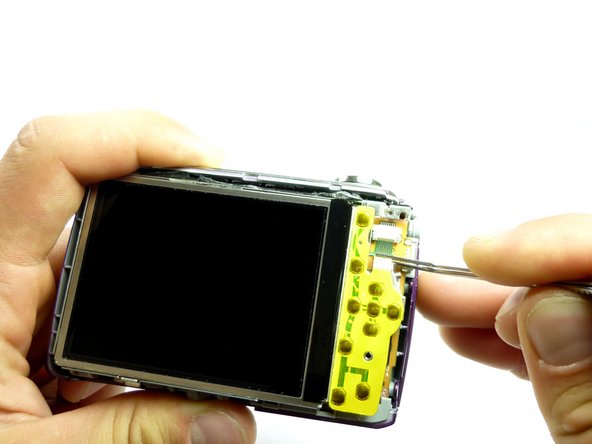
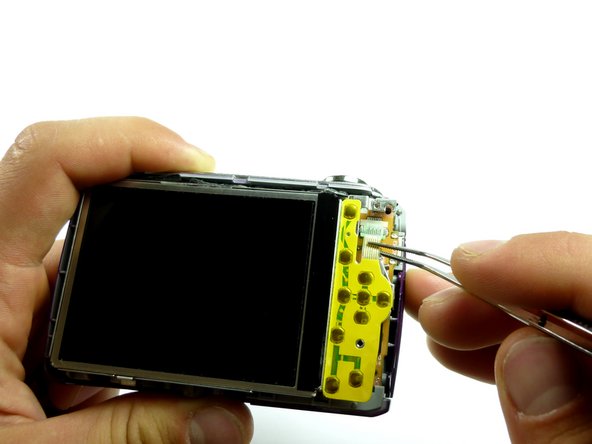
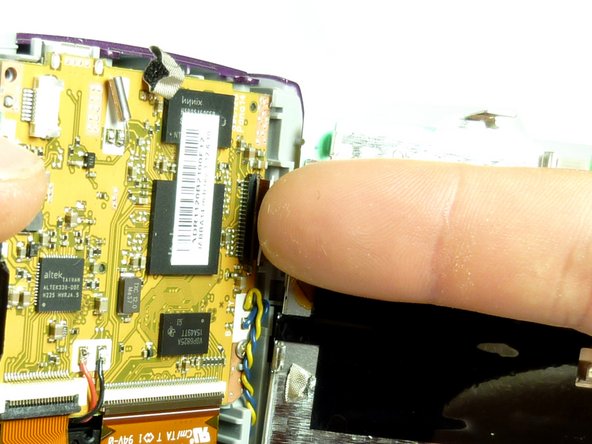
    • The next step is to remove the white ribbon on the upper right hand corner next to the LCD screen.

    • This can be done with or without tweezers.

    • The screen is still attached at the bottom, so do not take the screen off yet.

  6. Kodak EasyShare C195 Lens Replacement: 步骤 6 中的图像 1,3 Kodak EasyShare C195 Lens Replacement: 步骤 6 中的图像 2,3 Kodak EasyShare C195 Lens Replacement: 步骤 6 中的图像 3,3
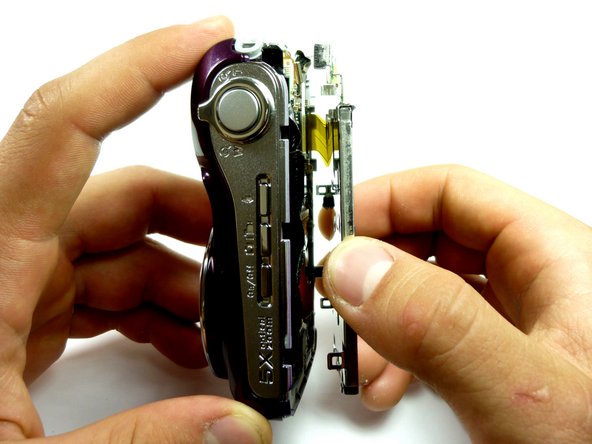
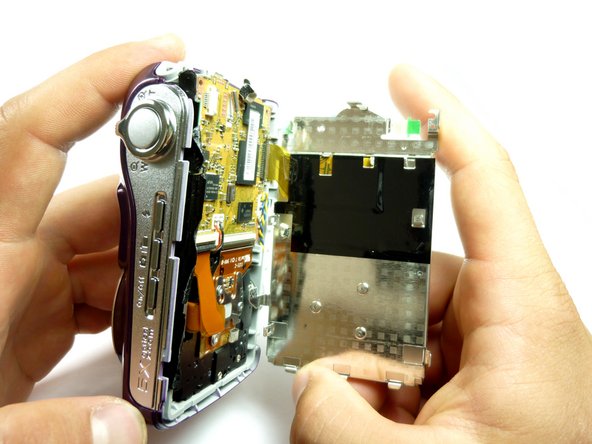
    • Carefully pry the top portion of the screen from the camera.

    • The screen is still attached to the camera via a yellow ribbon at the bottom of the camera.

  7. Kodak EasyShare C195 Lens Replacement: 步骤 7 中的图像 1,3 Kodak EasyShare C195 Lens Replacement: 步骤 7 中的图像 2,3 Kodak EasyShare C195 Lens Replacement: 步骤 7 中的图像 3,3
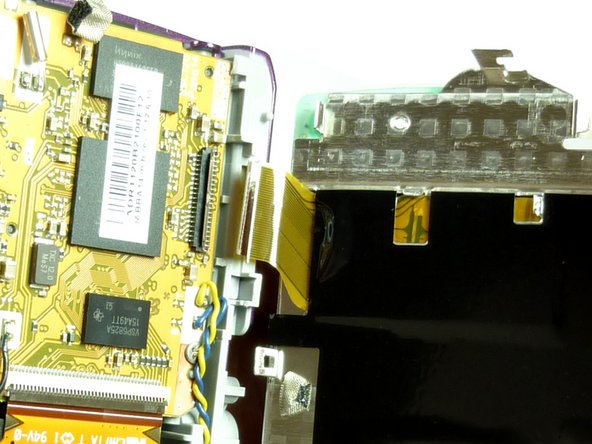
    • To remove the screen completely, push down on the rectangular tab indicated in the picture.

  8. Kodak EasyShare C195 Lens Replacement: 步骤 8 中的图像 1,2 Kodak EasyShare C195 Lens Replacement: 步骤 8 中的图像 2,2
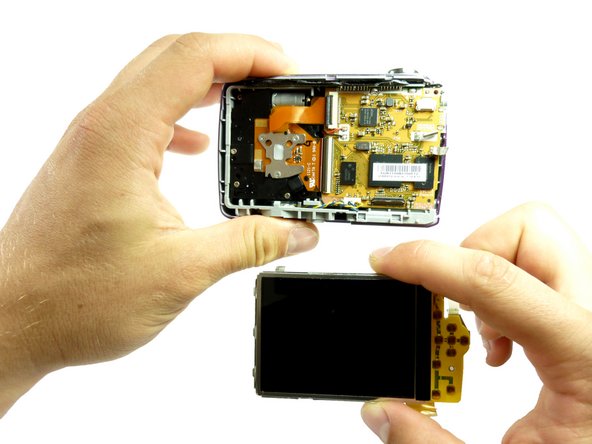
    • The LCD screen is now completely removed from the rest of the camera.

  9. Kodak EasyShare C195 Lens Replacement, Lens: 步骤 9 中的图像 1,3 Kodak EasyShare C195 Lens Replacement, Lens: 步骤 9 中的图像 2,3 Kodak EasyShare C195 Lens Replacement, Lens: 步骤 9 中的图像 3,3
    • Now that the LCD screen as been completely removed, the internal lens can be removed.

    • To do this, flip the two black tabs to the left of the yellow motherboard up.

  10. Kodak EasyShare C195 Lens Replacement: 步骤 10 中的图像 1,2 Kodak EasyShare C195 Lens Replacement: 步骤 10 中的图像 2,2
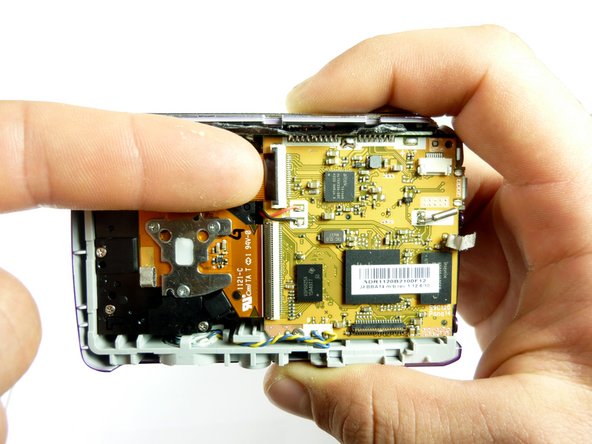
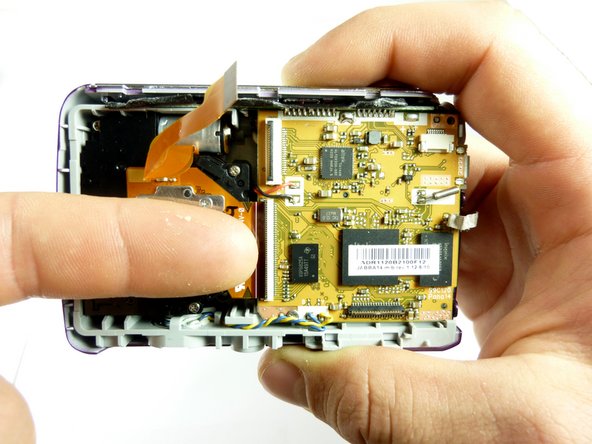
    • Once the tabs have been flipped, pull the orange tab out.

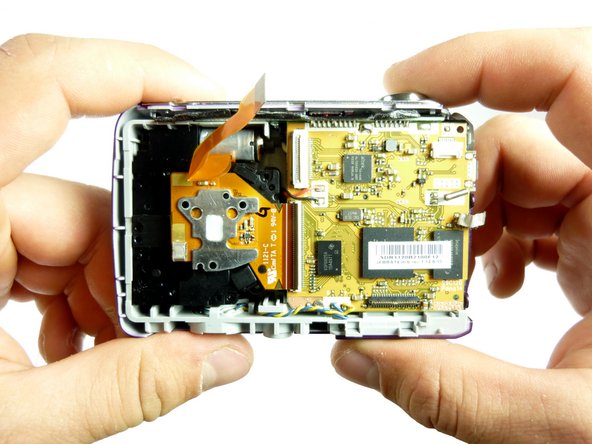
    • Next, use the #00 Philips head screwdriver to remove the five 4.5 mm screws to the left of the motherboard.

    • Remove the three Philips #00 3 mm screws on the silver metal plate directly behind the lens.

  11. Kodak EasyShare C195 Lens Replacement: 步骤 11 中的图像 1,2 Kodak EasyShare C195 Lens Replacement: 步骤 11 中的图像 2,2
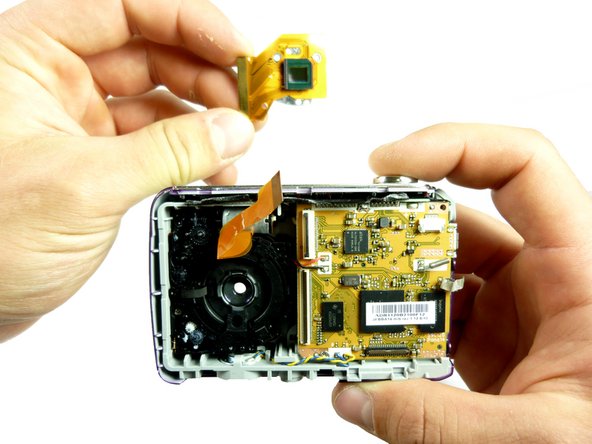
    • Remove the internal lens from the camera.

    • The second picture shows what the camera should look like with out the internal lens attached.

结论

To reassemble your device, follow these instructions in reverse order.

2等其他人完成本指南。

Alyssa

于04/12/12注册

81 声望

创作了4篇指南

团队

Cal Poly, Team 6-22, Amido Spring 2012 Cal Poly, Team 6-22, Amido Spring 2012 的会员

CPSU-AMIDO-S12S6G22

4 名成员

创作了8篇指南

0条评论

添加评论

浏览统计数据:

过去 24 小时: 0

过去 7 天: 22

过去 30 天: 31

总计 5,514