跳转到主内容

Kenwood KDC-BT362U Button Replacement

你所需要的

  1. Kenwood KDC-BT362U Button  Replacement, Front Panel: 步骤 1 中的图像 1,1
    • Locate the face-plate eject button.

  2. Kenwood KDC-BT362U Button  Replacement: 步骤 2 中的图像 1,2 Kenwood KDC-BT362U Button  Replacement: 步骤 2 中的图像 2,2
    • Press the eject button with your forefinger.

    • Remove the face-plate.

  3. Kenwood KDC-BT362U Button  Replacement: 步骤 3 中的图像 1,2 Kenwood KDC-BT362U Button  Replacement: 步骤 3 中的图像 2,2
    • Starting on the top side, pop the front panel frame out.

    • Remove the face-plate frame.

  4. Kenwood KDC-BT362U Button  Replacement: 步骤 4 中的图像 1,2 Kenwood KDC-BT362U Button  Replacement: 步骤 4 中的图像 2,2
    • Use the plastic opening tool to pry open the tabs.

    • Repeat on the opposite side.

  5. Kenwood KDC-BT362U Button  Replacement: 步骤 5 中的图像 1,1
    • Remove the front panel.

  6. Kenwood KDC-BT362U Button  Replacement, Button: 步骤 6 中的图像 1,1
    • Use the Phillips #0 Screwdriver to remove the four screws.

  7. Kenwood KDC-BT362U Button  Replacement: 步骤 7 中的图像 1,2 Kenwood KDC-BT362U Button  Replacement: 步骤 7 中的图像 2,2
    • Use the plastic opening tool to pry it open.

  8. Kenwood KDC-BT362U Button  Replacement: 步骤 8 中的图像 1,2 Kenwood KDC-BT362U Button  Replacement: 步骤 8 中的图像 2,2
    • Lift and remove the motherboard to reveal the inside of the front panel.

  9. Kenwood KDC-BT362U Button  Replacement: 步骤 9 中的图像 1,2 Kenwood KDC-BT362U Button  Replacement: 步骤 9 中的图像 2,2
    • Use the plastic opening tool to lift up and remove the cover.

  10. Kenwood KDC-BT362U Button  Replacement: 步骤 10 中的图像 1,1
    • The buttons are now able to be removed and replaced if damaged or missing.

结论

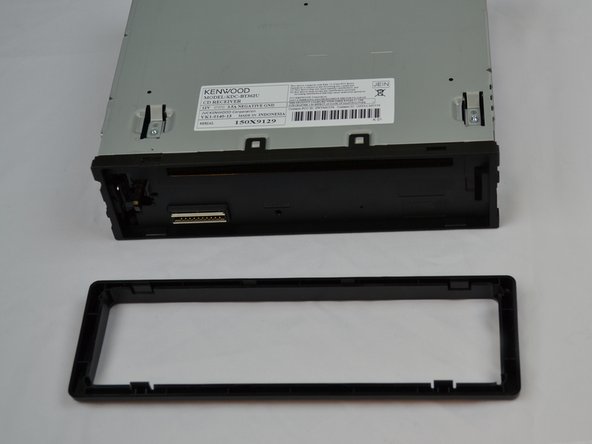
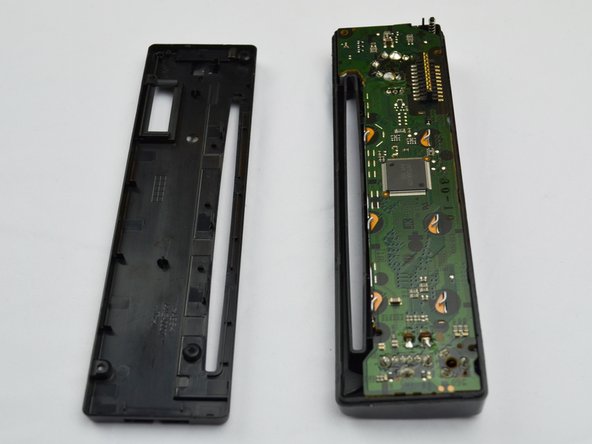
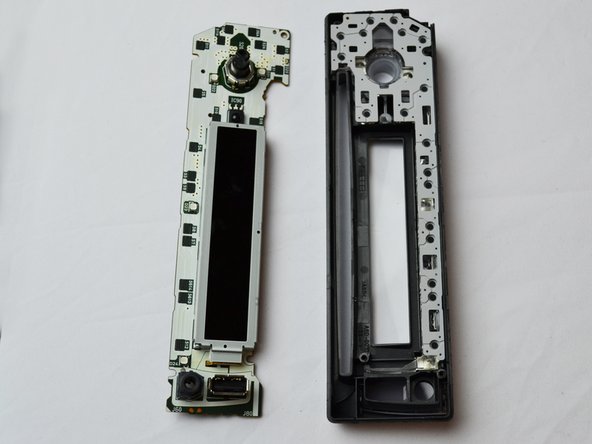
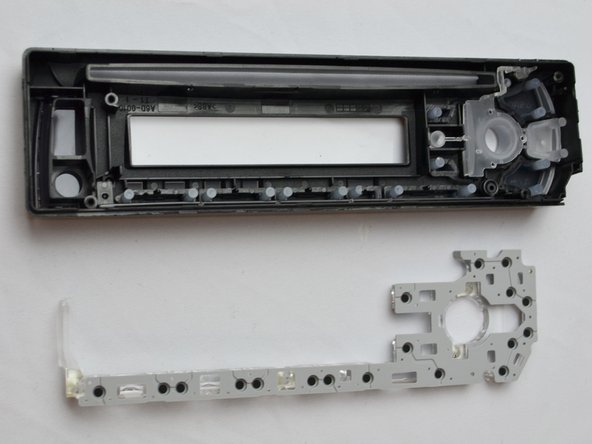
To reassemble your device, follow these instructions in reverse order.

2等其他人完成本指南。

Steven Chov

于10/04/16注册

349 声望

创作了3篇指南

团队

USF Tampa, Team 2-5, Cagle Fall 2016 USF Tampa, Team 2-5, Cagle Fall 2016 的会员

USFT-CAGLE-F16S2G5

4 名成员

创作了5篇指南

0条评论

添加评论

浏览统计数据:

过去 24 小时: 0

过去 7 天: 4

过去 30 天: 4

总计 752