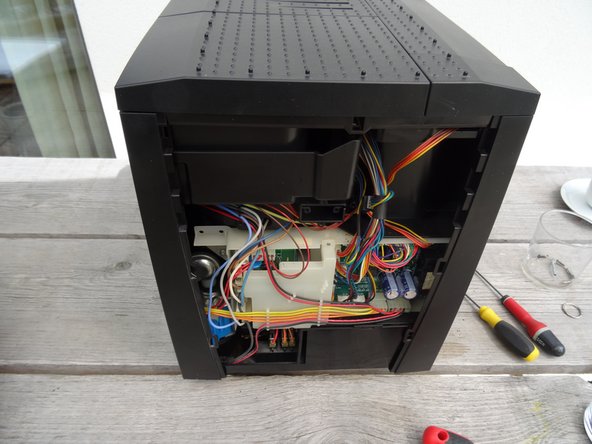
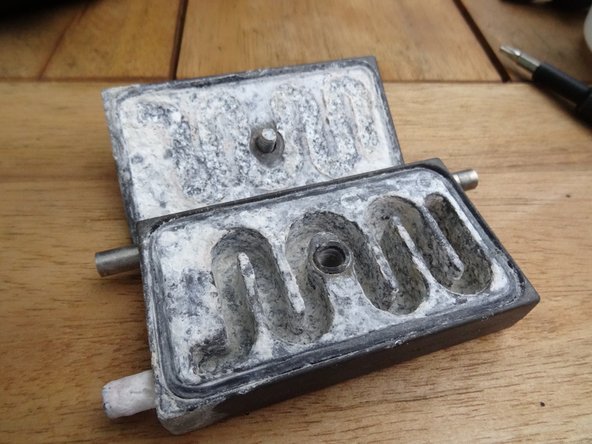
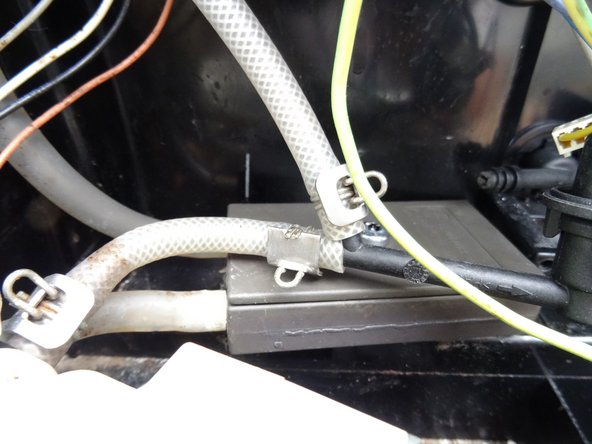
跳转到主内容

Jura Z Model heat exchanger replacement

你所需要的

  1. Jura Z Model heat exchanger replacement, Opening the Jura Z series housing: 步骤 1 中的图像 1,1
    • Unplug the machine from the power outlet

    • Remove all attachments: water tank, drip tray, aroma lid

  2. Jura Z Model heat exchanger replacement: 步骤 2 中的图像 1,3 Jura Z Model heat exchanger replacement: 步骤 2 中的图像 2,3 Jura Z Model heat exchanger replacement: 步骤 2 中的图像 3,3
    • Turn the machine so the back is facing toward the front.

    • The Jura sign must be removed. Turn it a few millimeters counterclickwise.

    • If this becomes difficult use a suction cup to assist.

    • Remove the Jura sign.

  3. Jura Z Model heat exchanger replacement: 步骤 3 中的图像 1,2 Jura Z Model heat exchanger replacement: 步骤 3 中的图像 2,2
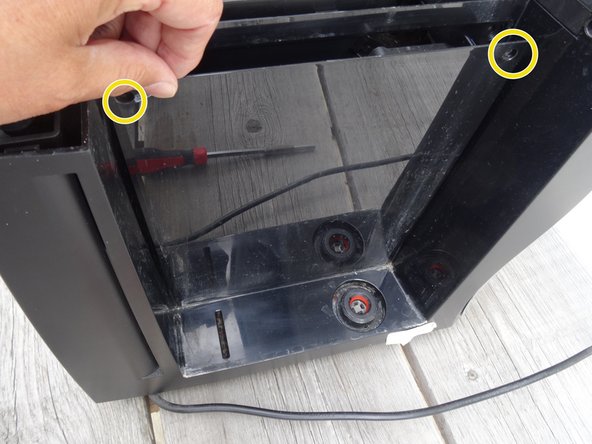
    • Behind the Jura sign are two screws with an oval head. They have to be removed.

    • These screws have an oval head that makes them look like rivets (picture 2). You need to use a special bit for their removal. If the right bit is not available, it could be done with a pair of needle nose pliers. Jura wants to keep us out of our own machines!!!!

  4. Jura Z Model heat exchanger replacement: 步骤 4 中的图像 1,2 Jura Z Model heat exchanger replacement: 步骤 4 中的图像 2,2
    • Push the back down a bit and then remove it.

  5. Jura Z Model heat exchanger replacement: 步骤 5 中的图像 1,1
    • Pull the right side panel- as seen looking to the frontpanel - backwards and take it off.

    • Sometimes it gets a bit stuck and may require a bit more of a pull.

  6. Jura Z Model heat exchanger replacement: 步骤 6 中的图像 1,3 Jura Z Model heat exchanger replacement: 步骤 6 中的图像 2,3 Jura Z Model heat exchanger replacement: 步骤 6 中的图像 3,3
    • In this step, you should remove the screws of the left side panel. The side panel can only be removed after removing the top cover.

    • Remove the Torx T15 screw on the front wall of the side panel.

    • In the side part there is a lid over the brew group. The lid is fastened at the top with two oval head screws. Remove those to remove the lid.

    • With the cover removed the brew group becomes visible

  7. Jura Z Model heat exchanger replacement: 步骤 7 中的图像 1,3 Jura Z Model heat exchanger replacement: 步骤 7 中的图像 2,3 Jura Z Model heat exchanger replacement: 步骤 7 中的图像 3,3
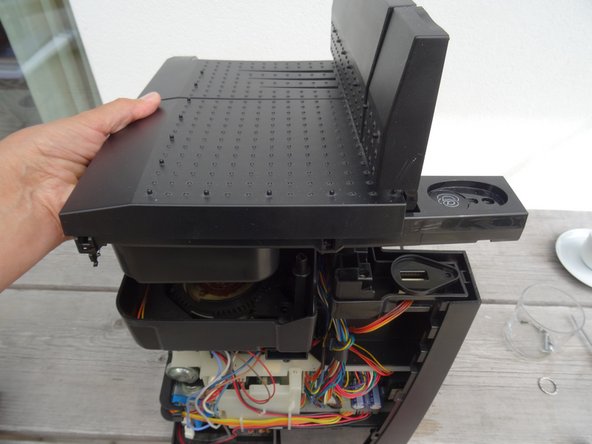
    • This step shows how to remove the top cover

    • Remove the powder tray and all coffee beans.

    • The cover is fastened with three Torx T15 screws. Those are easily visible under the covers as well as the small cover on the left back side.

    • Remove the two Phillips screws on the bean container and remove the bean container.

    • Lift the cover upwards.

    • If it is stuck, use a plastic opening tool to carefully pry it open.

    • The lid of the bean container is held in place by a small, strong magnet that loosely rests. It is either in the green marked recess, or it remains hanging on the bean container. Make sure it is not lost!

  8. Jura Z Model heat exchanger replacement: 步骤 8 中的图像 1,2 Jura Z Model heat exchanger replacement: 步骤 8 中的图像 2,2
    • Pull the left side panel backwards to take it off.

    • For some repairs it is not necessary to remove the left side panel.

  9. Jura Z Model heat exchanger replacement, Motor: 步骤 9 中的图像 1,3 Jura Z Model heat exchanger replacement, Motor: 步骤 9 中的图像 2,3 Jura Z Model heat exchanger replacement, Motor: 步骤 9 中的图像 3,3
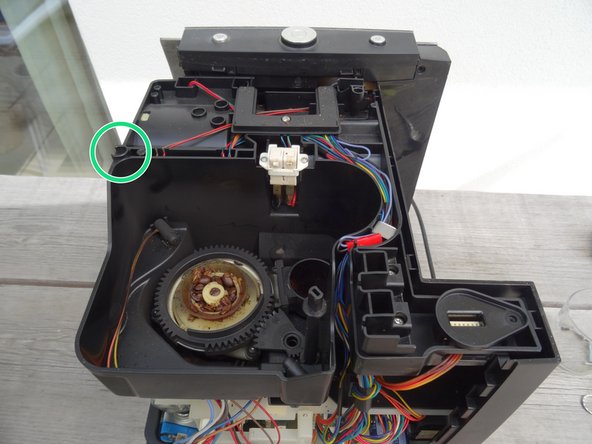
    • The drive motor is fastened with two Torx T20 screws.

    • Remove the two screws.

    • Take out the motor

    • The encoder that counts the revolutions is located on the motor shaft. Disconnect the plug from the encoder

  10. Jura Z Model heat exchanger replacement: 步骤 10 中的图像 1,1
    • The motor is only connected with two cables. If you want to replace it completely, you have to follow the cables and disconnect them. You can also cut them and solder them, but make sure that they are well insulated, e.g. with heat shrink tubing.

  11. Jura Z Model heat exchanger replacement, Jura Z Model remove ceramic valve: 步骤 11 中的图像 1,2 Jura Z Model heat exchanger replacement, Jura Z Model remove ceramic valve: 步骤 11 中的图像 2,2
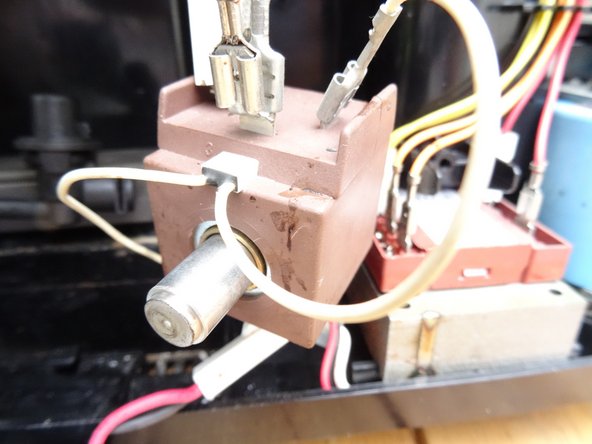
    • The ceramic valve is only pushed in. Release the detents at the bottom of the white plastic base and slide the valve to the right.

    • Lift out the valve.

    • Disconnect all connections and remove the valve.

    • If the valve is only to be removed to access other parts, you can leave the connectors on.

  12. Jura Z Model heat exchanger replacement, Jura Z5 Drain valve magnet: 步骤 12 中的图像 1,3 Jura Z Model heat exchanger replacement, Jura Z5 Drain valve magnet: 步骤 12 中的图像 2,3 Jura Z Model heat exchanger replacement, Jura Z5 Drain valve magnet: 步骤 12 中的图像 3,3
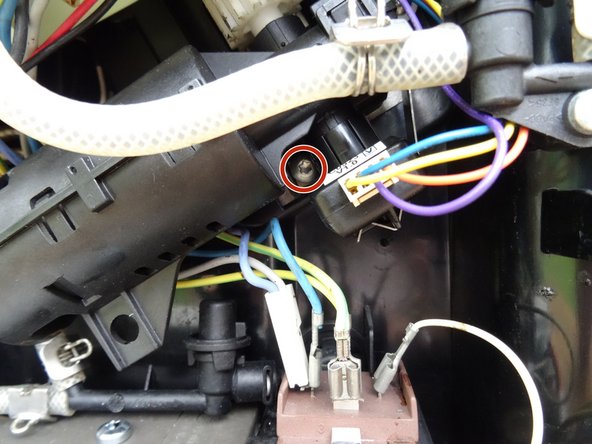
    • The solenoid is secured with a bracket held in place by two Torx T10 screws

    • Remove the two screws.

    • Take off the bracket

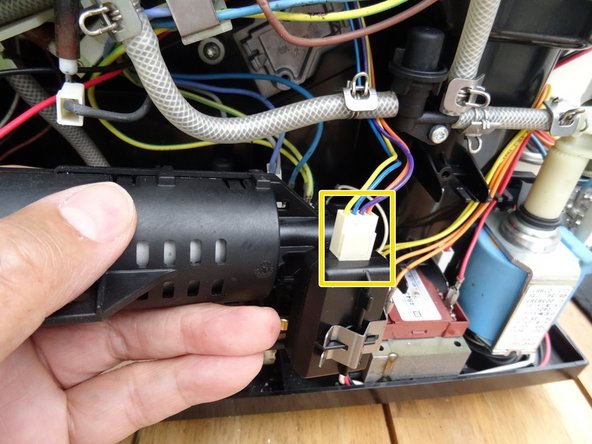
    • Take the solenoid out.

    • Disconnect the cables from the solenoid.

    • If the solenoid is only removed to access other parts, the cables can remain connected.

  13. Jura Z Model heat exchanger replacement: 步骤 13 中的图像 1,1
    • In newer models, there is a drainage motor instead of a magnet. In principle, it is removed in the same way as the magnet. Use these instructions

    • Remove the two Torx T15 screws on the drain motor and take out the motor. The side with the blue cable is marked with a dot.

    • If you have only removed the motor to make further repairs, you can proceed to the next step.

    • First leave the motor connected. Trigger a flush and observe if the pin moves back and forth.

    • The motor does not necessarily need to be replaced. Bend away the four metal tabs on the motor flange and detach the metal housing from the black gear case. Now you can try to turn the armature. The pin should move smoothly back and forth. If not, some silicone grease on the drive worm can help.

  14. Jura Z Model heat exchanger replacement, Heat exchanger: 步骤 14 中的图像 1,3 Jura Z Model heat exchanger replacement, Heat exchanger: 步骤 14 中的图像 2,3 Jura Z Model heat exchanger replacement, Heat exchanger: 步骤 14 中的图像 3,3
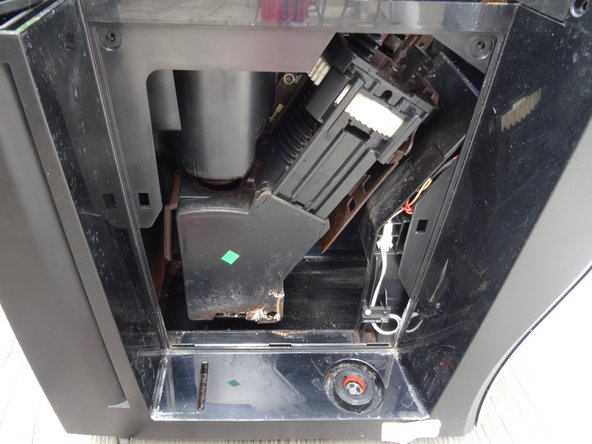
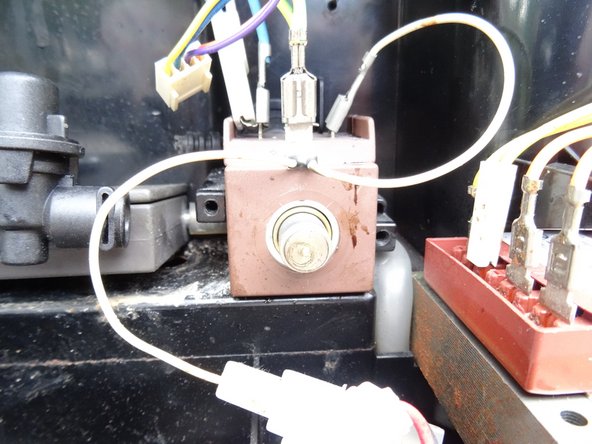
    • The heat exchanger is located at the bottom of the unit.

    • The two pictures show traces of lime everywhere. The heat exchanger was no longer tight.

    • To get to it better, you should remove the ceramic valve, the motor, and the solenoid for the drain valve, all work is quite easy to do.

    • We assume that you have already done this

  15. Jura Z Model heat exchanger replacement: 步骤 15 中的图像 1,2 Jura Z Model heat exchanger replacement: 步骤 15 中的图像 2,2
    • The heat exchanger is connected with three hoses, and there is also an outlet in the base plate. When assembling, make sure that the seal is still in place when you push the heat exchanger in. Note which hose is where.

    • One of the exhaust valves runs above the heat exchanger. It is much more convenient if you pull out the clamp on the exhaust valve and disconnect the exhaust valve. Pay attention to the O-ring.

    • Pull off the three hoses and lift the heat exchanger up.

结论

Work through the steps in reverse order to reassemble your device.

由衷感谢以下译者:

de en

100%

shingle正在帮助我们修复这个世界! 您也想加入吗?
开始翻译 ›

VauWeh

于10/19/15注册

205,365 声望

创作了250篇指南

团队

Repair is War on Entropy Repair is War on Entropy 的会员

Community

25 名成员

创作了1,150篇指南

0条评论

添加评论

浏览统计数据:

过去 24 小时: 7

过去 7 天: 20

过去 30 天: 55

总计 1,138