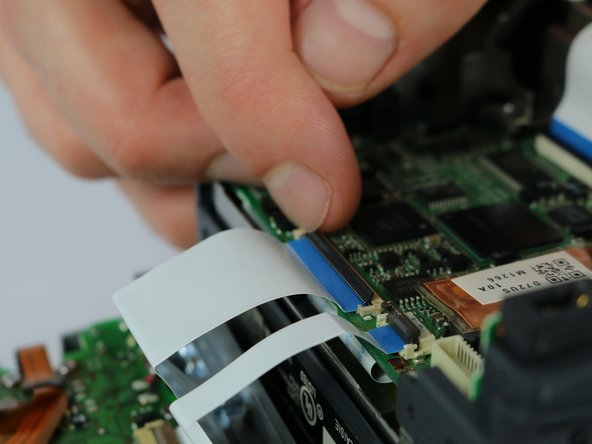
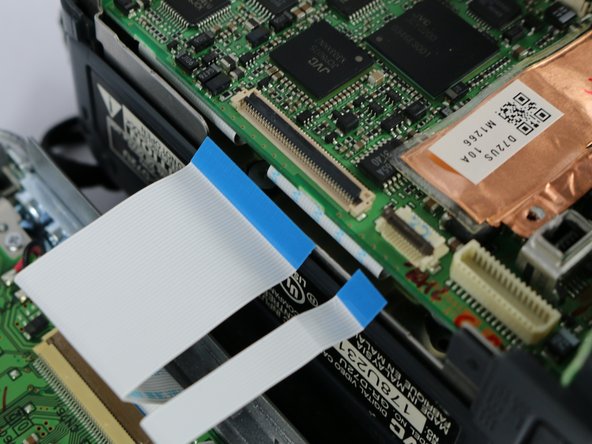
跳转到主内容

JVC GR-D72U Lateral Function Port Panel Replacement

你所需要的

  1. JVC GR-D72U Lateral Function Port Panel Replacement, Battery: 步骤 1 中的图像 1,2 JVC GR-D72U Lateral Function Port Panel Replacement, Battery: 步骤 1 中的图像 2,2
    • Locate button on bottom of camera.

    • Slide button to the right.

  2. JVC GR-D72U Lateral Function Port Panel Replacement: 步骤 2 中的图像 1,1
    • Pull the battery towards the bottom of the camcorder while lifting battery .

  3. JVC GR-D72U Lateral Function Port Panel Replacement, Lateral Function Port Panel: 步骤 3 中的图像 1,3 JVC GR-D72U Lateral Function Port Panel Replacement, Lateral Function Port Panel: 步骤 3 中的图像 2,3 JVC GR-D72U Lateral Function Port Panel Replacement, Lateral Function Port Panel: 步骤 3 中的图像 3,3
    • Remove silver plate that says “Auto Light” on the top of the camera using a metal spudger.

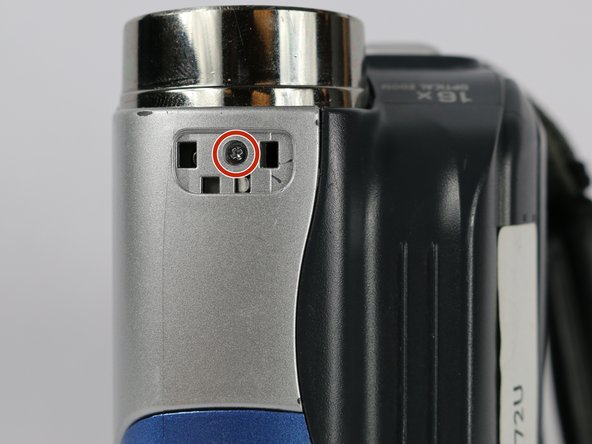
    • Remove the 3.1 mm screw.

    • Remove the three 5.3 mm screws from the back of the camera.

  4. JVC GR-D72U Lateral Function Port Panel Replacement: 步骤 4 中的图像 1,1
    • From the bottom of the camera remove the following four screws:

    • 5.3 mm

    • 3.1 mm

    • 5.1 mm

    • 3.5 mm

  5. JVC GR-D72U Lateral Function Port Panel Replacement: 步骤 5 中的图像 1,1
    • Use the small plastic opening tool to remove the blue side cover piece.

  6. JVC GR-D72U Lateral Function Port Panel Replacement: 步骤 6 中的图像 1,1
    • Remove the 3.1 mm screw on top of the camera, closest to the LCD monitor.

    • Remove the 5.4 mm screw next to the snapshot button.

  7. JVC GR-D72U Lateral Function Port Panel Replacement: 步骤 7 中的图像 1,1
    • Remove the 3.1 mm screw next to the USB and DV inputs.

  8. JVC GR-D72U Lateral Function Port Panel Replacement: 步骤 8 中的图像 1,1
    • Gently pull apart both halves of the camera to reveal the inner components.

  9. JVC GR-D72U Lateral Function Port Panel Replacement: 步骤 9 中的图像 1,3 JVC GR-D72U Lateral Function Port Panel Replacement: 步骤 9 中的图像 2,3 JVC GR-D72U Lateral Function Port Panel Replacement: 步骤 9 中的图像 3,3
    • Flip the cable locks to the up-position and pull both cables connecting the lateral function port panel to the rest of the camera.

    • Insert the cables from the new port panel into their inputs and flip the locks to the down position.

    • It is easier to use tweezers when inserting the cable but not required.

结论

To reassemble your device, follow these instructions in reverse order.

2等其他人完成本指南。

团队

USF Tampa, Team S2-G2, Nance Fall 2017 USF Tampa, Team S2-G2, Nance Fall 2017 的会员

USFT-NANCE-F17S2G2

4 名成员

创作了5篇指南

0条评论

添加评论

浏览统计数据:

过去 24 小时: 0

过去 7 天: 0

过去 30 天: 1

总计 435