跳转到主内容

JVC Adixxion GC-XA1BU LCD Cover Replacement

你所需要的

  1. JVC Adixxion GC-XA1BU LCD Cover Replacement, Battery: 步骤 1 中的图像 1,1
    • Find the side of the camera with the black switch shown.

  2. JVC Adixxion GC-XA1BU LCD Cover Replacement: 步骤 2 中的图像 1,1
    • Push down on the black switch.

  3. JVC Adixxion GC-XA1BU LCD Cover Replacement: 步骤 3 中的图像 1,1
    • Slide the battery cover back while pushing down on the black switch.

  4. JVC Adixxion GC-XA1BU LCD Cover Replacement: 步骤 4 中的图像 1,2 JVC Adixxion GC-XA1BU LCD Cover Replacement: 步骤 4 中的图像 2,2
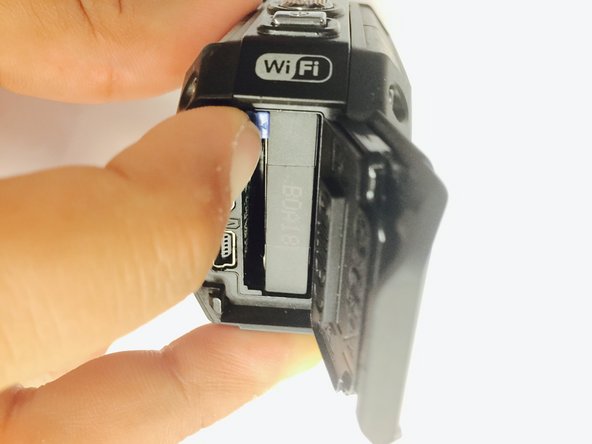
    • Open the battery compartment and push the blue battery release switch.

  5. JVC Adixxion GC-XA1BU LCD Cover Replacement: 步骤 5 中的图像 1,1
    • Remove the battery from the camera.

  6. JVC Adixxion GC-XA1BU LCD Cover Replacement, Battery Cover: 步骤 6 中的图像 1,1
    • Remove the two Phillips screws (4mm x 3mm) using the Phillips #00 screwdriver.

  7. JVC Adixxion GC-XA1BU LCD Cover Replacement, LCD Cover: 步骤 7 中的图像 1,2 JVC Adixxion GC-XA1BU LCD Cover Replacement, LCD Cover: 步骤 7 中的图像 2,2
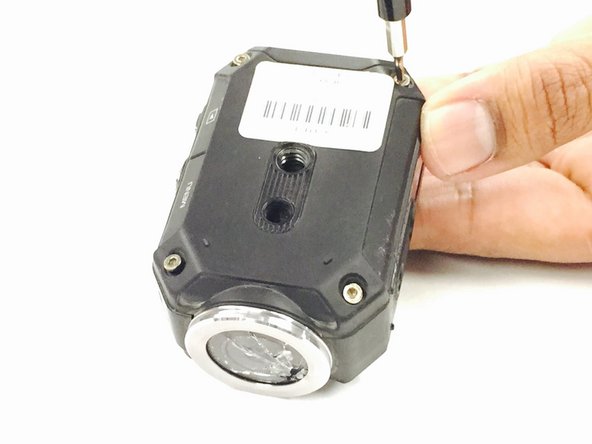
    • Remove the 8 screws (5mm x 4mm) from the corners of both the front and back of the camera (4 screws on each side) using the T6 Torx screwdriver.

  8. JVC Adixxion GC-XA1BU LCD Cover Replacement: 步骤 8 中的图像 1,1
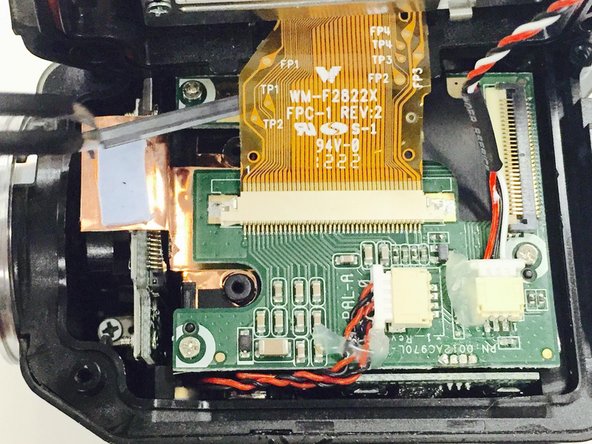
    • Carefully open the camera as shown and gently peel off the black cover tape.

  9. JVC Adixxion GC-XA1BU LCD Cover Replacement: 步骤 9 中的图像 1,3 JVC Adixxion GC-XA1BU LCD Cover Replacement: 步骤 9 中的图像 2,3 JVC Adixxion GC-XA1BU LCD Cover Replacement: 步骤 9 中的图像 3,3
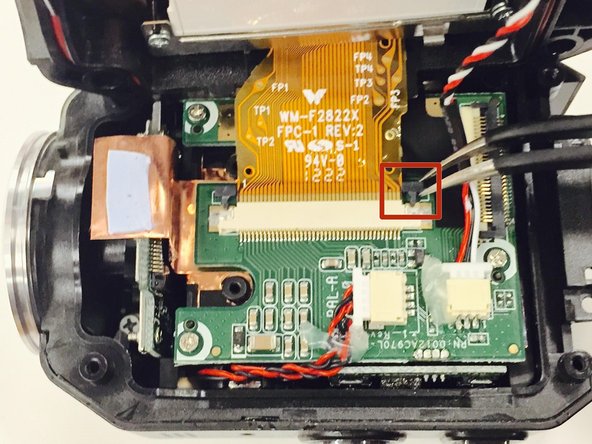
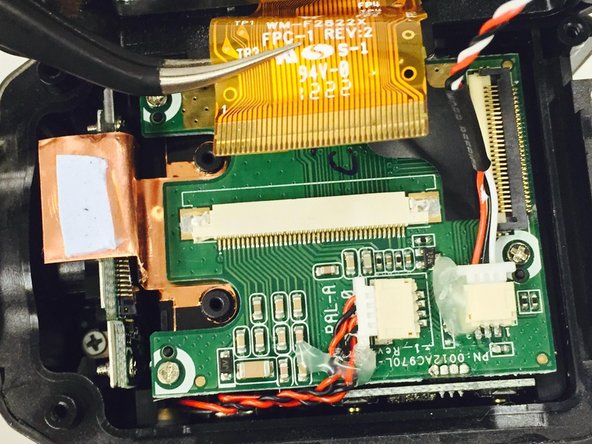
    • Carefully lift up and remove the cable ribbon clip using the tweezers.

  10. JVC Adixxion GC-XA1BU LCD Cover Replacement: 步骤 10 中的图像 1,2 JVC Adixxion GC-XA1BU LCD Cover Replacement: 步骤 10 中的图像 2,2
    • Carefully grasp and remove the ribbon cable using the tweezers.

  11. JVC Adixxion GC-XA1BU LCD Cover Replacement: 步骤 11 中的图像 1,1
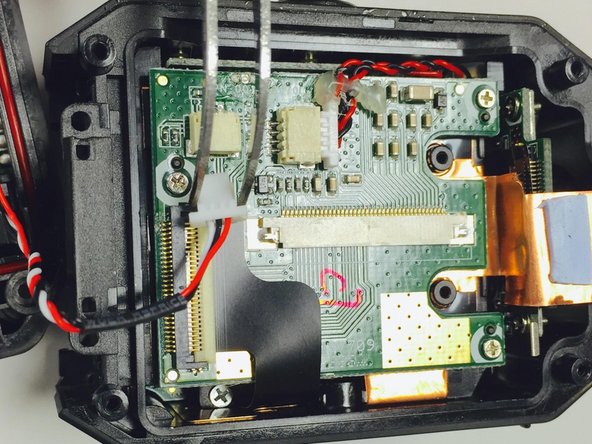
    • Turn the camera as shown and carefully remove the glue from the connector.

  12. JVC Adixxion GC-XA1BU LCD Cover Replacement: 步骤 12 中的图像 1,2 JVC Adixxion GC-XA1BU LCD Cover Replacement: 步骤 12 中的图像 2,2
    • Carefully pull the white clip out of the casing using the tweezers.

结论

To reassemble your device, follow these instructions in reverse order.

另外一个人完成了本指南。

团队

USF Tampa, Team 1-2, Tanski Winter 2015 USF Tampa, Team 1-2, Tanski Winter 2015 的会员

USFT-TANSKI-W15S1G2

4 名成员

创作了8篇指南

0指南评论

添加评论

浏览统计数据:

过去 24 小时: 0

过去 7 天: 4

过去 30 天: 16

总计 397