简介
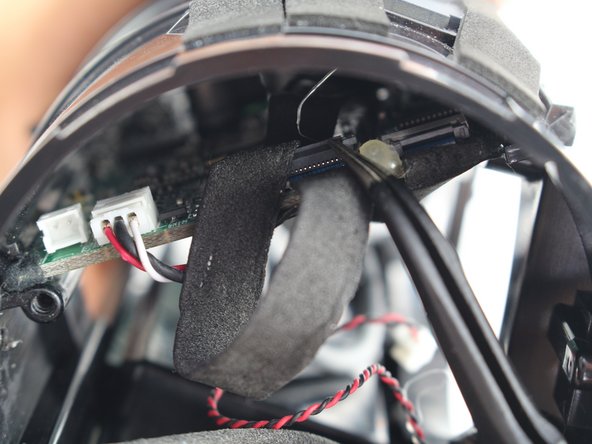
当它无法正常工作时,主板应该是你最后一个尝试更换的部件,因为它是最难接触的到的部分。
你所需要的
-
-
轻轻地从两侧拽开,并且从扬声器外壳移除。
@KanGoon Yes, on mine it took the removal of 6 (reasonably obvious) screws to remove that. I’ll try to insert a photo when I reassemble…
Very good guide! Pics and descriptions make this easy!
There is a step missing here. How do you remove the rubber cover that covers the port?
Gibt es eine Möglichkeit diese wieder wasserdicht zu bekommen?
-
-
-
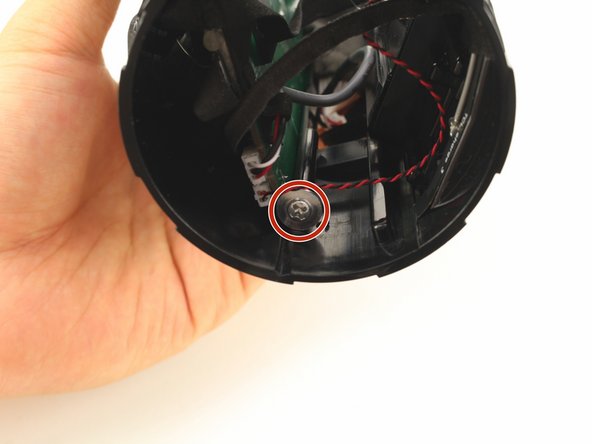
在顶盖上移除两个8mm #1 十字螺丝。
-
注意:可能只有一个螺丝。
If your Charge 3 doesn’t look like the above. Do not do this step YET. Go directly to Step 7 removal of the battery. By doing the battery first it will tell you which radiator to remove and thus no need to remove both.
NOTE:
On a newer version of the Charge 3 this image will be very different. you will not find a screw. You will also notice that there are two tabs that if slightly lifted while rotating the radiator counter clockwise the radiator is easily removed. There is also no foam or breakable seal on the newer Charge 3.
-
-
-
将塑料撬棍插入顶盖的两端。
I believe this is unnecessary, just turn the passive radiator counter clockwise and pull outward. I tried to use the pry tool and broke a plastic tab.
Tip— when you get to this part lightly tap the edge of the speaker on a hard surface— like you’re tapping a jar before opening it.
Muchas gracias a todos, me dieron cada uno la guía perfecta.
My charge 3 had less screws but the process was the same. Thanks for the instructions!
-
-
-
拧动并拉出被动散热器。左侧的散热器逆时针拧动,右侧的顺时针方向拧动。
-
-
-
在其他被动散热器上执行以上步骤。
-
注意:在更换电池的时候,只需要移除右侧的散热器。
right or left…. depends on how you view the Charge 3 i guess. No need to remove both radiators for a newer Charge 3. You can remove the battery cover first…find out what side the battery wires exit the battery compartment and then remove the radiator associated with that same side.
Anybody else have major problems trying to twist the radiator back into position after replacing the battery? I’m having trouble getting the screw holes to line up again on the right radiator.
To twist back I used saliva so it will slide easier against the rubber
-
-
-
移除在两个前置扬声器周围的八个10mm #1 十字螺丝。
Die Frage : Ist ob man irgendwo Ersatz Lautsprecher bekommt ???
Probier's mal hier, vergleiche aber ganz genau (Seriennummer GG…):
-
-
-
用#000 十字螺丝刀按一下扬声器接头的小金属盖,然后轻轻的将接头拉下。
Where can l buy those speaker for replacing
The speakers that is on my charge 3 is soldered on doesn’t have the clips in picture
-
-
-
-
现在第二个扬声器已经与主板脱离,将扬声器和线从外壳中拉出。
where can i buy these speaker,i need to replace the left side speaker because it was already damaged
-
-
-
从电池外壳上移除6个 8mm #1的十字螺丝。
-
将电池外壳从扬声器外壳上移除。
For the newer Charge 3 - there are two silver screws located on the opposite side of the charging ports ….. looking at the first picture above they would be in close proximity to the lower two red circles. However, they placed in horizontally not vertically. Once you remove these two screws you can lift the rubber off.
Note: The rubber is hinged on the opposite side of the two removed screws by tabs. Be careful when rotating it off not to break the tabs.
Once the rubber is removed…. you will be able to see the battery compartment. It has several black screws… one of which is wedged between the charging port rubber and the battery cover. You can gently pry up the rubber away to allow you to get a screw driver in to get the middle screw out.
The battery compartment is water tight and has a seal. You will want to loosen all screws evenly so as not to tear or damage the rubber seal.
-
-
-
从内部电池外壳上移除7个8mm #1 十字螺丝。
-
移除内部电池外壳。
The newer Charge 3 will have a solid black cover. Once removed the battery can be easily lifted out with your fingers. It is not taped in.
Gently lift the battery to determine the radiator that needs to be removed. You can identify it by following the battery wiring. There is a small hole at the bottom of the battery compartment that the battery wires go through. The side with the battery wiring hole is the same side as the radiator that needs to be removed.
-
-
-
轻轻地断开在扬声器内部的线缆接头连接。这个动作会将电池与主板分离。
mon problème d’origine était pas de charge sur secteur, dans mon cas nappe 11 connecteurs déconnectée. Je n’ai pas vu de système de retient pour cette nappe, je lui ai ajouté un petit point de colle, car bouge relativement beaucoup ! problème résolu
-
-
-
将电池和电池线从外壳中移除。
yo tambien quiero una bateria donde la cosigo?
Does anyone know where I can buy a replacement battery?
Unbedingt die Isolierung um das Kabel und die Polster an den Ecken der Batterie von der alten an die neue basteln, sonst kann sie im Fach hin und her klappern.
Se podria adactar este dispositivo directo a un cargador directo?
I already did many things to my charge 3 and one of them was to put two direct cables to the battery to be able to charge it since the usb port was damaged and I could not find a replacement, next I will add 4 more batteries
perdon que te respondi en ingles, yo le puse un cable directo usb a la bateria ya que el puerto usb se daño y no pude encontrar repuestos
-
-
-
从接口外壳上移除4个 8mm #1 十字螺丝。
-
用塑料撬棍撬开接口周围以将其卸下。
and then wiggle it directly (almost radially from the cylinder) out until you see the cables shown in the next step.
Be careful not to damage the plastic gasket as you pull it out,
-
-
-
从接口上移除两个线缆接头。
there’s not much room to get you fingers in. Again I used prying tools to help me get the two connectors off the PCB
How do i get another port bay
pjimenez98 - 回复
-
-
-
从接口电路板上移除3个 8mm #1 十字螺丝。
-
将接口外壳从电路板上移除。
Be careful not to break the 2 plastic lugs you can see just below (on the photo) the 2 screws at the edges
-
-
-
将USB, MicroUSB或AUX 接口从电路板上拆焊。
Salve, dove posso ordinare la presa usb piccola di ricarica, c’è un sito apposito?
-
-
-
轻轻地拉出在主板上的线缆接头。
-
-
-
轻轻地拔出在主板上的金色接头。
Buenos días, se me despegó el otro extremo del cable del conector dorado y quisiera que me indiquen en qué lugar se vuelve a conectar. Muchas gracias
-
请按逆序来重新组装你的设备。
请按逆序来重新组装你的设备。
11等其他人完成本指南。
由衷感谢以下译者:
100%
这些译者帮助我们修补全世界! 您也想加入吗?
开始翻译 ›
10条评论
Internation version is different. There are no screws for passive radiotors.
You have to twist it. I have to managed to get it open because there is no video on youtube (I can’t find any)
If that even is Charge 3.
My JBL charge 3 is not charging …please give me idea to fix ..but it’s working perfectly only
My jbl charge are charging but it won't turn on…… i have tried several times to turn it on but it won't turn…… hoping for solutions……
hello mate! did you find any solution?
MAybe your battery or your power button is dead
Not charging or does not turn on, It might be a battery problem, usually these speakers have a battery that starts to loose capacity in about 2 to 3 years, and if you are a frequent user, then it can last even less... If the battery is not capable of storing power, it may be the reason for which you cannot turn it on or charge it.
Hope it helps.
hi why my jbl don't want to get full charge?


Sometimes disassemblers forget that the first time they disassembled the item it didn’t want to give up easily: I didn’t like the forces I was having to apply at all, so I switched to two plastic prying tools per “corner” and one in-between them (total 5, you could use plectrums…) before I was happy the the forces were low enough not to break anything.
Frank Puranik - 回复
the front grill is supposed to be first not the back the back has longer while the front has shorter clip
Water Bass Tester (Water BT) - 回复
There are two Phillips head screws to remove before prying the cover off
jason - 回复
Where in south Africa can I buy jbl charge3 port bay replacement
Donovan Fransman - 回复
There appears to be different versions of the Charge 3. If you find it difficult to pry open a second side the two small screws mentioned by Jason will need to be removed but it also indicates that there will be some additional changes to this tear down that I will try to convey in the comments as well.
john Ramirez - 回复
Sadly I damaged the latches on my charge 3. There was more to it than just prying the front cover up. First, there is a small latch on both sides that you need to push down before pulling the front cover towards you that release the clips holding the front cover in place. Pull only slightly forward because… Second, in the front cover there are 6 circular notches connected to the front cover in tue four corners including the middle corners, you need to squeeze the front cover a little bit gently removing the notches so they dont break (like mine did).
ralphkeneth_gomz - 回复
Definitely had to watch about 10 videos and still couldn’t get it to pop out easily.. Took a look at the first picture in the next step and really took note of where the little hole that lets you through to push down the tab is. Once I took a look at that and combined the techniques I’d seen in some of the videos it finally popped off easily. https://www.youtube.com/watch?v=u7i0_nD9... I only watched the first minute of this video but it helped a good bit if anyone else is having trouble.
Rowan Darko - 回复
How do you know if the speakers or one of them is burned or broken.. i notice that one speaker is playing much less hard then the other one.. I wonder now if maybe there is another problem with my device.. Battery problem?
Bukowski101 - 回复