简介
这份指南会提供如何拆卸 Intel NUC8i7BEH 或同类设备的信息。
你所需要的
-
-
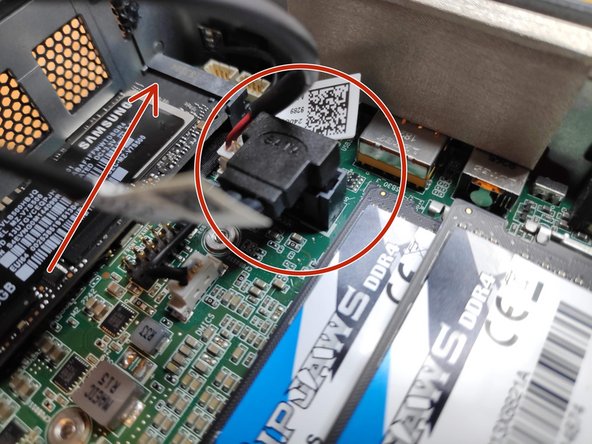
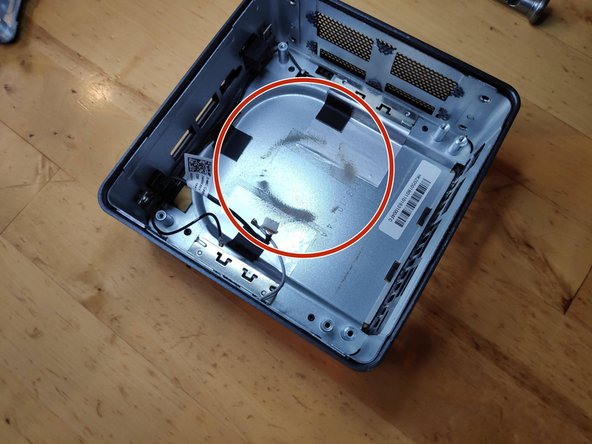
抬起盖子,注意连接在NUC主板上的线缆。这1些线是2.5寸硬盘的电源和数据线.
-
小心地从主板上拔下线缆,把硬盘架放在一边。
-
在最后一张照片中,刀片SSD的槽用红色箭头标出。这是安装刀片SSD的地方,用螺丝固定。
-
-


请按照相反的顺序组装回去。
请按照相反的顺序组装回去。
31等其他人完成本指南。
11条评论
I’ve awarded the 30 points because these how to in steps are just great. One little critic, having read other stuff I understood the later models had greater risks of breaking things because of the more complicated wifi and mic cables, and these steps could have been better explained, like do the wifi cables plug in or slide off a splade like connection, and what can I use as a pry tool from around the house. These are the frightening steps to someone who has not done this unit before, while just about everything else isn’t much different to opening and taking parts out of a laptop.
Thank You, I was having fan noise issues with my NUCi7BEH and was trying to figure out how to pop the MOBO from the case.
This guide was fantastic, loads of dust collected on the heat sink, clean air and it seems to be running great now.
Ave temp before this clean out was 65ºC but would spike from 90-100ºC under any load at all, even the VMs just spinning up.
Now after clean, all is good, temps idle sitting at around 35ºC now and under load about 70º C. Huge difference.
Big Thanks to Vladimir for making this wonderful guide.
Thanks, Vladimir Knobel, for putting together this excellent instruction with video and pictures. I used it to remove and replace my fan. I greatly appreciate it!!
merci, ça m’a bien aidé et j’espère avoir résolu ce pb de ventirad, j’ai pu dépoussiérer. encore merci.