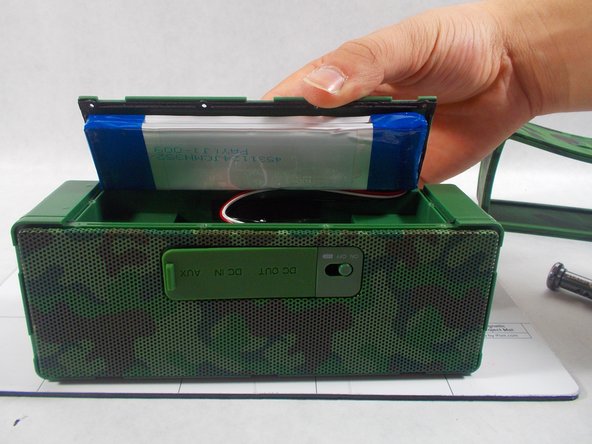
跳转到主内容

Insignia NS-SPBTBRICK-CM USB Port Replacement

你所需要的

  1. 注意:步骤 1-4 源自标记为进行中的 指南

    Insignia NS-SPBTBRICK-CM USB Port Replacement, Battery: 步骤 1 中的图像 1,1
    • Remove the rubber sleeve.

  2. Insignia NS-SPBTBRICK-CM USB Port Replacement: 步骤 2 中的图像 1,1
    • Use the specified screwdriver to unscrew the ten screws on the back cover.

  3. Insignia NS-SPBTBRICK-CM USB Port Replacement: 步骤 3 中的图像 1,2 Insignia NS-SPBTBRICK-CM USB Port Replacement: 步骤 3 中的图像 2,2
    • Remove the back cover. Be careful to not lose any of the screws because they are extremely small and can be easily lost.

  4. Insignia NS-SPBTBRICK-CM USB Port Replacement: 步骤 4 中的图像 1,3 Insignia NS-SPBTBRICK-CM USB Port Replacement: 步骤 4 中的图像 2,3 Insignia NS-SPBTBRICK-CM USB Port Replacement: 步骤 4 中的图像 3,3
    • The battery will be attached to the back cover with sticky tape. Unplug the wires connecting the battery to the speaker.

  5. Insignia NS-SPBTBRICK-CM USB Port Replacement, USB Port: 步骤 5 中的图像 1,1
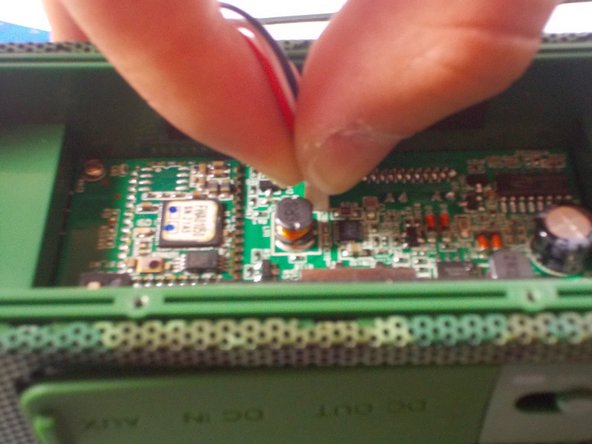
    • Once the battery and back cover have been successfully removed, use the soldering iron. Place the soldering iron on the solders until properly heated.

  6. 在这个步骤中使用的工具:
    Tweezers
    $4.99
    购买
    • Once the metal is heated, it will be easy to remove the piece. Be careful not to alter the circuit board in any way with the heat. Use tweezers to remove the old part. Be careful not to touch the piece with your hands because the piece will be very hot.

  7. Insignia NS-SPBTBRICK-CM USB Port Replacement: 步骤 7 中的图像 1,1
    • Once the switch has been removed properly, place the new switch in the same spot as the old one.

  8. Insignia NS-SPBTBRICK-CM USB Port Replacement: 步骤 8 中的图像 1,1
    • Use the soldering iron to melt the existing solders and attach the new switch onto where the old switch was located.

  9. Insignia NS-SPBTBRICK-CM USB Port Replacement: 步骤 9 中的图像 1,3 Insignia NS-SPBTBRICK-CM USB Port Replacement: 步骤 9 中的图像 2,3 Insignia NS-SPBTBRICK-CM USB Port Replacement: 步骤 9 中的图像 3,3
    • After the new piece is properly melted into place, put the battery and back cover onto the device and screw the cover back on using the specified screwdriver and the ten screws.

结论

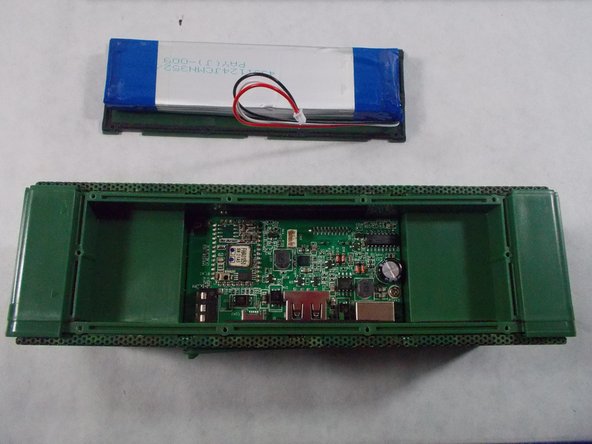
To reassemble your device, follow these instructions in reverse order.

Erin Steele

于03/08/17注册

649 声望

创作了5篇指南

团队

0条评论

添加评论

浏览统计数据:

过去 24 小时: 0

过去 7 天: 0

过去 30 天: 1

总计 142