跳转到主内容

Insignia Flex 8 NS-P16AT08 Speakers Replacement

你所需要的

  1. Insignia Flex 8 NS-P16AT08 Speakers Replacement, Back Casing: 步骤 1 中的图像 1,3 Insignia Flex 8 NS-P16AT08 Speakers Replacement, Back Casing: 步骤 1 中的图像 2,3 Insignia Flex 8 NS-P16AT08 Speakers Replacement, Back Casing: 步骤 1 中的图像 3,3
    • Make sure device is powered off.

    • Wedge the plastic opening tool anywhere in the seam between the back casing and screen.

    • Slide the plastic opening tool along the sides and corners of the seam of the device while it separates from the screen.

    • You will hear the popping sound of the plastic connections separating from the device.

  2. Insignia Flex 8 NS-P16AT08 Speakers Replacement: 步骤 2 中的图像 1,1
    • Lift the back casing away from the screen.

    • Set casing aside.

  3. Insignia Flex 8 NS-P16AT08 Speakers Replacement, Speakers: 步骤 3 中的图像 1,2 Insignia Flex 8 NS-P16AT08 Speakers Replacement, Speakers: 步骤 3 中的图像 2,2
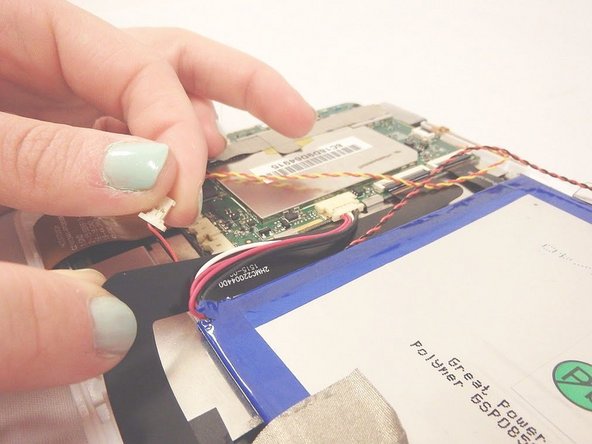
    • There are two connections that attach the speakers to the motherboard.

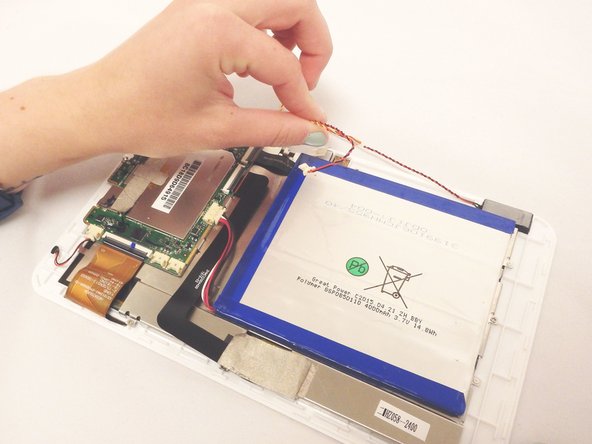
    • Unplug the cables from the motherboard by gently pulling them away.

    • Speaker cables will be free to be removed.

  4. Insignia Flex 8 NS-P16AT08 Speakers Replacement: 步骤 4 中的图像 1,2 Insignia Flex 8 NS-P16AT08 Speakers Replacement: 步骤 4 中的图像 2,2
    • Remove the tape that is holding the speaker cables down.

    • Remove the speaker cables from underneath the black connector ribbons.

    • The cables are hooked underneath black connector ribbons; carefully unhook them.

  5. Insignia Flex 8 NS-P16AT08 Speakers Replacement: 步骤 5 中的图像 1,1
    • Gently pry both speakers away from adhesive with metal spudger tool.

    • Always use a nylon spudger or plastic opening tool before a metal spudger. Metal spudgers are great for serious prying power but can damage your device if used incorrectly.

    • The speakers can now be completely removed from the device.

结论

To reassemble your device, follow these instructions in reverse order.

0条评论

添加评论

浏览统计数据:

过去 24 小时: 0

过去 7 天: 0

过去 30 天: 0

总计 208