跳转到主内容

IBM ThinkPad A31 CPU Replacement

你所需要的

  1. IBM ThinkPad A31 CPU Replacement, Hard Drive: 步骤 1 中的图像 1,3 IBM ThinkPad A31 CPU Replacement, Hard Drive: 步骤 1 中的图像 2,3 IBM ThinkPad A31 CPU Replacement, Hard Drive: 步骤 1 中的图像 3,3
    • Remove the 6mm screw

    • Pull out the hard drive

    • The hard drive might be a little tough to pull out

  2. IBM ThinkPad A31 CPU Replacement, Keyboard: 步骤 2 中的图像 1,3 IBM ThinkPad A31 CPU Replacement, Keyboard: 步骤 2 中的图像 2,3 IBM ThinkPad A31 CPU Replacement, Keyboard: 步骤 2 中的图像 3,3
    • The sticker is to keep the warranty on the laptop so once removed the warranty is void

    • Peel the sticker and remove the 15mm screw

    • Remove all 6 of the 16mm screws

  3. IBM ThinkPad A31 CPU Replacement: 步骤 3 中的图像 1,2 IBM ThinkPad A31 CPU Replacement: 步骤 3 中的图像 2,2
    • use a prying tool and insert it on the cracks on the sides of the keyboard and lift gently until you here a click

    • repeat this step on all sides of the keyboard until the keyboard is completely detached from the laptop

  4. IBM ThinkPad A31 CPU Replacement: 步骤 4 中的图像 1,3 IBM ThinkPad A31 CPU Replacement: 步骤 4 中的图像 2,3 IBM ThinkPad A31 CPU Replacement: 步骤 4 中的图像 3,3
    • Lift the keyboard and remove the keyboard ribbon cable from the laptop

  5. IBM ThinkPad A31 CPU Replacement, Display: 步骤 5 中的图像 1,2 IBM ThinkPad A31 CPU Replacement, Display: 步骤 5 中的图像 2,2
    • Remove the one 21mm screw

    • Remove the 6mm screw

  6. IBM ThinkPad A31 CPU Replacement: 步骤 6 中的图像 1,2 IBM ThinkPad A31 CPU Replacement: 步骤 6 中的图像 2,2
    • Take the tool and run it under the black case.

  7. IBM ThinkPad A31 CPU Replacement: 步骤 7 中的图像 1,3 IBM ThinkPad A31 CPU Replacement: 步骤 7 中的图像 2,3 IBM ThinkPad A31 CPU Replacement: 步骤 7 中的图像 3,3
    • Unscrew the 2 (17mm) screws

    • Unscrew the 6mm screw

  8. IBM ThinkPad A31 CPU Replacement: 步骤 8 中的图像 1,2 IBM ThinkPad A31 CPU Replacement: 步骤 8 中的图像 2,2
    • Gently disconnect the white display ribbon cable

    • Pulling on the ribbon cable too hard could result in worse or faulty connection.

  9. IBM ThinkPad A31 CPU Replacement: 步骤 9 中的图像 1,3 IBM ThinkPad A31 CPU Replacement: 步骤 9 中的图像 2,3 IBM ThinkPad A31 CPU Replacement: 步骤 9 中的图像 3,3
    • Unscrew 4 (6mm) screws

    • Lift screen straight up

    • If not lifted straight up the screen could get damaged

  10. IBM ThinkPad A31 CPU Replacement, Battery: 步骤 10 中的图像 1,2 IBM ThinkPad A31 CPU Replacement, Battery: 步骤 10 中的图像 2,2
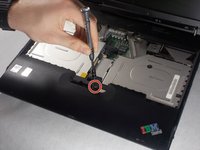
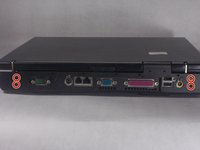
    • Flip the ThinkPad over so that it is upside down.

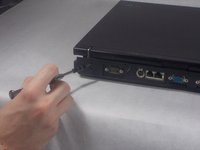
    • Push latch switch to the left.

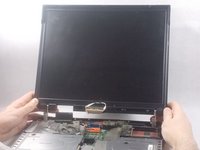
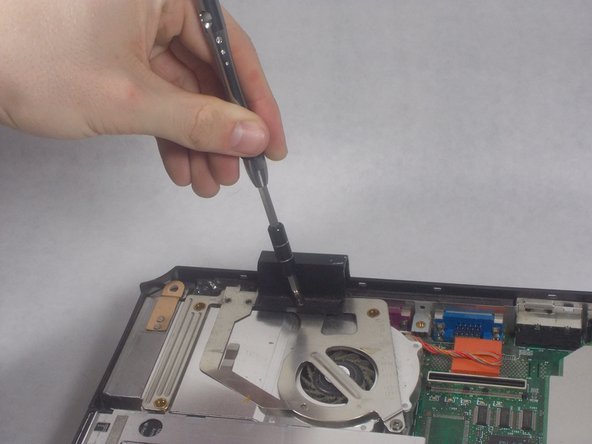
    • Gently lift the battery out and away from the ThinkPad

    • You have to hold the latch to the left while you remove the battery. Simply pushing once will not unlock the battery

  11. IBM ThinkPad A31 CPU Replacement, CPU: 步骤 11 中的图像 1,3 IBM ThinkPad A31 CPU Replacement, CPU: 步骤 11 中的图像 2,3 IBM ThinkPad A31 CPU Replacement, CPU: 步骤 11 中的图像 3,3
    • Remove the 6mm screw

    • LIft the bracket out

  12. IBM ThinkPad A31 CPU Replacement: 步骤 12 中的图像 1,3 IBM ThinkPad A31 CPU Replacement: 步骤 12 中的图像 2,3 IBM ThinkPad A31 CPU Replacement: 步骤 12 中的图像 3,3
    • Remove one 6mm screw

    • Remove 3 18mm screws

    • Take off the bracket on the CPU fan

  13. IBM ThinkPad A31 CPU Replacement: 步骤 13 中的图像 1,3 IBM ThinkPad A31 CPU Replacement: 步骤 13 中的图像 2,3 IBM ThinkPad A31 CPU Replacement: 步骤 13 中的图像 3,3
    • Lift the CPU fan

    • Pull out the cable attached to the motherboard

  14. IBM ThinkPad A31 CPU Replacement: 步骤 14 中的图像 1,2 IBM ThinkPad A31 CPU Replacement: 步骤 14 中的图像 2,2
    • Turn the locking screw to unlock with the flat head screwdriver

    • LIft the CPU out

结论

To reassemble your device, follow these instructions in reverse order.

另外一个人完成了本指南。

Thomas Stone

于03/19/18注册

235 声望

创作了2篇指南

团队

UMass Dartmouth, Team S2-G2, Bernier Spring 2018 UMass Dartmouth, Team S2-G2, Bernier Spring 2018 的会员

UMASSD-BERNIER-S18S2G2

3 名成员

创作了10篇指南

0条评论

添加评论

浏览统计数据:

过去 24 小时: 2

过去 7 天: 4

过去 30 天: 10

总计 887