简介
A complete teardown guide for the IBM ThinkPad 701C and 701CS models. For repair, refurbishing guides, and reproduction parts, visit https://701c.org.
This guide will use the two-letter screw reference IDs in brackets after the length. These IDs are found on page 161 of the service manual.
你所需要的
视频概述
Complete 701C Restoration
精选文档
-
-
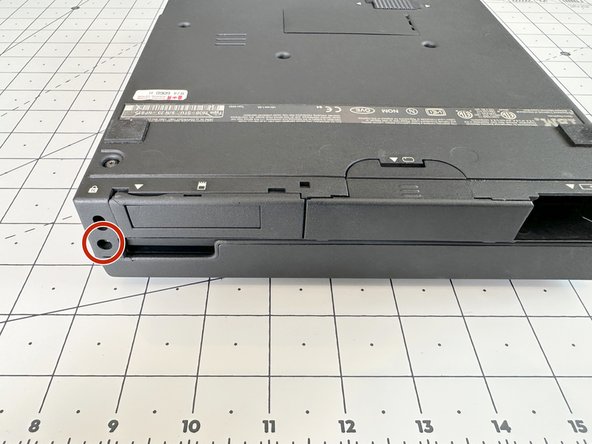
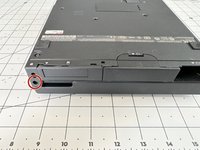
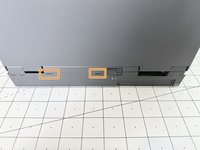
Remove the 6mm (BC) screw with a T6 Torx bit from the right side by the screen hinge.
-
Rotate the laptop so the screen hinge is at the rear. Remove the 16mm (BK) screw using a T6 Torx bit.
-
-
-
Open the screen so its a bit past vertical and rotate the back of the laptop toward you.
-
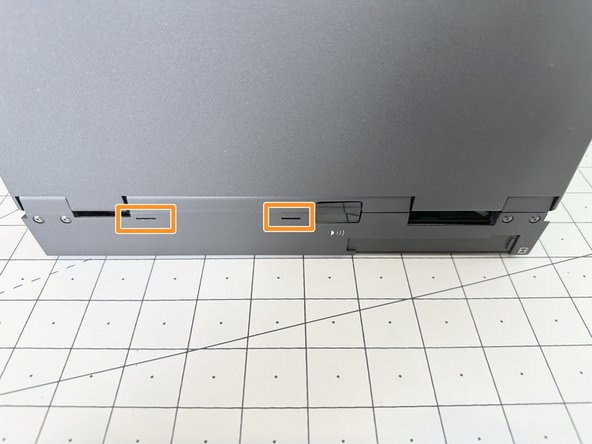
Using a plastic spudger, push the two plastic tabs while lifting up gently on the top plate.
-
Lay the screen completely flat and use a plastic spudger to push the back of the top plate up and towards you.
-
You should now able to lift the top plate up and out, exposing the LCD converter board and keyboard track.
-
-
-
Remove the PCMCIA cover by pushing out on the top edge and rotating downward to release the hard drive.
-
Remove the Hard disk drive by sliding the unlock button and pushing it out. The HDD should be removed after the Battery and the PCMCIA cover to avoid damage to the plastic clips.
-
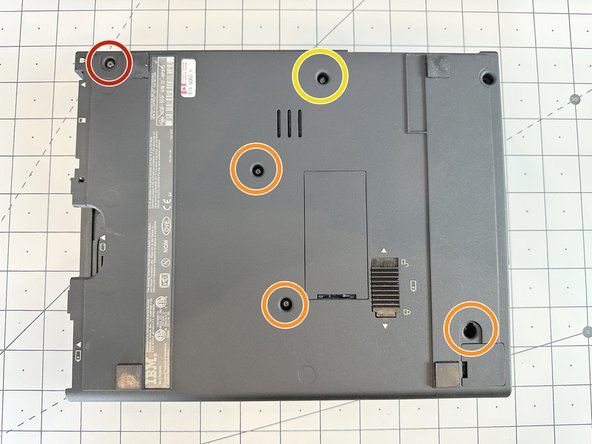
Flip the laptop over so the screen hinge is facing away from you. Remove the 8mm (BH) screw at the top left with a T6 Torx bit.
-
Remove the three (3) 6mm (BC) screws from the middle and bottom right with a T6 Torx bit.
-
Remove the 10mm (BE) screw from the top center with a T6 Torx bit.
-
Remove the four (4) 3mm (BF) screws freom the front of the lowe case using a T1 Torx bit.
-
-
-
Flip the laptop over so that the display hinge is facing you and open the display to a 90 degree angle from the chasis.
-
Remove the four (4) 7.5mm (BG) screws from the back using a T6 Torx bit. At this point the screen will come free.
-
Carefully pull up to remove it from its posts and rest backwards, exposing the next screw.
-
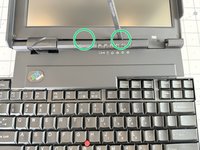
Remove the 6mm (BC) screw from the top right of the chasis using a T6 Torx bit.
-
-
-
-
To remove the keyboard, push the assembly back towards the display, releasing it from the front clips and tilt it up towards the display.
-
Using a plastic Spudger tool, remove the ribbon cables from connectors and set it aside.
-
Lift off the keyboard and set aside.
-
-
-
Disconnect microphone cable from the daughter board using a plastic spudger tool.
-
Disconnect the power cable to the display inverter board.
-
Disconnect display ribbon cables from the daughter board using a plastic spudger tool.
-
Pull the display up and away and set aside.
-
-
-
Disconnect the speaker cable.
-
Use a plastic spuger to press down on the system board where indicated during the next step to safely disconnect the daughter board from the main system board.
-
To disconnect daughter board from connector. Tilt up from right side and remove up and to the left.
-
-
-
Remove two (2) flat 6mm (BL) screws close to the connector using a T6 Torx bit.
-
Turn the case around so the back is facing you and remove two (2) 6mm (BC) screws from the back holding the connector to the metal stiffener.
-
Lift off main board.
-
A metal PCB spacer might loosen. Ensure that you clip it back onto the board during assembly.
-
-
-
Using a plastic spudger or a hobby knife, carefully loosen the glue between the speaker and the case.
-
Remove the speaker and set aside.
-
-
-
Remove the four (4) 8.4mm (BD) screws from the inside frame using a T6 Torx bit.
-
Remove the two (2) 8mm (BH) screws from the bottom left display bracket using a T6 Torx bit.
-
Remove the two (2) 5mm (BI) screws from the bottom right display bracket using a T6 Torx bit.
-
Lift off the left hinge cover before proceeding to the next step.
-
-
在这个步骤中使用的工具:Tweezers$4.99
-
Use a plastic pick to unclip the T-shaped snaps along the sides of the bezel.
-
The top of the bezel may be glued to the frame. Carefully dislodge the bezel from the glue before lifting the frame out and away.
-
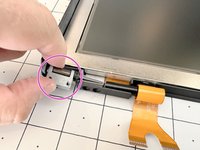
After removing the bezel, you can remove the display hinges by lifting them up and out.
-
The display should now come away freely from the frame.
-
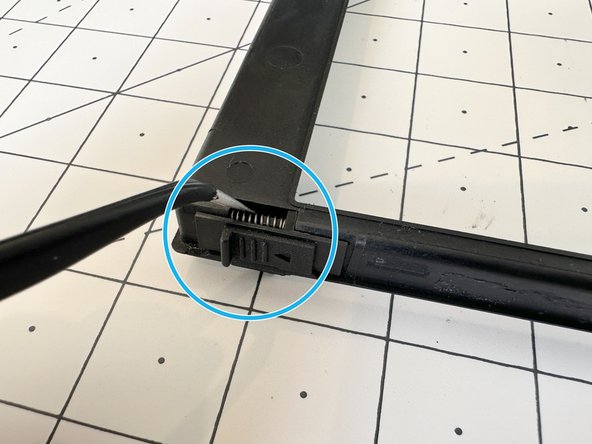
If needed, you can remove the display latches from the back of the bezel by using a pair of tweezers to squeeze the springs. The latches sould pop out.
-


To reassemble your device, follow these instructions in reverse order.
5等其他人完成本指南。
