跳转到主内容

IBM ThinkPad 560z Hard Drive Replacement

你所需要的

  1. IBM ThinkPad 560z Hard Drive Replacement, Upper Case: 步骤 1 中的图像 1,1
    • Remove the 7 mm Phillips #0 screws.

    • Remove the 10 mm Phillips #0 screws.

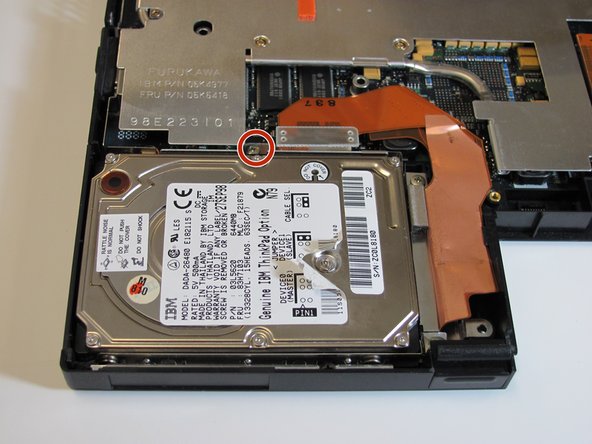
    • Remove the 14 mm Phillips #0 screw.

  2. IBM ThinkPad 560z Hard Drive Replacement: 步骤 2 中的图像 1,2 IBM ThinkPad 560z Hard Drive Replacement: 步骤 2 中的图像 2,2
    • Open the flap on the left hand side.

  3. IBM ThinkPad 560z Hard Drive Replacement: 步骤 3 中的图像 1,2 IBM ThinkPad 560z Hard Drive Replacement: 步骤 3 中的图像 2,2
    • Insert the plastic opening tools between the right and left sides of the latch.

    • Pry the right side of the latch, and then pry the left side to detach the laptop's cover.

  4. IBM ThinkPad 560z Hard Drive Replacement: 步骤 4 中的图像 1,2 IBM ThinkPad 560z Hard Drive Replacement: 步骤 4 中的图像 2,2
    • Open the flap on the right side.

  5. IBM ThinkPad 560z Hard Drive Replacement: 步骤 5 中的图像 1,1
    • Insert the plastic opening tools towards the right side of the latch.

    • Gently pry the right side out to release the top cover.

  6. IBM ThinkPad 560z Hard Drive Replacement: 步骤 6 中的图像 1,2 IBM ThinkPad 560z Hard Drive Replacement: 步骤 6 中的图像 2,2
    • Lift the keyboard slowly.

    • A cable connects the keyboard to the motherboard. If you are not careful, you will damage the cable.

  7. IBM ThinkPad 560z Hard Drive Replacement: 步骤 7 中的图像 1,1
    • Use your fingers or a spudger to detach the connector.

  8. IBM ThinkPad 560z Hard Drive Replacement: 步骤 8 中的图像 1,2 IBM ThinkPad 560z Hard Drive Replacement: 步骤 8 中的图像 2,2
    • Carefully lift and remove the keyboard.

  9. IBM ThinkPad 560z Hard Drive Replacement, Hard Disk Drive: 步骤 9 中的图像 1,1
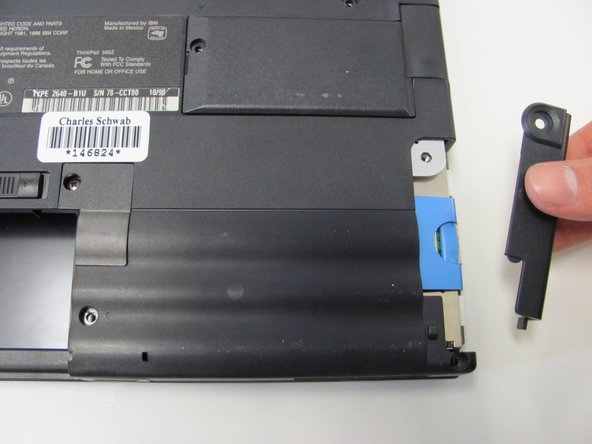
    • On the back of the computer, use a Flathead screwdriver to remove this lone screw.

  10. IBM ThinkPad 560z Hard Drive Replacement: 步骤 10 中的图像 1,2 IBM ThinkPad 560z Hard Drive Replacement: 步骤 10 中的图像 2,2
    • After the screw is out, gently remove the cover.

  11. IBM ThinkPad 560z Hard Drive Replacement: 步骤 11 中的图像 1,3 IBM ThinkPad 560z Hard Drive Replacement: 步骤 11 中的图像 2,3 IBM ThinkPad 560z Hard Drive Replacement: 步骤 11 中的图像 3,3
    • Turn the computer back over so the hard drive faces up. Remove the shown screw with a Phillips screwdriver.

  12. IBM ThinkPad 560z Hard Drive Replacement: 步骤 12 中的图像 1,1
    • Make sure you are grounded and detach the IDA cable connecting the hard disk to the motherboard.

  13. IBM ThinkPad 560z Hard Drive Replacement: 步骤 13 中的图像 1,2 IBM ThinkPad 560z Hard Drive Replacement: 步骤 13 中的图像 2,2
    • Remove the final two screws (shown) and slide out the hard drive.

结论

To reassemble your device, follow these instructions in reverse order.

2等其他人完成本指南。

Derek Driscoll

于04/15/10注册

119 声望

创作了8篇指南

团队

Cal Poly, Team 26-27, Regan Spring 2010 Cal Poly, Team 26-27, Regan Spring 2010 的会员

CPSU-REGAN-S10S26G27

3 名成员

创作了18篇指南

一条评论

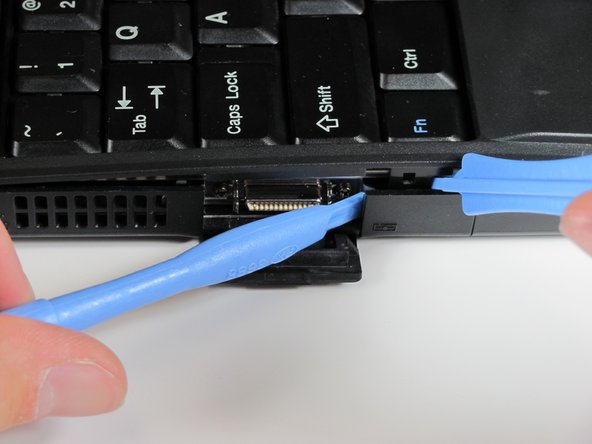
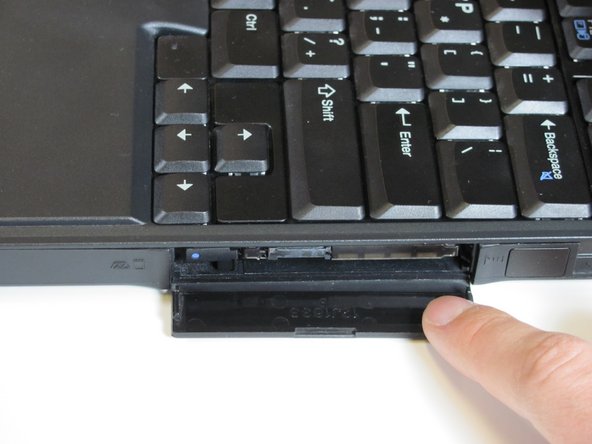
You don't have to go to this length to remove the hard drive on a 560Z. Only do steps 0 (remove battery), 9 (remove screw) and 10 (remove cover). Then simply grab the blue tab of the hard drive caddy and pull the drive out of the bay. Complete directions on maintenance of the IBM Thinkpad 560Z can be found here:

http://www.thinkpads.com/support/hmm/hmm...

The Hardware Maintenance Manual has all of the information you need to take a 560Z apart and put it back together.

The procedure outlined here is similar to what the 560, 560E and 560X systems required; the 560Z is totally different when removing the hard drive.

Raymond - 回复

添加评论

浏览统计数据:

过去 24 小时: 1

过去 7 天: 3

过去 30 天: 8

总计 3,826