跳转到主内容

华为P10 Plus 电池更换

你所需要的

  1. 华为P10 Plus 电池更换, 显示屏: 步骤 1 中的图像 1,3 华为P10 Plus 电池更换, 显示屏: 步骤 1 中的图像 2,3 华为P10 Plus 电池更换, 显示屏: 步骤 1 中的图像 3,3
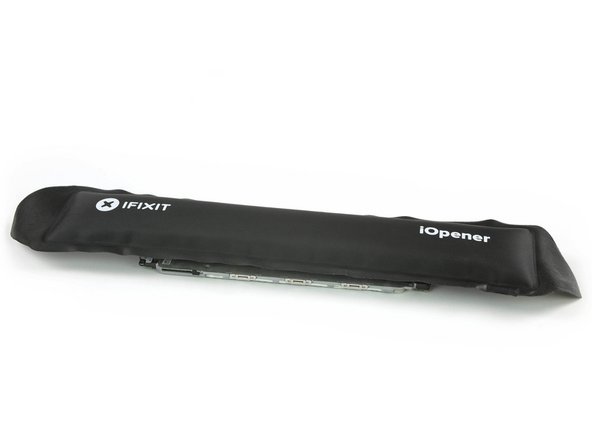
    • 使用iOpener 软化显示屏下方的粘合剂,聚焦在显示屏的上部和下部。

    • 使用撬刀或iFlex分离显示屏四周的粘合剂。

    • 为避免损坏显示屏,请勿将工具太深地推入手机中。

  2. 华为P10 Plus 电池更换: 步骤 2 中的图像 1,3 华为P10 Plus 电池更换: 步骤 2 中的图像 2,3 华为P10 Plus 电池更换: 步骤 2 中的图像 3,3
    • 屏幕和手机之间有一根薄的显示屏电缆,打开设备时要小心不要撕开它。

    • 将一个吸盘或iSclack放在手机的上部,然后将显示器从中框上抬起。

    • 请勿卸下显示器,将电缆固定在拧在手机上的支架下。你可以翻转显示屏将其放下而不会拉紧电缆,或者只需按住下一步即可。

  3. 华为P10 Plus 电池更换: 步骤 3 中的图像 1,3 华为P10 Plus 电池更换: 步骤 3 中的图像 2,3 华为P10 Plus 电池更换: 步骤 3 中的图像 3,3
    • 打开覆盖显示屏柔性电缆的金属屏蔽层。

    • 使用撬棒断开显示屏柔性电缆。

    • 取下显示屏。

    • 重新组装手机时,请使用双面胶带或预先切割的胶条替换旧胶粘剂。

  4. 华为P10 Plus 电池更换, 中框: 步骤 4 中的图像 1,2 华为P10 Plus 电池更换, 中框: 步骤 4 中的图像 2,2
    • 卸下15颗菲利普斯#00螺丝。

    • 卸下按住显示屏弯曲连接器的金属屏蔽盖。

  5. 华为P10 Plus 电池更换: 步骤 5 中的图像 1,3 华为P10 Plus 电池更换: 步骤 5 中的图像 2,3 华为P10 Plus 电池更换: 步骤 5 中的图像 3,3
    • 卸下SIM卡托盘。

    • 用撬棒的尖端撬起中间框架,直到获得良好的抓力。

  6. 华为P10 Plus 电池更换: 步骤 6 中的图像 1,3 华为P10 Plus 电池更换: 步骤 6 中的图像 2,3 华为P10 Plus 电池更换: 步骤 6 中的图像 3,3
    • 卸下中框。

    • 用撬棒断开电池柔性电缆。

  7. 华为P10 Plus 电池更换, 电池: 步骤 7 中的图像 1,3 华为P10 Plus 电池更换, 电池: 步骤 7 中的图像 2,3 华为P10 Plus 电池更换, 电池: 步骤 7 中的图像 3,3
    • 电池和主板之间有一个拉伸释放粘合片,在开始拉动之前用镊子将它们拉出间隙。

    • 通过以平角度稳定地拉动拉环来剥离粘合带。

    • 如果粘合带断裂,你可以抓住并绕镊子尖端扭转几次并继续拉动。

    • 按照加热说明操作,将iOpener放在电池上,以软化剩余的胶条。

  8. 华为P10 Plus 电池更换: 步骤 8 中的图像 1,3 华为P10 Plus 电池更换: 步骤 8 中的图像 2,3 华为P10 Plus 电池更换: 步骤 8 中的图像 3,3
    • 在以下步骤中,避免弯曲或刺破电池很重要,损坏可能导致电池起火。

    • 子板互连电缆在电池右侧下方,如红色所示。避免在这个区域撬动。

    • 在电池的左上角下方插入一个撬棒,小心地将其撬出。你还可以使用旧的礼品卡或信用卡。

    • 如果你可以将电池向右拨动并将其取下,请执行此操作,否则请切断左侧的剩余粘合剂。然后在电池右侧重复此过程,避开电缆区域。

  9. 华为P10 Plus 电池更换: 步骤 9 中的图像 1,2 华为P10 Plus 电池更换: 步骤 9 中的图像 2,2
    • 取出电池。

    • 重新组装手机时,请使用双面胶带或预先切割的胶条替换旧胶粘剂。

结论

请按逆序重组你的设备。如有必要,从新涂抹胶水。

15等其他人完成本指南。

由衷感谢以下译者:

en zh

100%

Yuting Zhao正在帮助我们修复这个世界! 您也想加入吗?
开始翻译 ›

Tobias Isakeit

于03/31/14注册

117,426 声望

创作了188篇指南

团队

Master Techs Master Techs 的会员

Community

322 名成员

创作了2,527篇指南

4条评论

good guide, took me a hour

the pull tab got torn when i tried pulling it so i had to get the battery out in the old fashion way praying it wont explode

edit: i had 14 screws not 15

מתן כהן לביא - 回复

Guida fatta bene Ok mi è venuta comodissima e o risolto sostituendo batteria ,vetro e carcassa in 30 min circa . Grazie

Globalit srl - 回复

Great description!

Indeed, the screw on the very bottom, second from the left is not there.

The battery tab broke as well, I could soften the adhesive with some isopropanol.

lija31415 - 回复

Vielen Dank für diese super Anleitung, hat alles prima geklappt. Einzig der Accu wollte nicht so leicht rausgehen.

gerhard.kleetz - 回复

添加评论

浏览统计数据:

过去 24 小时: 9

过去 7 天: 40

过去 30 天: 126

总计 22,623