简介
Screen replacement is one of the most common smartphone repairs. This guide will help you remove the broken screen and install a new one on Huawei Honor 9X. One specifity with this smartphone is that it has a pop-up frontal camera which must be disassembled to perform the repair. You can also use this guide to replace the battery since screen replacement includes the removal of it.
你所需要的
-
-
Turn off the phone
-
Use plastic picks and opening tools to remove the back cover
-
You can use a heat gun to soften the glue and reduce potential damage, but it is possible to remove the back cover without applying heat
-
Pay attention to not rip the flex connecting the fingerprint sensor to the motherboard, place the back cover next to the phone after separating them as shown in the image
-
-
-
Detach the black film covering the plate covering the motherboard
-
Be careful not to rip the film since it contains flexes and presumably temperature sensors
-
Unscrew 11 screws holding the plate covering motherboard and remove it
-
-
-
Remove the screw holding the flex going from the frontal camera
-
Disconnect the flexes going to the motherboard from the buttons, the screen, the battery, the bottom circuit board, the fingerprint sensor and the frontal camera use of an opening tool is recommended
-
Remove the SIM/SD-card tray either with a tool coming with the phone or a needle of sufficient size, otherwise the cards, the tray or the motherboard may be broken
-
Remove the motherboard
-
Remove the speaker marked on the second image
-
-
-
-
Unscrew the screws holding the frontal camera. The 3 metallic screws are the only ones different from the rest screws, make sure not to lose them
-
Roll out the camera to its highest position and notice that there is one more screw you need to remove uinder the flex
-
Ensure that the frontal camera is in the lowest position before removing it
-
-
-
Remove the 6 screws holding the speaker and the circuit cover marked in the first picture
-
Remove the speaker and the plastic cover
-
Disconnect the flexes going to the motherboard marked in the second image
-
Remove the circuit board and the vibromotor
-
-
-
Follow the markers on the film attached to the battery to unfold the film and remove the battery
-
You may need to use some force to detach the battery by pulling the film out of the smartphone
-
Do not use any charp tools to not damage the battery!
-
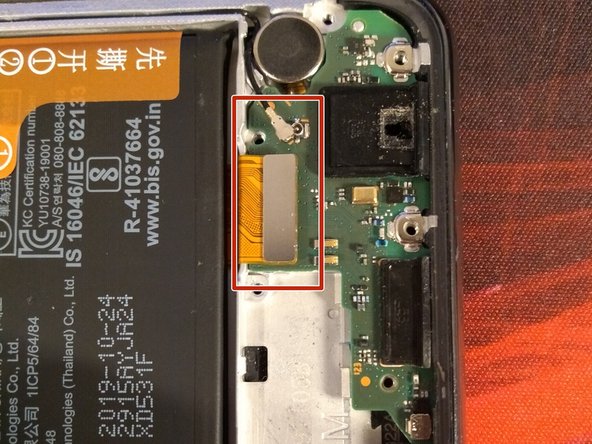
Detach the film covering the flexes
-
Remove the flexes connecting the motherbord and the bottom circuit board
-
-
-
Remove the screen similarly to how you removed the back cover in Step 1
-
Clean the frame from the remaining glue and glass shards if such are present
-
You can check the new screen by connecting the flexes coming from it, the battery, and the buttons, and turning on the smartphone as you normally do. Turn it back off and disconnect the flexes before attempting next spep
-
Apply the glue to the inner edge of the frame and quickly (within 1-2 minutes) attach the new screen, turn the phone screen-down on a clean even surface and press on it for 1-2 minutes for better adhesion
-
Remove the residual glue if such appeared on the frontal side
-


To reassemble your device, follow the instructions from (including) Step 6 in reverse order. The cleaning of all parts from dust is recommended. The back cover should be glued to the frame using the E-8000 glue you used to attach the screen.
To reassemble your device, follow the instructions from (including) Step 6 in reverse order. The cleaning of all parts from dust is recommended. The back cover should be glued to the frame using the E-8000 glue you used to attach the screen.