跳转到主内容

此翻译可能不反映源指南的最新更新。 帮助更新翻译查看源指南

如何疏通Keurig迷你B-31水软管

你所需要的

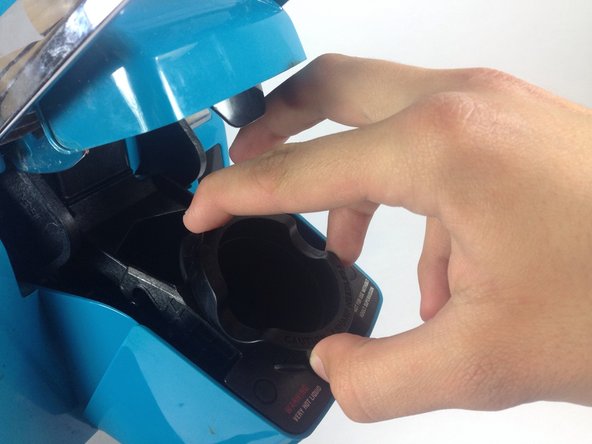
  1. 如何疏通Keurig迷你B-31水软管, K杯架: 步骤 1 中的图像 1,1
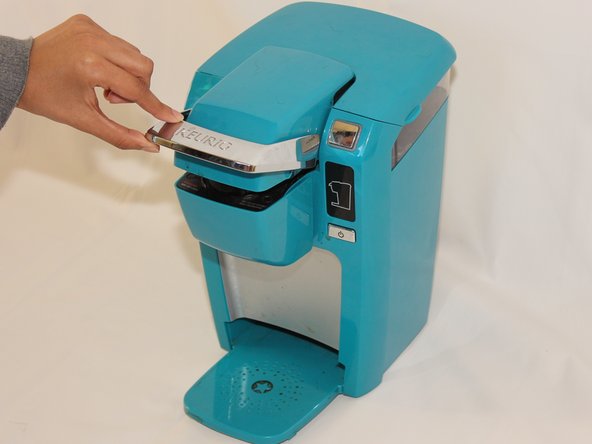
    • 举起的Keurig迷你手柄。

  2. 如何疏通Keurig迷你B-31水软管: 步骤 2 中的图像 1,2 如何疏通Keurig迷你B-31水软管: 步骤 2 中的图像 2,2
    • 一定要避免针上面和里面的k -因为可以刺破你的手

    • 坚决把一个手指放在三的标签,把K杯架到位,每一个,在轻轻推。标签是很难看到的,但他们的存在将使容易清除。顶部的标签位于同一个位置,白色的三角形和底部两个位于塑料凸点突出的图片。

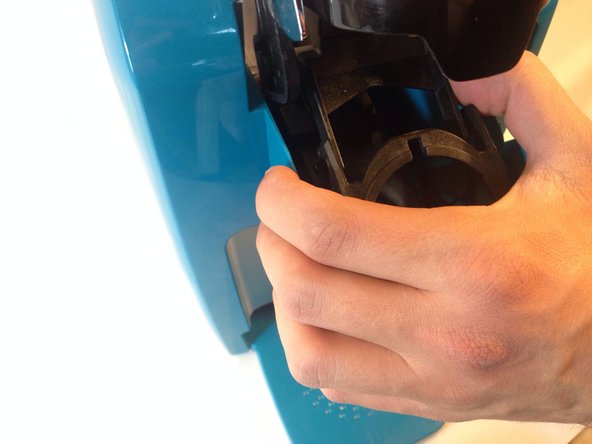
  3. 如何疏通Keurig迷你B-31水软管: 步骤 3 中的图像 1,2 如何疏通Keurig迷你B-31水软管: 步骤 3 中的图像 2,2
    • 牢固的岩石的K杯持有人从一侧到另一侧,放松的K杯持有人从其座位。

  4. 如何疏通Keurig迷你B-31水软管: 步骤 4 中的图像 1,1
    • 把K杯架取出。

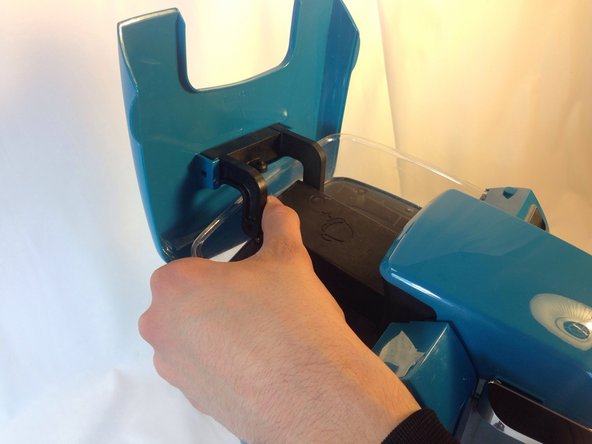
  5. 如何疏通Keurig迷你B-31水软管, 拆卸 Keurig Mini B-31 顶部: 步骤 5 中的图像 1,3 如何疏通Keurig迷你B-31水软管, 拆卸 Keurig Mini B-31 顶部: 步骤 5 中的图像 2,3 如何疏通Keurig迷你B-31水软管, 拆卸 Keurig Mini B-31 顶部: 步骤 5 中的图像 3,3
    • 打开 Keurig 的顶盖。

    • 用手抓住顶盖的其中一个连接臂直接向外拉。 这将需要大力一些,以挣脱插销。 一侧的连接臂脱离后,另一条连接臂也重复这个过程。

  6. 如何疏通Keurig迷你B-31水软管: 步骤 6 中的图像 1,1
    • 将 Keurig 翻面放置,使水箱指向远离你的位置。

  7. 如何疏通Keurig迷你B-31水软管: 步骤 7 中的图像 1,1
    • 躲避尖锐处,因为它可能会刺你的手。

    • 拧下固定顶部塑料盖的两颗 9mm #1 十字螺丝。

  8. 如何疏通Keurig迷你B-31水软管: 步骤 8 中的图像 1,1
    • 将 Keurig 以竖直方向摆放,并让正面对着你。

    • 从 Keurig 顶部拉下盖子。稍稍用力就能轻而易举的拿下。

  9. 如何疏通Keurig迷你B-31水软管: 步骤 9 中的图像 1,1
    • 牢牢抓住软管并将其从塑料喷嘴上拉出。

  10. 如何疏通Keurig迷你B-31水软管, 顶针: 步骤 10 中的图像 1,1
    • 拧下设备顶部的两个 9mm #1十字螺丝。

  11. 如何疏通Keurig迷你B-31水软管: 步骤 11 中的图像 1,1
    • 轻轻按下连接软管的喷嘴。 塑料外壳和针头一起弹出,不要太用力。

  12. 如何疏通Keurig迷你B-31水软管, 拆卸 Keurig Mini B-31 支撑臂: 步骤 12 中的图像 1,1
    • 拔下针头后,向上拉手柄即可打开设备。

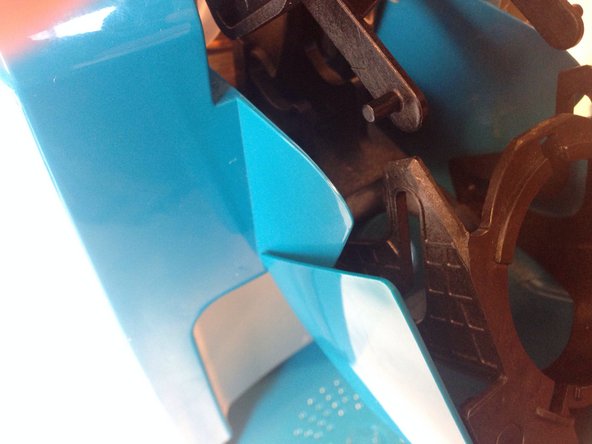
  13. 如何疏通Keurig迷你B-31水软管: 步骤 13 中的图像 1,3 如何疏通Keurig迷你B-31水软管: 步骤 13 中的图像 2,3 如何疏通Keurig迷你B-31水软管: 步骤 13 中的图像 3,3
    • 推入连接在K型杯架塑料外壳上的其中一个支撑臂,将其从导轨上取下。两侧的手臂是相同的,所以卸下一边之后,另一边重复该过程。

    • 他塑料是可弯曲的,不用太用力。

    • 一旦支架被删除,状态应该看起来像图片。 K杯架的外壳应该与支架分开。

  14. 如何疏通Keurig迷你B-31水软管: 步骤 14 中的图像 1,1
    • 使用1号十字螺丝刀卸下将支撑组件固定的四个12毫米螺丝。

  15. 如何疏通Keurig迷你B-31水软管: 步骤 15 中的图像 1,2 如何疏通Keurig迷你B-31水软管: 步骤 15 中的图像 2,2
    • 抬起支架并拉起手柄组件。 它应该很容易脱落。

    • 这个白色组件很容易脱落,将其取下放在一边,确保不会丢失。

  16. 如何疏通Keurig迷你B-31水软管, 如何疏通Keurig迷你B-31水软管: 步骤 16 中的图像 1,1
    • 举起的Keurig迷你臂得到它的方式。

    • 把水管在其基础而捏紧。

    • 在保持管子压力的同时,用手指滑动直到尖端挤出任何堵塞软管的材料。

    • 重复这个过程,直到所有的障碍被移除。

结论

将您的设备,遵循这些指示,以相反的顺序。

38等其他人完成本指南。

由衷感谢以下译者:

en zh

75%

Leeroy_正在帮助我们修复这个世界! 您也想加入吗?
开始翻译 ›

Andrew Adriance

于01/14/14注册

1,914 声望

创作了7篇指南

团队

Cal Poly, Team 17-1, Forte Winter 2014 Cal Poly, Team 17-1, Forte Winter 2014 的会员

CPSU-FORTE-W14S17G1

5 名成员

创作了17篇指南

42条评论

To clear the hose I needn't have gone beyond step 9. Once the hose is detached one can run a pipe cleaner down it. I was amazed how many coffee grounds were stuck way up there where there shouldn't be any!

A tip would be to use a magnetized screwdriver: I was worried that the screws would fall into the workings of the machine.

For the final step of reattaching the lid, having a second person would help or perhaps holding it between your knees might help - trying to apply pressure to the screws also made the arms/compartment want to collapse/ close so that was a bit of a challenge.

Very informative instructions and I now have a Keurig that works again!! :)

Linda Alphan - 回复

Thumbs up on the magnetized screwdriver tip

M A -

The screws are stainless steel and are thus not magnetic.

jastpeel -

The screws were magnetic for me.. they are probably a carbon steel Or galvanized. They aren’t stainless.

Amanda T -

While you have your brewer this far apart it would be wise to take a small wire or even a sewing needle and run it down the slightly squared, open side of both of the Keurig needles. You'll be surprised at how grounds have gotten in there and slowed the flow of output liquid, mine flows like a new one again.
mhb2661 - 回复

添加评论

浏览统计数据:

过去 24 小时: 7

过去 7 天: 39

过去 30 天: 196

总计 181,796