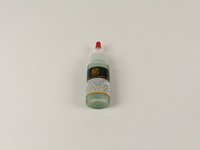
跳转到主内容

How to oil a Daisy Model 10 Carbine

你所需要的

  1. How to oil a Daisy Model 10 Carbine, Removing Screws: 步骤 1 中的图像 1,3 How to oil a Daisy Model 10 Carbine, Removing Screws: 步骤 1 中的图像 2,3 How to oil a Daisy Model 10 Carbine, Removing Screws: 步骤 1 中的图像 3,3
    • Make sure the safety is on!

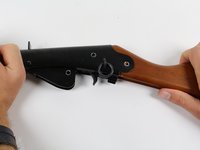
    • Place the carbine with the saddle ring and leather thong facing upwards.

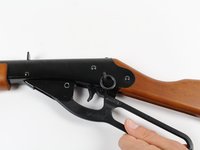
    • Locate the screw head on the cocking lever.

    • There should be one on either side of the saddle ring and one on the cocking lever assembly.

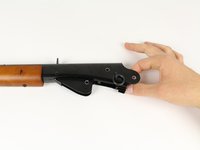
    • Place a #2 Phillips Screwdriver in the 11/16ths of an inch, matte black screw on the cocking lever assembly. Twist with a counter-clockwise motion.

    • Completely remove the screws.

    • Be wary of the black washers on the other side of the Carbine. Be sure to keep track of them once they fall out after the screws are removed

  2. How to oil a Daisy Model 10 Carbine, Removing the Lever: 步骤 2 中的图像 1,2 How to oil a Daisy Model 10 Carbine, Removing the Lever: 步骤 2 中的图像 2,2
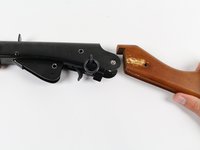
    • Remove the cocking lever by placing your dominant hand’s fingers through the cocking lever handle.

    • With your fingers in the handle, slide the lever towards the butt of the carbine.

    • Finally, pull the cocking lever and carbine in opposite directions to replace the cocking lever.

  3. How to oil a Daisy Model 10 Carbine, Removing Side Screws: 步骤 3 中的图像 1,2 How to oil a Daisy Model 10 Carbine, Removing Side Screws: 步骤 3 中的图像 2,2
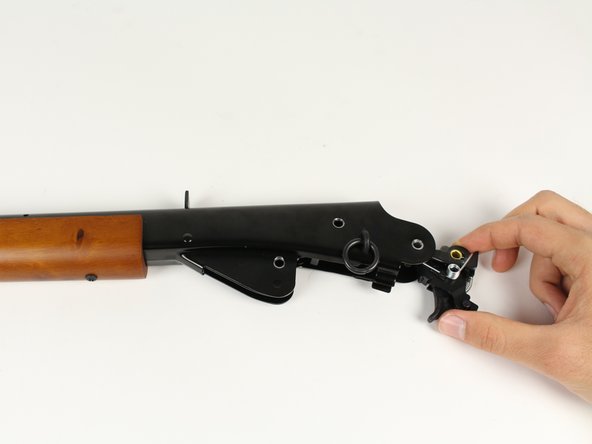
    • Once the cocking lever is removed, place the carbine with the saddle ring facing upwards.

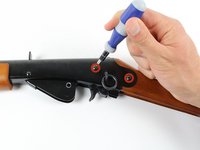
    • Locate the screws on either side of the saddle ring.

    • Using a #2 Phillips Screwdriver, twist in a counter-clockwise motion.

    • Completely remove the two screws.

    • Be wary of the two washers on the other side of the Carbine. Be sure to keep track of them once they fall out after the screws are removed

  4. How to oil a Daisy Model 10 Carbine, Removing Top Screw: 步骤 4 中的图像 1,2 How to oil a Daisy Model 10 Carbine, Removing Top Screw: 步骤 4 中的图像 2,2
    • Now rotate your carbine so the top of the carbine is visible.

    • Locate the screw located above the saddle ring where the black metal meets the wooden butt.

    • Using the same #2 Phillips Screwdriver, twist in a counter-clockwise motion.

    • Completely remove the screw.

    • Be wary that this screw is a different length, and that there is no washer attached to it.

  5. How to oil a Daisy Model 10 Carbine, Removing the Butt: 步骤 5 中的图像 1,2 How to oil a Daisy Model 10 Carbine, Removing the Butt: 步骤 5 中的图像 2,2
    • Place your dominant hand on the wooden butt and your other hand on the metal barrel.

    • Slide the butt away from the Carbine until it is free of the metal tongs.

    • The butt will not slide out quickly. The metal tongs grip the butt so that it is a tight fit.

  6. How to oil a Daisy Model 10 Carbine, Remove the Firing Mechanism: 步骤 6 中的图像 1,3 How to oil a Daisy Model 10 Carbine, Remove the Firing Mechanism: 步骤 6 中的图像 2,3 How to oil a Daisy Model 10 Carbine, Remove the Firing Mechanism: 步骤 6 中的图像 3,3
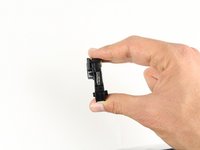
    • Wiggling the firing mechanism and pull it out of the back opening of the carbine.

    • There is oil on the firing mechanism and it may be slippery.

    • The firing mechanism may take some maneuvering and time to get out of the gun.

  7. How to oil a Daisy Model 10 Carbine, Oil Hole Oil Replacement: 步骤 7 中的图像 1,3 How to oil a Daisy Model 10 Carbine, Oil Hole Oil Replacement: 步骤 7 中的图像 2,3 How to oil a Daisy Model 10 Carbine, Oil Hole Oil Replacement: 步骤 7 中的图像 3,3
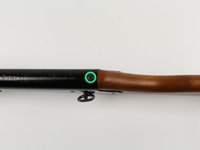
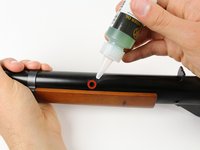
    • Locate the oil hole above the center of the forearm.

    • The forearm is the wooden portion of the gun that is not the butt.

    • Add two drops of 20 weight oil in the oil hole.

  8. How to oil a Daisy Model 10 Carbine, Firing Mechanism Oil Replacement: 步骤 8 中的图像 1,1
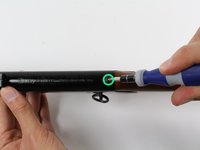
    • Place two to three drops of oil on the ridged area of the firing mechanism.

  9. How to oil a Daisy Model 10 Carbine, Cocking Lever Oil Replacement: 步骤 9 中的图像 1,1
    • Place two to three drops of oil on the cocking lever, to the right of the screw hole.

    • This will be near the point the cocking lever rotates about.

结论

To reassemble your device, follow these instructions in reverse order.

另外一个人完成了本指南。

Timothy Gachot

于10/12/14注册

237 声望

创作了2篇指南

团队

Cal Poly, Team 6-20, Maness Fall 2014 Cal Poly, Team 6-20, Maness Fall 2014 的会员

CPSU-MANESS-F14S6G20

4 名成员

创作了5篇指南

0条评论

添加评论

浏览统计数据:

过去 24 小时: 0

过去 7 天: 2

过去 30 天: 5

总计 1,029