简介
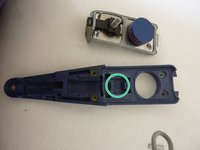
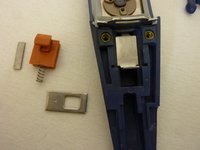
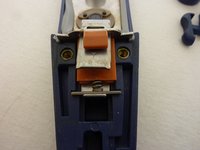
This is how the re-assembled steamer will look - notice how the locking mechanism is set up to work correctly
你所需要的
-
-
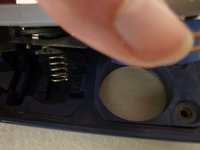
Take the metal plate (when you removed the gasket, you will have to put it on again; when you removed the valve, you have to pull the rubber part through the hole first, so that the groove covers the metal, then assemble the plastic part) and the black fork.
-
Pull the fork through the hole in the rubber gasket and push it under the square plastic part with the spring.
-
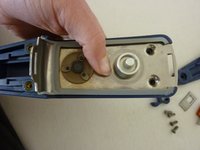
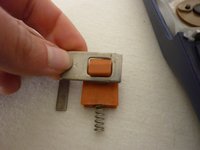
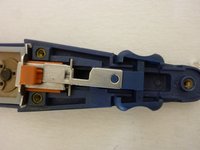
WARNING: The fork has a curved side which MUST point towards the spring (not towards the metal). The curved side of the square part must lean on the fork, as you can see in picture 3. When you do this step wrong, you will notice that the valve won't close.
-
-
-
Take the metal part and the plastic handle
-
The spring should be placed in the knob (see picture with green circle)
-
You may have to move the metal part a bit to the front so that it slides in correctly. Pay attention to the gasket, it should stay in it's place.
-
Insert both screws and tighten them.
-
-
-
-
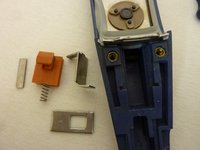
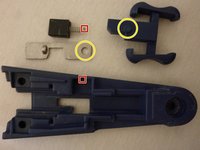
From the 4 parts, take the Z-shaped one (Top right) and place it with the more slim flap into the notch of the black fork.
-
Then you can lay the metal chip into the notch left.
-
-
-
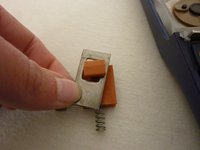
Now you can bring together the orange part with the spring and the metal chip which belongs to it (As seen in the picture).
-
After that, push the metal chip in the notch and press the spring behind the small metal chip.
-
If the Z-shaped part disturbs you at this point, pull it back while pressing on the valve. WARNING: While you are pulling, the part may slip out of the fork. To check, slide the valve once again forward, the small black valve should now lift up.
-
-
-
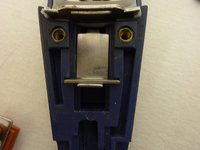
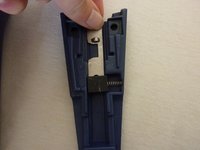
Place the black plastic part with the spring in the notch.
-
After that, you can slide the metal part under it.
-
Finally, you have to place the slider onto the metal chip so that it fits onto the knob.
-
-
-
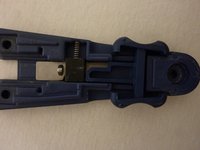
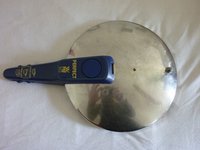
Lay the lid onto the handle, as seen in the picture.
-
The slider should be moved to the "closed"-position and the metal chip should connect with the Z-shaped part.
-
Place the screws in the right position and tighten them. Finished!
-
It would be good to test if the lid closes right. Fill some water into the pot, place and fasten the lid, turn on the stove and wait for the valve to close.
-


Follow instructions in reverse order for re-assembly.
57等其他人完成本指南。
由衷感谢以下译者:
100%

这些译者帮助我们修补全世界! 您也想加入吗?
开始翻译 ›
64指南评论
Wonderful step by step color photos layout. My handle valve got stuck rising under pressure. Looked for help on my computer and found Leni.
Quite impressed with positive steps shown. Took my time and fixed it on my first try. Now the valve is cleaned and does not stick at all. Could not have done it without your Professional Response towards this fine Pressure Cooker WMF.
THANK YOU KINDLY LENI, people like yourself are hero's too others like me who needed instruction. I THANK YOU again, you're the best!!! AP
Thank you for the really nice response. I am happy that I could help.
Leni -
Wunderbar.
Danke