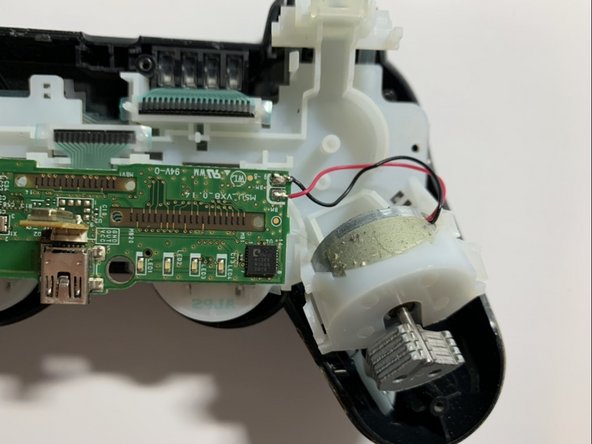
跳转到主内容

How to Fix/Prevent Joystick Drift on a DualShock 3

你所需要的

  1. How to Fix/Prevent Joystick Drift on a DualShock 3, How to Fix/Prevent Joystick Drift on a DualShock 3: 步骤 1 中的图像 1,1
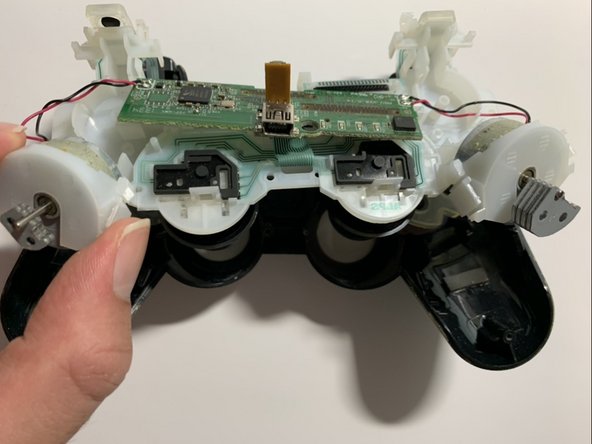
    • Use a Phillips #1 screwdriver to remove the five 7.2 mm Phillips screws which hold the back shell to the controller.

  2. How to Fix/Prevent Joystick Drift on a DualShock 3: 步骤 2 中的图像 1,1
    • Remove the back shell from the controller by pulling the front and back shells apart at the same time.

  3. How to Fix/Prevent Joystick Drift on a DualShock 3: 步骤 3 中的图像 1,3 How to Fix/Prevent Joystick Drift on a DualShock 3: 步骤 3 中的图像 2,3 How to Fix/Prevent Joystick Drift on a DualShock 3: 步骤 3 中的图像 3,3
    • Disconnect the battery from the controller by pressing the two sides of the connector and pulling it out.

    • Do not pull on the red and black wires to avoid damaging the connection.

  4. How to Fix/Prevent Joystick Drift on a DualShock 3: 步骤 4 中的图像 1,2 How to Fix/Prevent Joystick Drift on a DualShock 3: 步骤 4 中的图像 2,2
    • Use a toothpick to remove any sticky dirt like substances from the rumble motors.

    • Use the cotton swab to remove any dust particles or hairs from the rumble motors.

  5. How to Fix/Prevent Joystick Drift on a DualShock 3: 步骤 5 中的图像 1,2 How to Fix/Prevent Joystick Drift on a DualShock 3: 步骤 5 中的图像 2,2
    • Remove the motherboard by pushing the two white hooks on both the left and right side of the motherboard backwards.

  6. How to Fix/Prevent Joystick Drift on a DualShock 3: 步骤 6 中的图像 1,1
    • Use a Phillips #1 screwdriver to remove the single 7.2 mm screw, which secures the white body piece inside the controller.

  7. How to Fix/Prevent Joystick Drift on a DualShock 3: 步骤 7 中的图像 1,3 How to Fix/Prevent Joystick Drift on a DualShock 3: 步骤 7 中的图像 2,3 How to Fix/Prevent Joystick Drift on a DualShock 3: 步骤 7 中的图像 3,3
    • To remove the white body piece, start by using your fingers to unhook the small black hooks securing the left and right rumble motors.

  8. How to Fix/Prevent Joystick Drift on a DualShock 3: 步骤 8 中的图像 1,2 How to Fix/Prevent Joystick Drift on a DualShock 3: 步骤 8 中的图像 2,2
    • Remove the white body piece from the controller by pushing the unhooked left and right rumble motors in an upward direction.

  9. How to Fix/Prevent Joystick Drift on a DualShock 3: 步骤 9 中的图像 1,3 How to Fix/Prevent Joystick Drift on a DualShock 3: 步骤 9 中的图像 2,3 How to Fix/Prevent Joystick Drift on a DualShock 3: 步骤 9 中的图像 3,3
    • Use the brush to remove dust/dirt particles from the inside of the front shell.

    • Use a cotton swab to remove any dust/dirt particles in smaller crevices.

  10. How to Fix/Prevent Joystick Drift on a DualShock 3: 步骤 10 中的图像 1,2 How to Fix/Prevent Joystick Drift on a DualShock 3: 步骤 10 中的图像 2,2
    • Reattach the white body piece to the inside of the front shell by pushing the rumble motors back in place.

    • The rumble motors are properly secured when you can see that the small black hooks are holding them firmly in place.

  11. How to Fix/Prevent Joystick Drift on a DualShock 3: 步骤 11 中的图像 1,1
    • Place the battery back onto the motherboard.

    • Reconnect the battery by plugging the white connector piece back into the beige colored socket.

  12. How to Fix/Prevent Joystick Drift on a DualShock 3: 步骤 12 中的图像 1,1
    • Use the Phillips #1 screwdriver to screw the single 7.2 mm Phillips screw to secure the white body piece inside the controller.

  13. How to Fix/Prevent Joystick Drift on a DualShock 3: 步骤 13 中的图像 1,1
    • Snap the front and back shell together.

    • Screw the five 7.2 mm Phillips screws on the back shell screw holders, using the Phillips #1 screwdriver.

结论

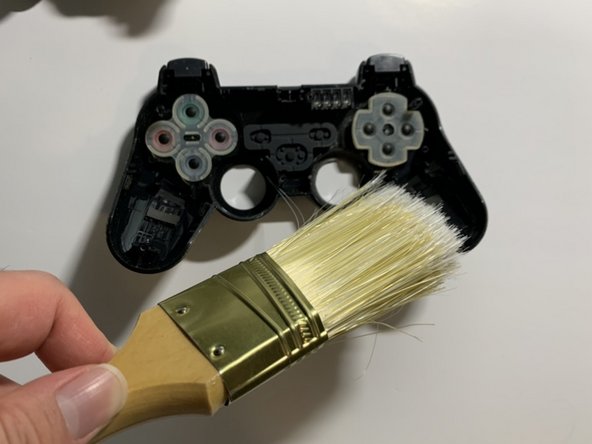
If this maintenance did not fix your joystick drift, you may need to replace the joysticks altogether.

7等其他人完成本指南。

Rohan Bangash

于07/04/22注册

424 声望

撰写一个指南

团队

York University, Team M-1, Allen Summer 2022 York University, Team M-1, Allen Summer 2022 的会员

YORK-ALLEN-SU22SMG1

1 名成员

创作了5篇指南

一条评论

This guide is very helpful to all the users of PS3 as this is commonly occurring problem in the gaming console controller. This quick fix can save people a lot of money from not sending controller to PS service station for repair. I really liked how detailed each step is described with proper instruction and to the point. The tools you used liked toothpicks and cotton swaps, are also some of the things which are easily available at everyone's house and there's no special need to go to market for it, which makes the fix much more easier.

Prarthit patel - 回复

添加评论

浏览统计数据:

过去 24 小时: 21

过去 7 天: 179

过去 30 天: 841

总计 16,554