简介
This guide takes you through the process of disassembling a small guitar practice amp to access the internals for repair. An Ibanez IBZ10BV2 10-watt bass practice amplifier is used to illustrate the process, but the general procedure applies to most other similar, low-priced solid state practice amplifiers.
你所需要的
-
-
Removing the back panel will allow you to access the speaker and main amplifier chassis
-
Identify and remove the screws holding on the back panel. On my particular Ibanez, 6 Philips head screws are used
-
Usually, guitar amplifiers will have a back panel that covers only around half of the amplifier cabinet, while bass amplifiers will have a back panel that seals the cabinet completely
-
-
-
The metal chassis houses the amplifier electronics themselves. You will need to remove it from the cabinet in order to access the power supply and main amplifier circuit board
-
Identify and remove the screws holding the chassis to the cabinet
-
Some mild adhesive may have been used as well. Once you are sure that all screws have been removed, gently push or pry the chassis away from the cabinet
-
-
-
-
Disconnect the speaker as shown, and remove the power lead clamp from the cabinet
-
The chassis should now be free from the cabinet
-
-
-
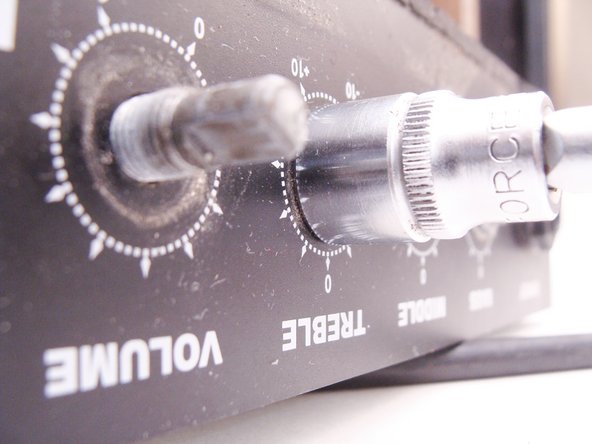
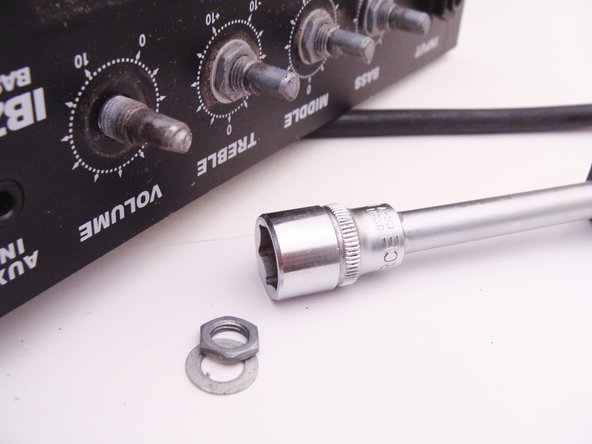
To remove the amplifier board from the chassis, you will first need to remove the volume and tone control knobs
-
Use a flat blade screwdriver to gently pry the knobs off the potentiometer shafts
-
After removing the knobs, use a socket wrench with the appropriately sized hex bit to remove the potentiometer nuts
-
Make sure to keep the accompanying washers along with the nuts for reassembly
-
-
-
Remove the nut and washer holding the 6.25mm guitar input jack to the chassis
-
Disconnect any wires going from the board to other parts of the chassis, such as to the power switch or power transformer
-
Identify and remove any other screws that might prevent removal of the board. On my Ibanez, two screws held the power amplifier IC heat-sink to the chassis. Removal of the screws and their accompanying lock washers allowed the board to be lifted off with the heat-sink
-
-
-
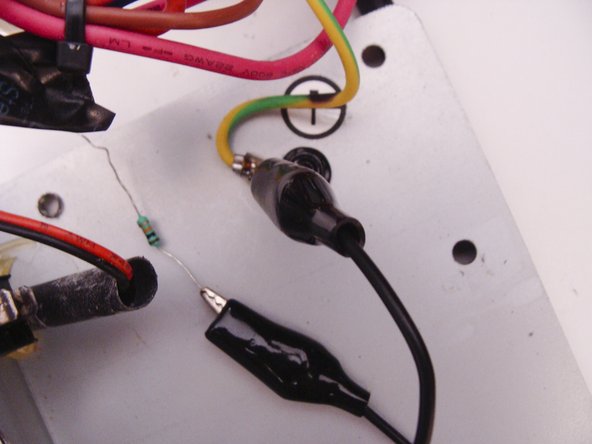
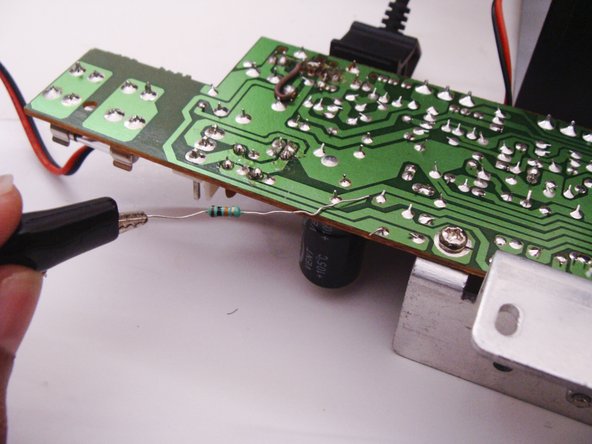
Connect one end of an alligator lead to the chassis ground, and the other lead to an 10K ohm resistor
-
Identify the power supply capacitors and touch the 10K ohm resistor's open lead to each of it's leads for a few seconds
-
If you are paranoid, you may check with a voltmeter to ensure that the capacitors are safely discharged
-
It should now be safe to work on your amplifier's circuit board
-


To reassemble your device, follow these instructions in reverse order.
To reassemble your device, follow these instructions in reverse order.
2等其他人完成本指南。