跳转到主内容

Hamilton Beach 49980A Main Housing Replacement

你所需要的

  1. Hamilton Beach 49980A Main Housing Replacement, Bottom Plate: 步骤 1 中的图像 1,3 Hamilton Beach 49980A Main Housing Replacement, Bottom Plate: 步骤 1 中的图像 2,3 Hamilton Beach 49980A Main Housing Replacement, Bottom Plate: 步骤 1 中的图像 3,3
    • Begin by inverting the coffee maker and resting it on a flat surface to make working on the bottom easier.

    • Now use a Y0 bit to remove all of the .46 inch long screws from the bottom.

    • Lift the plate to remove it from the rest of the machine.

  2. Hamilton Beach 49980A Main Housing Replacement, Motherboard: 步骤 2 中的图像 1,1
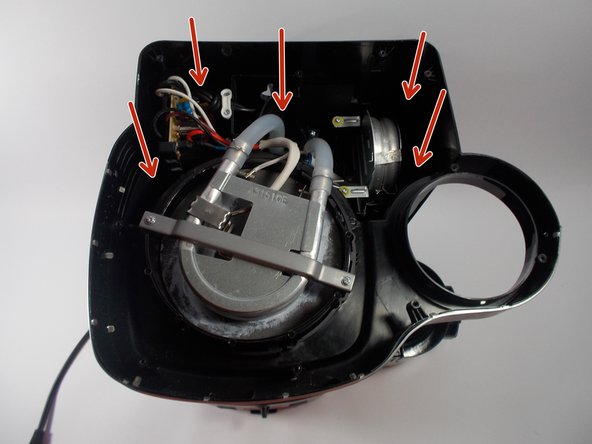
    • Once the bottom plate is removed, use a PH1 bit to remove the .525 inch long screws holding the motherboard bracket in the main housing.

  3. Hamilton Beach 49980A Main Housing Replacement: 步骤 3 中的图像 1,2 Hamilton Beach 49980A Main Housing Replacement: 步骤 3 中的图像 2,2
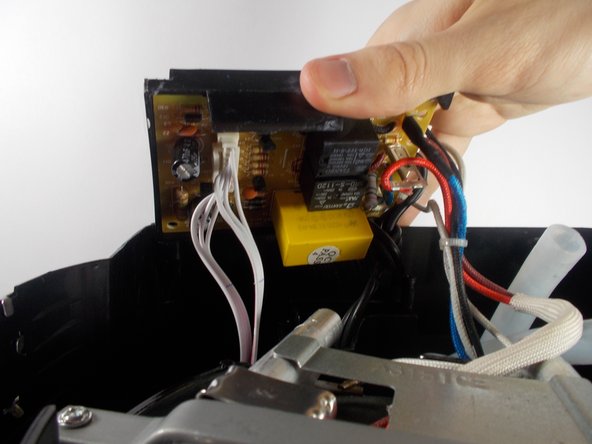
    • Using a PH1 bit, remove the two .425 inch long screws holding down the white power cord bracket. This will give you the slack in the wire that you need to work on the motherboard.

    • Carefully remove the large white connector that has multiple wires attached to it. This is the wire connected to the button functions on the interface of the coffee maker.

  4. Hamilton Beach 49980A Main Housing Replacement, Main Housing: 步骤 4 中的图像 1,1
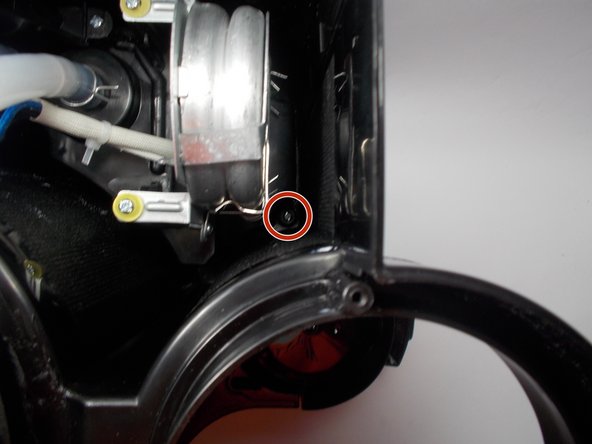
    • After removing the motherboard. Proceed to remove the inner housing which holds the excess power cord. This can be removed by using the PH1 bit to remove the .525 inch long screws that hold the housing in the main housing.

    • This step is crucial because if this inner housing is left attached, the power cord will bind between the two pieces that slide past each other during removal of the main housing.

  5. Hamilton Beach 49980A Main Housing Replacement: 步骤 5 中的图像 1,3 Hamilton Beach 49980A Main Housing Replacement: 步骤 5 中的图像 2,3 Hamilton Beach 49980A Main Housing Replacement: 步骤 5 中的图像 3,3
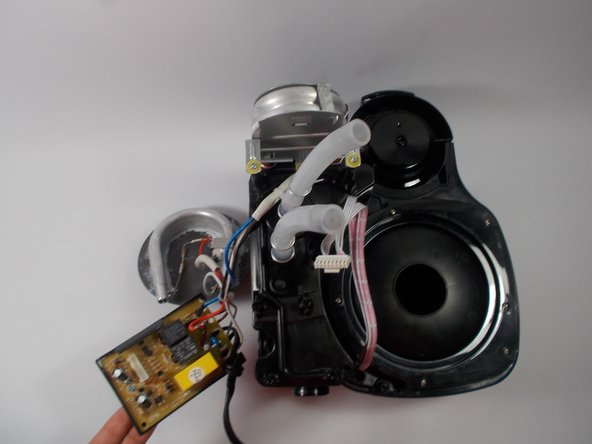
    • Use a long screwdriver with the PH1 bit to access the screws holding the main housing to the top of the machine.

    • Pull main housing up and be sure to run all of the inner parts through the cavity at the bottom. This may take a few tries since components can easily get caught on each other

结论

To reassemble your device, follow these instructions in reverse order.

Daniel Servant

于03/25/16注册

301 声望

创作了3篇指南

团队

UMass Dartmouth, Team 1-7, Miles Spring 2016 UMass Dartmouth, Team 1-7, Miles Spring 2016 的会员

UMASSD-MILES-S16S1G7

3 名成员

创作了7篇指南

0条评论

添加评论

浏览统计数据:

过去 24 小时: 1

过去 7 天: 5

过去 30 天: 9

总计 1,118