跳转到主内容

当前版本的文档还未经巡查,您可以查看最新的已查核版本

你所需要的

  1. , SIM(Subscriber Identity Module用户身份模块)卡: 步骤 1 中的图像 1,2 , SIM(Subscriber Identity Module用户身份模块)卡: 步骤 1 中的图像 2,2
    • 将卡针或一个回形针插入SIM卡槽边的小孔,该孔位于手机左上侧。

    • 向孔内按下弹出卡槽。

    • 此操作可能需要施加较大的力量。

  2. : 步骤 2 中的图像 1,1
    • 将SIM卡槽从手机充抽出。

    • 在重新安装SIM卡时,注意SIM卡的朝向与卡槽匹配。

  3. , MicroSD卡: 步骤 3 中的图像 1,2 , MicroSD卡: 步骤 3 中的图像 2,2
    • 用取卡针插入放置SIM卡或microSD卡附近的小口里,位于手机的右上方。

    • 按下弹出托盘。

    • 这可能需时一定的力度,但也不要用力过大。

  4. : 步骤 4 中的图像 1,1
    • 从HTC One M8中将microSD卡托盘组件取出。

    • 当插入的microSD卡,确保它是相对于托盘的合理位置。

  5. , 后盖: 步骤 5 中的图像 1,2 , 后盖: 步骤 5 中的图像 2,2
    • 使用 iOpener 或热风枪来让扬声器上下网罩上胶水融化一些。

    • 参考iOpener 指南 来使用iOpener。

  6. : 步骤 6 中的图像 1,3 : 步骤 6 中的图像 2,3 : 步骤 6 中的图像 3,3
    • 使用塑料撬棒工具来轻轻撬起手机底部扬声器网罩。

    • 黏胶到处都是,可以使用专门去除黏胶的工具Goo-gone。

  7. : 步骤 7 中的图像 1,2 : 步骤 7 中的图像 2,2
    • 使用塑料撬棒工具轻轻撬起手机顶部的扬声器网罩。

  8. : 步骤 8 中的图像 1,1
    • 移除顶部两颗银色 3 mm 菲利普十字 #00 螺丝。

    • 移除底部四颗黑色 T5 Torx 螺丝。

  9. : 步骤 9 中的图像 1,3 : 步骤 9 中的图像 2,3 : 步骤 9 中的图像 3,3
    • 使用撬棒和撬片配合,来打开固定手机壳四周的夹扣。

    • 虽然图中使用的是金属撬棒,但最好使用塑料或尼龙质地的撬棒,避免损坏手机。

    • 注意不要碰到电源键:它在手机后壳上。

    • 大力才能撬开手机!

  10. 这个步骤还没有翻译 帮忙翻译一下

    : 步骤 10 中的图像 1,2 : 步骤 10 中的图像 2,2
    • Remove the two silver 2mm Phillips #00 screws securing the battery connector to the motherboard.

    • Use a plastic opening tool to gently pry up the battery connector.

  11. 这个步骤还没有翻译 帮忙翻译一下

    : 步骤 11 中的图像 1,3 : 步骤 11 中的图像 2,3 : 步骤 11 中的图像 3,3
    • Use a spudger to disconnect the two ZIF connectors.

    • Use the flat end of a spudger to disconnect the black antenna cable.

    • Use a set of tweezers to pull the two ribbon cables free of the ZIF connectors.

  12. 这个步骤还没有翻译 帮忙翻译一下

    : 步骤 12 中的图像 1,3 : 步骤 12 中的图像 2,3 : 步骤 12 中的图像 3,3
    • Remove the single silver 4mm T5 Torx screw securing the headphone jack/micro USB board.

    • You may need to gently bend the small ribbon cable out of the way to get to the screw.

    • Use a pair of tweezers or a plastic opening tool to gently pry the headphone jack/micro USB board up and out of the phone.

  13. 这个步骤还没有翻译 帮忙翻译一下

    : 步骤 13 中的图像 1,3 : 步骤 13 中的图像 2,3 : 步骤 13 中的图像 3,3
    • Use the tip of a spudger to disconnect the seven ZIF connectors.

    • Use a pair of tweezers to gently pull the seven ribbon cables free of the connectors.

  14. 这个步骤还没有翻译 帮忙翻译一下

    : 步骤 14 中的图像 1,3 : 步骤 14 中的图像 2,3 : 步骤 14 中的图像 3,3
    • Use an iOpener to loosen the adhesive securing the display assembly to the rest of the device.

    • Use a suction cup to gently separate the display assembly from the rest of the device.

  15. 这个步骤还没有翻译 帮忙翻译一下

    : 步骤 15 中的图像 1,3 : 步骤 15 中的图像 2,3 : 步骤 15 中的图像 3,3
    • Carefully guide the display assembly ribbon cable through the midframe for removal.

终点

70等其他人完成本指南。

Michael Gonzalez

于04/14/15注册

4,430 声望

创作了5篇指南

团队

Cal Poly, Team 5-9, Maness Spring 2015 Cal Poly, Team 5-9, Maness Spring 2015 的会员

CPSU-MANESS-S15S5G9

4 名成员

创作了18篇指南

10条评论

Great guide - many thanks!

In step 13, you only need to disconnect four ZIF connectors - the top two on the left and top one on the right can be left connected.

Thanks again!

Byrn

Byrn - 回复

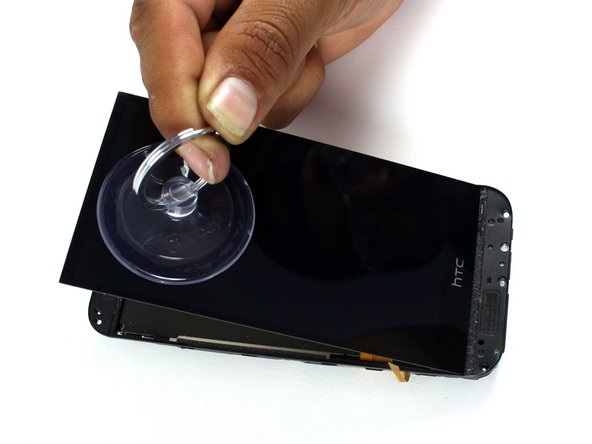
Be careful when reassembling:

Make sure the power button is put in the right way, it may look symmetrical but it's not! When put in the wrong way it does not work. Check if the shape of the button aligns with the edge of the casing, it's pretty easy to see if you pay attention to it.

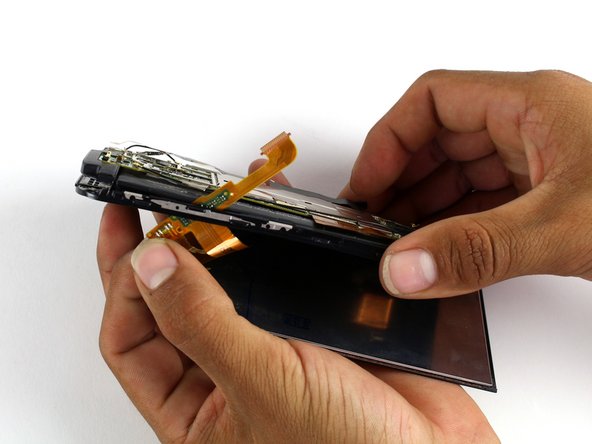
Also keep an eye on the back camera. The round black cover glass may shift when trying to click the phone in its casing.

I ended up taking it apart at least 4 times because of this :(

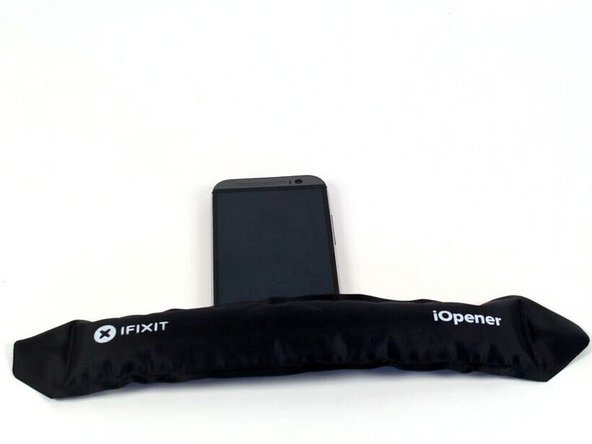
Also, if you want to heat things up you can also use an incandescent light bulb and put your phone over it.

Jan de Vries - 回复

position of the square block on the power button is a little bit left from the center (phone facing you with screen)

AG Draaijer -

don't follow step 13 in fact &&^& this guide listen to byrn

DeAndre Barron - 回复

very helpful, thanks

Stuart Gilks - 回复

添加评论

浏览统计数据:

过去 24 小时: 1

过去 7 天: 9

过去 30 天: 32

总计 54,113