简介
使用本指南来更换你的 HTC One M8 的电池。
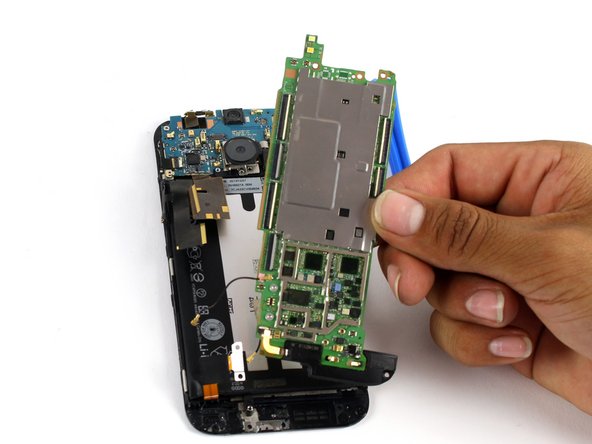
请注意,您的设备可能会有大量的铜屏蔽和磁带覆盖在显示屏组件的背面,如说明中,您需要轻轻移除它才能进入主板。
你所需要的


要重新组装您的设备,请按照相反的顺序执行这些说明。
要重新组装您的设备,请按照相反的顺序执行这些说明。
125等其他人完成本指南。

团队

Cal Poly, Team 5-9, Maness Spring 2015 Cal Poly, Team 5-9, Maness Spring 2015 的会员
CPSU-MANESS-S15S5G9
4 名成员
创作了18篇指南
33条评论
thanks for the instructions. i dropped my m8 and the power button wasnt responding at all and volume down wasnt either . i dissassembled the phone ( maybe i shouldnt have used my swiss army blade, left dents in plastic) using this guide..and pushed all the connectors into firmly and it worked again . thanks a bunch
I did not replace the adhesive: there's enough left to keep everything secure
zoccola zoccola
Hi, if there is a lot of tape is it necessary to replace it with new tape and copper shielding, and where can you get it please ?