跳转到主内容

HP dv5-1125nr Motherboard Replacement

你所需要的

  1. HP dv5-1125nr Motherboard Replacement, Battery: 步骤 1 中的图像 1,1
    • Ensure your computer is shut down. Removing the battery while the laptop is still on may corrupt your files. Remove any power adapters and cords connected to the laptop body.

    • Slide the switch to the left until the release clicks.

  2. HP dv5-1125nr Motherboard Replacement: 步骤 2 中的图像 1,1
    • Remove the battery.

    • The release switch may need to be held down while removing the battery.

  3. HP dv5-1125nr Motherboard Replacement, Hard Drive: 步骤 3 中的图像 1,2 HP dv5-1125nr Motherboard Replacement, Hard Drive: 步骤 3 中的图像 2,2
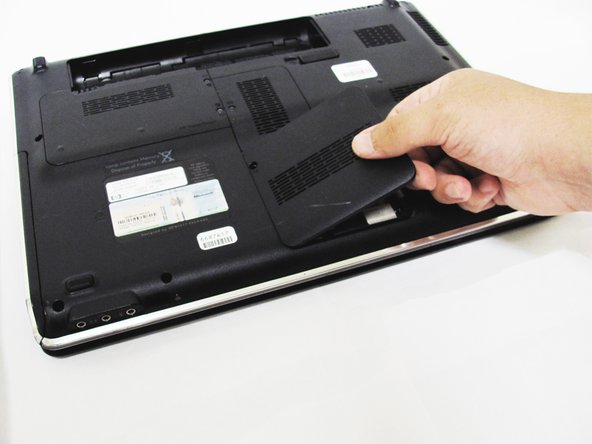
    • Remove the two 5mm Phillips screws on the hard drive cover using a Phillips #00 screwdriver.

  4. HP dv5-1125nr Motherboard Replacement: 步骤 4 中的图像 1,1
    • Remove the plastic hard drive cover.

  5. HP dv5-1125nr Motherboard Replacement: 步骤 5 中的图像 1,2 HP dv5-1125nr Motherboard Replacement: 步骤 5 中的图像 2,2
    • Pull up on the two plastic flaps on the hard drive enclosure to remove it.

  6. HP dv5-1125nr Motherboard Replacement: 步骤 6 中的图像 1,2 HP dv5-1125nr Motherboard Replacement: 步骤 6 中的图像 2,2
    • Gently lift the ribbon cable away from the hard drive enclosure to free the drive.

  7. HP dv5-1125nr Motherboard Replacement: 步骤 7 中的图像 1,2 HP dv5-1125nr Motherboard Replacement: 步骤 7 中的图像 2,2
    • Locate four 2mm Phillips screws on the side of the enclosure and remove them using a Phillips #00 screwdriver.

    • Slide the hard drive out of the enclosure to complete the removal process.

  8. HP dv5-1125nr Motherboard Replacement, WLAN Card: 步骤 8 中的图像 1,1
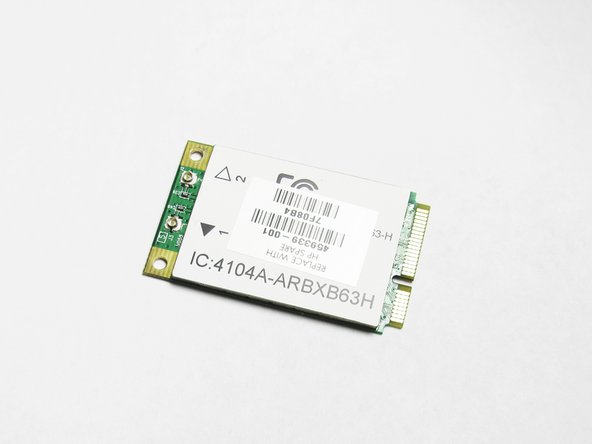
    • Locate the wireless card and the two wires attached to it.

    • Caution: Prying on the WLAN card wires in the wrong direction could damage your wireless card. Make sure to lift straight up when removing the wires.

    • Using a plastic spudger tool, carefully lift up on each wire connecting the card to unsnap the connectors.

  9. HP dv5-1125nr Motherboard Replacement: 步骤 9 中的图像 1,2 HP dv5-1125nr Motherboard Replacement: 步骤 9 中的图像 2,2
    • Locate the 2.5mm Phillips screw on the corner of the WLAN card and remove it using a Phillips #000 screwdriver.

  10. HP dv5-1125nr Motherboard Replacement: 步骤 10 中的图像 1,2 HP dv5-1125nr Motherboard Replacement: 步骤 10 中的图像 2,2
    • Upon removing the screw, the WLAN card will pop up. Keeping a natural angle, slide the card out of the slot.

    • The card is now free from your computer.

  11. HP dv5-1125nr Motherboard Replacement, Disk Drive: 步骤 11 中的图像 1,2 HP dv5-1125nr Motherboard Replacement, Disk Drive: 步骤 11 中的图像 2,2
    • Locate two 3mm Phillips screws on the CMOS panel cover and remove them with a Phillips #00 screwdriver.

    • Remove the CMOS panel cover.

  12. HP dv5-1125nr Motherboard Replacement: 步骤 12 中的图像 1,3 HP dv5-1125nr Motherboard Replacement: 步骤 12 中的图像 2,3 HP dv5-1125nr Motherboard Replacement: 步骤 12 中的图像 3,3
    • The optical drive is now ready for removal. Using a plastic removal tool, lift the optical drive away from your computer.

    • Using your hands, slide the remainder of the drive out of the computer.

  13. HP dv5-1125nr Motherboard Replacement, CMOS Battery: 步骤 13 中的图像 1,2 HP dv5-1125nr Motherboard Replacement, CMOS Battery: 步骤 13 中的图像 2,2
    • Remove these two 4mm Phillips screws on the back panel using a Phillips #00 screwdriver and remove the cover to reveal the CMOS battery

  14. HP dv5-1125nr Motherboard Replacement: 步骤 14 中的图像 1,2 HP dv5-1125nr Motherboard Replacement: 步骤 14 中的图像 2,2
    在这个步骤中使用的工具:
    Flathead 3/32" or 2.5 mm Screwdriver
    $5.49
    购买
    • Locate the CR2032 watch battery

    • Using a 2.5mm flathead screwdriver, carefully pry up the battery using the tab to the right of the battery

  15. HP dv5-1125nr Motherboard Replacement: 步骤 15 中的图像 1,1
    • The CMOS battery is now removed from your system.

  16. HP dv5-1125nr Motherboard Replacement, RAM: 步骤 16 中的图像 1,1
    • Remove the one 4mm Phillips screw from the RAM cover using a Phillips #00 screwdriver.

  17. HP dv5-1125nr Motherboard Replacement: 步骤 17 中的图像 1,2 HP dv5-1125nr Motherboard Replacement: 步骤 17 中的图像 2,2
    • Remove the RAM cover to reveal the module's underneath.

  18. HP dv5-1125nr Motherboard Replacement: 步骤 18 中的图像 1,3 HP dv5-1125nr Motherboard Replacement: 步骤 18 中的图像 2,3 HP dv5-1125nr Motherboard Replacement: 步骤 18 中的图像 3,3
    • Make sure to ground yourself before touching the RAM modules; they are very sensitive to static electricity.

    • Push the two metal tabs on the side of the RAM module outwards, towards the battery and CMOS compartments (up and down).

    • Once the module is released, gently pull the module upwards.

    • Repeat for the RAM module underneath the first one.

  19. HP dv5-1125nr Motherboard Replacement, Keyboard: 步骤 19 中的图像 1,1
    • Begin by unscrewing the three 3mm Phillips head screws inside the battery bay with the Phillips #00 screwdriver.

  20. HP dv5-1125nr Motherboard Replacement: 步骤 20 中的图像 1,1
    • Remove the five remaining 2mm screws using a Phillips #00 screwdriver.

  21. HP dv5-1125nr Motherboard Replacement: 步骤 21 中的图像 1,1
    • Unscrew the 4mm Phillips screw inside the hard drive bay.

    • Make sure to keep track of which screw goes where. The sizes are different for each set of screws!

  22. HP dv5-1125nr Motherboard Replacement: 步骤 22 中的图像 1,2 HP dv5-1125nr Motherboard Replacement: 步骤 22 中的图像 2,2
    • Locate the hole in between the hard drive and RAM compartments.

    • The hole is marked by a small keyboard symbol in the plastic (see the second picture).

    • Unscrew the 4mm Phillips head screw from this hole.

  23. HP dv5-1125nr Motherboard Replacement: 步骤 23 中的图像 1,2 HP dv5-1125nr Motherboard Replacement: 步骤 23 中的图像 2,2
    • Flip the laptop, and use the plastic opening tool on the side seam to remove the top cover.

    • You may need to use the opening tool on both sides of the cover.

    • Be careful not to break the ribbon cables under the cover.

  24. HP dv5-1125nr Motherboard Replacement: 步骤 24 中的图像 1,1
    在这个步骤中使用的工具:
    Flathead 3/32" or 2.5 mm Screwdriver
    $5.49
    购买
    • Use a 2.5mm flathead screwdriver to remove the four 3mm screws on top of the keyboard.

  25. HP dv5-1125nr Motherboard Replacement: 步骤 25 中的图像 1,1
    • Dislodge the keyboard to access the underside.

    • Do not fully remove the keyboard. It is still attached by a ribbon cable, and forceful removal could break this necessary connection.

  26. HP dv5-1125nr Motherboard Replacement: 步骤 26 中的图像 1,2 HP dv5-1125nr Motherboard Replacement: 步骤 26 中的图像 2,2
    • Locate the ribbon cable connection between the keyboard and motherboard.

    • Pull upwards on the small black bar to release the ribbon cable and remove it.

    • Do not yank on the ribbon or try to pull it out. This may break the cable or motherboard.

  27. HP dv5-1125nr Motherboard Replacement: 步骤 27 中的图像 1,1
    • The keyboard is now ready for replacement.

  28. HP dv5-1125nr Motherboard Replacement, Display: 步骤 28 中的图像 1,3 HP dv5-1125nr Motherboard Replacement, Display: 步骤 28 中的图像 2,3 HP dv5-1125nr Motherboard Replacement, Display: 步骤 28 中的图像 3,3
    • Locate four 3mm screws in the upper corners of the keyboard tray and remove them using a #00 Phillips screwdriver.

  29. HP dv5-1125nr Motherboard Replacement: 步骤 29 中的图像 1,2 HP dv5-1125nr Motherboard Replacement: 步骤 29 中的图像 2,2
    • Locate the two ribbon cable connectors that attach the speaker assembly to the motherboard.

    • Using your fingers, carefully detach the ribbon cables from the motherboard by pulling them straight out on the connector.

  30. HP dv5-1125nr Motherboard Replacement: 步骤 30 中的图像 1,1
    • Remove the speaker assembly from the keyboard tray.

  31. HP dv5-1125nr Motherboard Replacement: 步骤 31 中的图像 1,1
    • Locate the large display ribbon connector near the upper left corner of the keyboard tray and remove the ribbon by pulling straight out on the connector.

  32. HP dv5-1125nr Motherboard Replacement: 步骤 32 中的图像 1,1
    • The display should now be loose, but make sure to remove all ribbon connectors before attempting to take off the display.

    • Locate the two final ribbon connectors for the display on the motherboard and remove them similarly by pulling straight outward on the connectors.

    • You are now free to remove the display from the computer.

  33. HP dv5-1125nr Motherboard Replacement, Motherboard: 步骤 33 中的图像 1,1
    • Remove the three 3mm Phillips head screws on the top of the frame using the Phillips #00 screwdriver.

  34. HP dv5-1125nr Motherboard Replacement: 步骤 34 中的图像 1,2 HP dv5-1125nr Motherboard Replacement: 步骤 34 中的图像 2,2
    • Using a plastic opening tool, carefully pry off the top plastic cover by lifting it up at the seam at various points around the edge, then remove it completely.

  35. HP dv5-1125nr Motherboard Replacement: 步骤 35 中的图像 1,2 HP dv5-1125nr Motherboard Replacement: 步骤 35 中的图像 2,2
    • Remove the two 2mm screws on the bottom right of the motherboard using the Phillips #00 screwdriver.

  36. HP dv5-1125nr Motherboard Replacement: 步骤 36 中的图像 1,2 HP dv5-1125nr Motherboard Replacement: 步骤 36 中的图像 2,2
    • Using the Phillips #00 screwdriver, unscrew the spring-release fasteners on the modem card and remove it from the board.

    • Do not try to remove the modem card from the laptop, it is still attached to the modem connector on the underbody.

  37. HP dv5-1125nr Motherboard Replacement: 步骤 37 中的图像 1,1
    • Remove the power cable and two ribbons on the top right side of the board.

    • These ribbons can be removed by simply pulling to the right of the connector.

  38. HP dv5-1125nr Motherboard Replacement: 步骤 38 中的图像 1,1
    • Remove the ribbon on the bottom left of the board.

  39. HP dv5-1125nr Motherboard Replacement: 步骤 39 中的图像 1,1
    • Remove the one 3mm Phillips screw on the bottom left corner of the board using the Phillips #00 Screwdriver.

  40. HP dv5-1125nr Motherboard Replacement: 步骤 40 中的图像 1,1
    • Make sure to ground yourself to a metal object before attempting to remove the motherboard. Static charge build-up is dangerous to electronics and may ruin your motherboard if not properly grounded.

    • Remove the motherboard from the laptop body, being careful to keep the modem board from dislodging itself.

    • Your motherboard is now removed.

结论

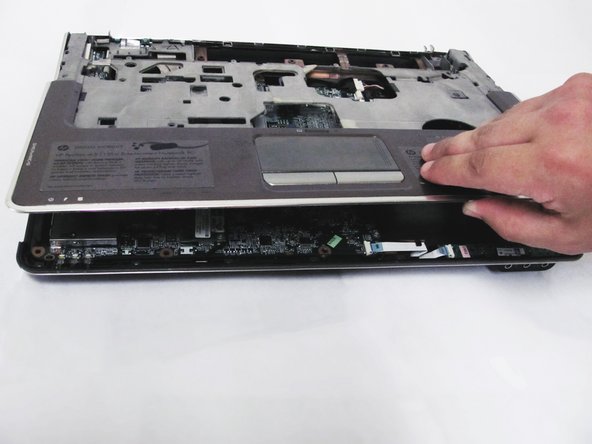
To reassemble your device, follow these instructions in reverse order. Ensure the ribbons and plastic connectors are placed in the correct orientation.

8等其他人完成本指南。

Nick Loey

于04/01/14注册

1,676 声望

创作了8篇指南

团队

Cal Poly, Team 9-15, Regan Spring 2014 Cal Poly, Team 9-15, Regan Spring 2014 的会员

CPSU-REGAN-S14S9G15

4 名成员

创作了10篇指南

2条评论

I hv Hp dv 5 1125nr laptop it display problems I m not getting cpu or graffic card

Vijay - 回复

Problema con hp dv5 1050es, no arranca cuando pulso botón de encendido

Nacho - 回复

添加评论

浏览统计数据:

过去 24 小时: 1

过去 7 天: 4

过去 30 天: 9

总计 4,479