跳转到主内容

当前版本的文档还未经巡查,您可以查看最新的已查核版本

你所需要的

  1. 这个步骤还没有翻译 帮忙翻译一下

    : 步骤 1 中的图像 1,1
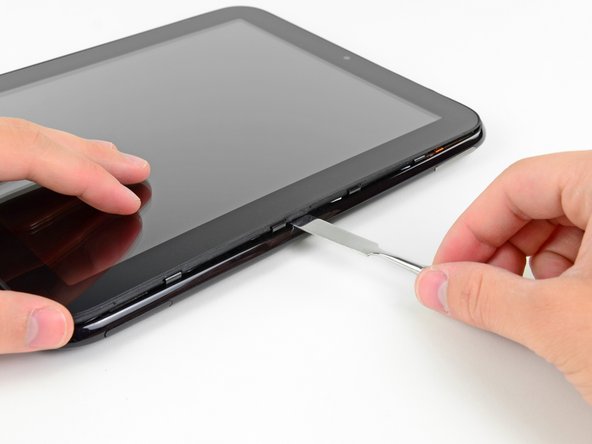
    • In the following steps, you will use a metal spudger to lift the front panel out from the rear case of your TouchPad.

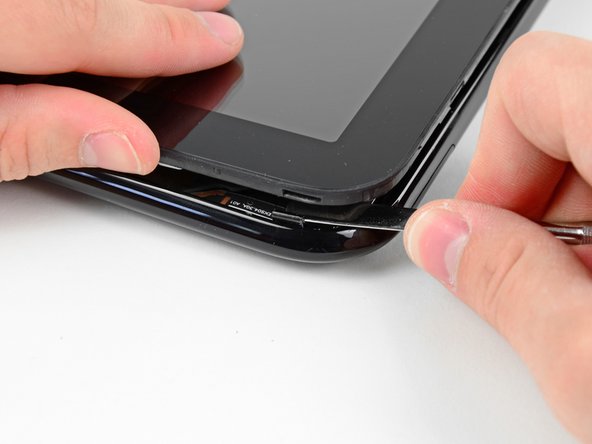
    • The front panel is held in by seven clips (boxed in red) that are lightly anchored to the rear case. When you remove the front panel assembly, you are bound to break either the clips or their supports attached to the rear case. We will update this guide as we find replacement parts or a better method to remove the panel.

    • As you remove the front panel assembly, also be careful not to damage the ambient light sensor (boxed in yellow) or the two antennas (boxed in orange).

  2. 这个步骤还没有翻译 帮忙翻译一下

    : 步骤 2 中的图像 1,1
    • Insert a flat metal spudger in the gap between the rubber outer ring on the front panel assembly and the black plastic rear case near the USB connector.

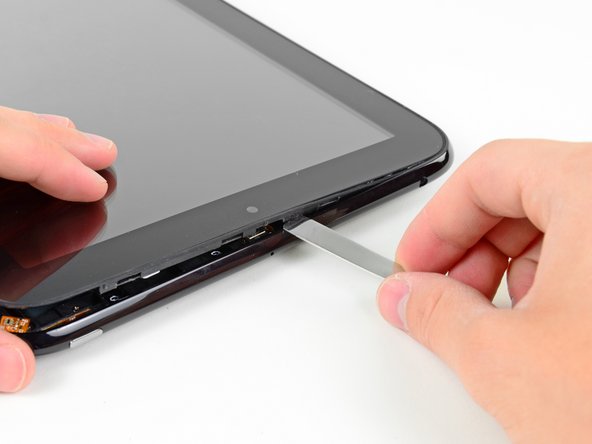
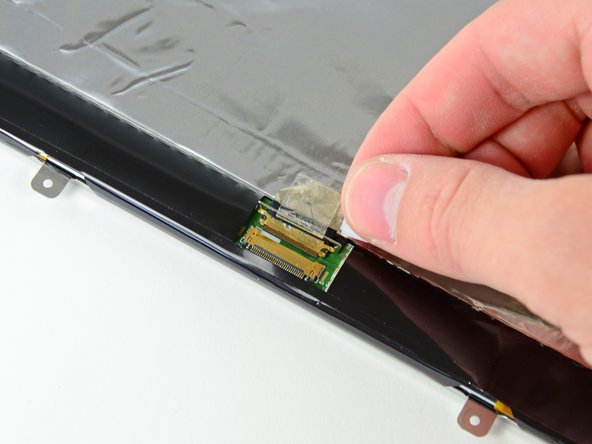
    • Pry the front panel assembly up from the rear case, being careful not to damage the LCD or the glass panel.

    • As you work through the following steps, insert your metal spudger and pry the front panel up, but do not try to slide the spudger along the gap you're creating. Always remove your spudger, then insert it at another spot and pry upward.

  3. 这个步骤还没有翻译 帮忙翻译一下

    : 步骤 3 中的图像 1,2 : 步骤 3 中的图像 2,2
    • As in the previous step, use a spudger to pry the front panel up from the rear case along its long edge on the volume button side of the TouchPad.

    • Continue to pry the front panel assembly up along the volume button side of the TouchPad until there is a gap between it and the rear case.

  4. 这个步骤还没有翻译 帮忙翻译一下

    : 步骤 4 中的图像 1,2 : 步骤 4 中的图像 2,2
    • Pry up the front panel assembly along the top edge of the TouchPad.

    • Be careful not to damage the ambient light sensor or the upper antenna.

  5. 这个步骤还没有翻译 帮忙翻译一下

    : 步骤 5 中的图像 1,1
    • Pry up the front panel along the edge closest to the home screen button.

  6. 这个步骤还没有翻译 帮忙翻译一下

    : 步骤 6 中的图像 1,2 : 步骤 6 中的图像 2,2
    • Before lifting the free side of the front panel up from the rear case, you may need to release it from the plastic retaining clips holding it down.

    • Use your metal spudger to pull the stuck retaining clips away from the edge of the front panel.

  7. 这个步骤还没有翻译 帮忙翻译一下

    : 步骤 7 中的图像 1,1
    • After freeing the retaining clips, lift the front panel assembly away from the rear case.

    • Do not try to remove the front panel assembly from the TouchPad just yet, as it is still connected to the motherboard.

  8. 这个步骤还没有翻译 帮忙翻译一下

    : 步骤 8 中的图像 1,1
    • Use the attached black tab to pull the display data cable straight up and out of its socket on the motherboard.

    • Pull the cable upwards and not parallel to the face of the motherboard. Doing otherwise may damage the socket on the motherboard.

    • Take care not to pull on the ribbon that is stuck by adhesive to the bottom of cable you are detaching. It does not need to be disconnected.

  9. 这个步骤还没有翻译 帮忙翻译一下

    : 步骤 9 中的图像 1,3 : 步骤 9 中的图像 2,3 : 步骤 9 中的图像 3,3
    • Use your fingernail to carefully flip up the retaining flaps on the two digitizer ribbon cable ZIF sockets.

    • Be sure you are prying up on the hinged retaining flaps, not the sockets themselves.

    • Pull the digitizer ribbon cable straight out of its two sockets on the motherboard.

  10. 这个步骤还没有翻译 帮忙翻译一下

    : 步骤 10 中的图像 1,1
    • Remove the front panel assembly from the rear case assembly.

  11. 这个步骤还没有翻译 帮忙翻译一下

    : 步骤 11 中的图像 1,1
    • Remove the six 2.2 mm Phillips screws securing the LCD to the front panel.

  12. 这个步骤还没有翻译 帮忙翻译一下

    : 步骤 12 中的图像 1,2 : 步骤 12 中的图像 2,2
    • Lift up the LCD assembly and remove it from the front panel.

  13. 这个步骤还没有翻译 帮忙翻译一下

    : 步骤 13 中的图像 1,1
    • Use the edge of a plastic opening tool to peel up the self-adhesive pull tab stuck to the display data cable.

  14. 这个步骤还没有翻译 帮忙翻译一下

    : 步骤 14 中的图像 1,2 : 步骤 14 中的图像 2,2
    • Pull the tab up and toward the middle of the display to unlock the display data cable connector from its socket on the LCD.

    • Pull the display data cable out of its socket on the LCD and set it aside.

    • Do not lift upward on the connector as you pull it out of its socket. Pull the connector parallel to the face of the LCD.

  15. 这个步骤还没有翻译 帮忙翻译一下

    : 步骤 15 中的图像 1,1
    • LCD remains.

终点

11等其他人完成本指南。

一条评论

This was an especially easy and very helpful guide.... If anyone finds out where to get the HP Touchpad plastic retainer clips (which break very easily as it turns out) please let me know here or at gskdesigns@gmail.com.

Great Guide!

GK

George Kelley - 回复

添加评论

浏览统计数据:

过去 24 小时: 1

过去 7 天: 12

过去 30 天: 14

总计 26,992