简介
It is suggested to attempt this guide with 2 or more people.
Required Tools
- T-9 Screwdriver
- Needle-Nose Pliers
你所需要的
-
-
First, begin by removing the printer's hood.
-
Open the printer's mouth by simply pulling down on it; there are 2 mouth pieces that need to be pulled down.
-
Adjust the flap covering the scanner upward, as shown.
-
-
-
-
To access and remove the fourth and final screw attaching the hood, the panel for the power button must be removed as follows:
-
Reach into the mouth of the printer and press on the small clip behind the power button. This allows the panel of the power button to be removed.
-
After pressing the clip, pull out the power button panel by pulling from right to left.
-
-
-
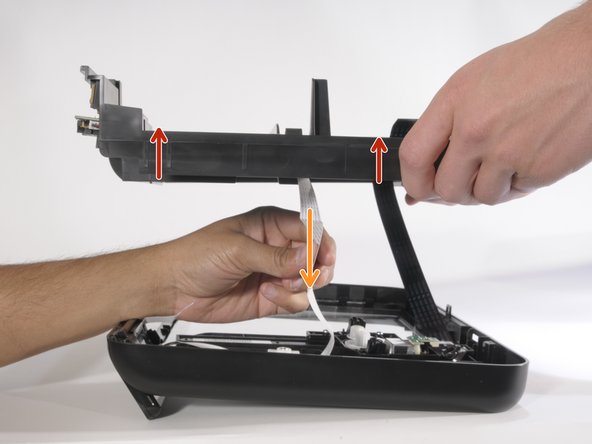
This step is easier with two people. Carefully have one person lift the hood of the printer 2-3 inches above where it was resting.
-
Remove the ribbon cables and wires attaching the motherboard (the only green PCB board) to the hood by gently pulling upward on them.
-
When all three cables are removed, lift the hood away from the printer and set it aside.
-
-
-
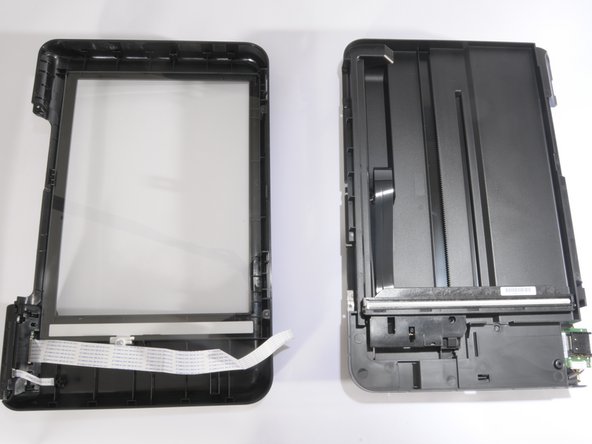
After being separated from the printer, the hood is ready to be disassembled.
-
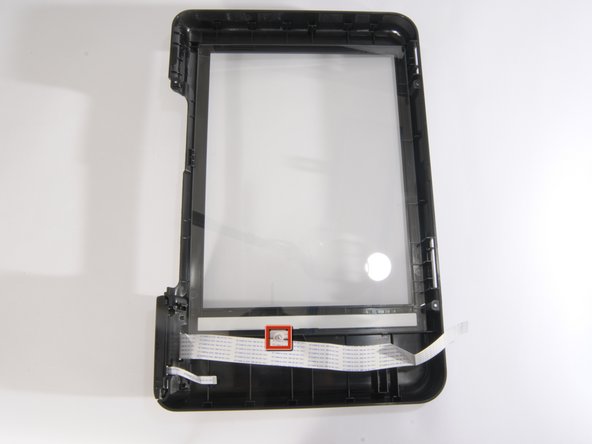
Remove the only screw on the printer hood's underside, as shown. Use a T-9 screwdriver.
-
-
-
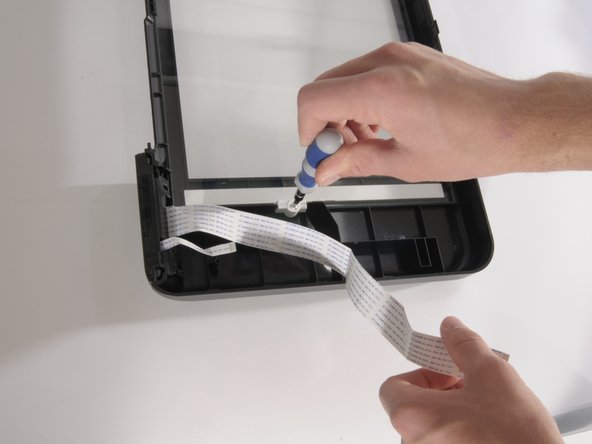
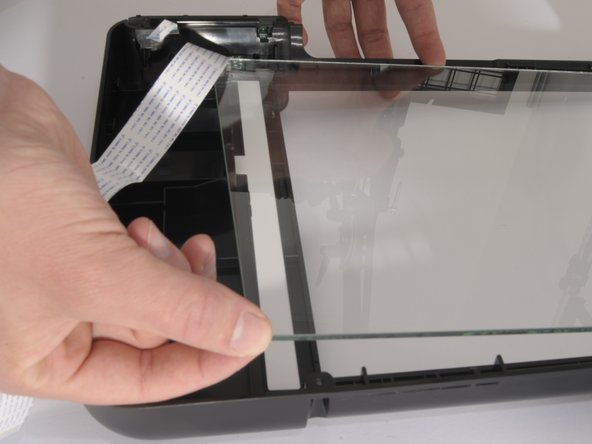
The scanner glass is held down by one T-9 screw. Use a screw driver to remove the screw.
-


To reassemble your device, follow these instructions in reverse order.
To reassemble your device, follow these instructions in reverse order.
4等其他人完成本指南。
团队

Cal Poly, Team 10-38, Forte Spring 2011 Cal Poly, Team 10-38, Forte Spring 2011 的会员
CPSU-FORTE-S11S10G38
5 名成员
创作了10篇指南
5条评论
Very helpful guide, the scanner glass was dirty from inside, so the guide was able to give me clear instructions how to proceed with the openning. Thanks!
Very helpful in most ways. I needed to clean the inside of the glass because the ribbon cable was leaving a discoloration when traveling and showed up on my scanned documents. I actually did this solo and was fine until reassemble faze when the actual scanner bar would not stay in place to reassemble the two parts. I finally got it back together after much profanity and no small amount of patients. The next dilemma was the reassembly of top to bottom which was easily fixed with a small piece of duct tape holding The right side in place while reconnecting the two ribbon cables and the power connector. All is back together and working fine. My thanx to my God and to you for a successful fix.
I found that it was actually a T10 bit on mine as well and found when removing the 3 screws shown in red a 2” bit works best but with the one marked in orange under the power button a 1” if placed in the screw first then pulled forward slightly I was able to use a 1/4” drive screwdriver on a slight angle which made it much faster to remove that one screw. That being said, still a very helpful fix to a problem that was really frustrating me as I kept cleaning the top of the glass until I realized the problem was on the underside.
As an after thought, if it were me I would have designed the scanner portion so that less effort would be needed to clean both sides of the glass like screws or clips that can be accessed just by lifting the door on the top.
These instructions are very good and I was able to do this with my husbands help. With one except it doesn’t mention if the new scanner glass has a right side or a wrong side to it. Does it matter at all which side goes up and which side goes down?
Thank you
Bonnie