本指南有最近更改,您可查看未经巡查的最新版本。
简介
This guide will help you to remove the print head and to clean the printer : the print head park slot is usually full of ink and dust melted.
你所需要的
-
-
Turn on the printer
-
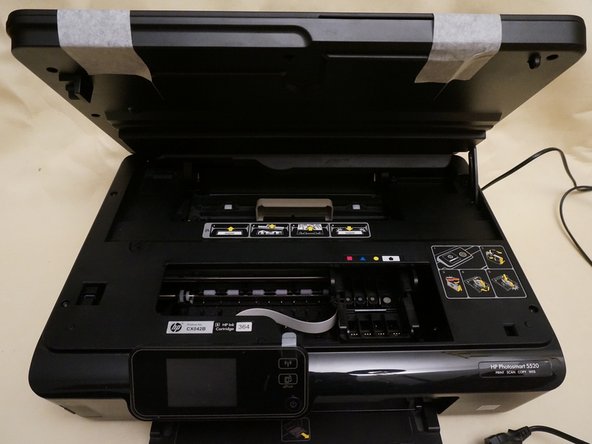
Lift up the scanner glass and the top cover, then the printerhead is centered in the printer case
-
Remove the ink cartridges.
-
Unplug the printer but do not turn off with the front I/O button. Otherwise the printhead will return to its park slot.
-
Use adhesive tape to fix together the scanner glass and the cover
-
-
-
Gently pull on the hook. Retain the scanner glass and the cover once the hook is removed.
-
-
-
-
Unscrew the 7 torx screws. Do not forget the one under the printer label (You have to remove the printer label. Lower right corner).
-
Push the clips at the rear of the LCD panel and pull the LCD panel outwards at the same time
-
Then, pull the ribbon connected to the LCD panel to disconnect the LCD panel from the printer.
-
Remove the 2 remaining torx screws hidden by the LCD panel
-
See where are clips (Blue arrows)
-
-
-
Remove the springs that maintain the print head.
-
Remove the print head by pulling on the ribbons.
-
When inserting the print head after cleaning or replacing, make sure the horizontal plastic ribbon is between the plastic guides, as shown in the last picture.
-
-
-
The printer has an automatic feature to clean the print head. Usually, there is a lot of ink (Probably melt with dust) in the area where the print head is cleaned
-
Remove the 5 torx screw as shown in the picture
-
Assuming the print head is now removed (Not shown on the picture), now gently tip the plastic plate and remove it
-
If you didn't put gloves yet, it is time to do it !
-
Now, push the carriage that holds the print head cleaning system (Red arrows)
-
The carriage that holds the print head cleaning system is now clean (Last picture)
-


To reassemble your device, follow these instructions in reverse order.
To reassemble your device, follow these instructions in reverse order.
62等其他人完成本指南。
41条评论
A l'étape 3, je n'arrive pas à retirer l'écran LCD. quand on me dit de pousser les deux clips à l'arrière, je ne vois les pas. tout semble solide et j'ai peur de casser quelque chose en forçant. comment franchir cette étape?
J'ai aussi eu un peu de difficulté à enlever l'écran LCD. Il ne faut pas hésiter à tirer dessus. Quand un clip est enlevé, les autres viennent plus facilement
LENNON -
Bonjour : très bon tutoriel, mais ..., manquent des précisions ; Etape 2 : comment est fixée et se démonte cette charnière-glissière ? Etape 3 : MISSION IMPOSSIBLE pour le démontage de l'écran LCD ! combien de clips ? à quoi ressemblent-ils ? comment faut-il agir sur ces clips, "à tâtons et en aveugle" ? etc ... ; je n'ai pas réussi à franchir cette étape qui demande des explications supplémentaires ... Merci : MJL
MJL -
J'ai étais ravie d'avoir ce tutoriel entre les mains car j'avais de gros problèmes et la tout est très bien détaillé en image c'est parfait même les références pour les pièces à changer d'indiquer c'est très bien
The print head cleaning system carriage can be completely removed. Need to push the carriage to back of printer. Remove screw in back right corner, next to the black cylindrical pump with rubber hoses, and another in the gear assembly that runs this pump. Then wiggle and remove this pump/gear assembly. Now the carriage can be moved forward on the track till a slot allows getting past a small metal shaft and a gear. Now you can clean it in the sink with hot water. Be careful to put the two springs back on this carriage before putting it back into the printer.
And be sure all the tubing will freely flow water, or the pumping action will not work!